
How to Create an Online Course with MemberSpace
Online courses are a great way to further establish yourself as an expert in your field — while also generating steady income! Courses aren't just for coaches, either. All creative professionals and service providers should consider having at least one online course in their arsenal.
Why Create an Online Course?
One course can have a lot of benefits for your brand and business. You can use a course to:
- Boost your profile as a leader in your area of expertise or "zone of genius."
- Develop a long-term source of income.
- Provide an entry-level point for people interested in your services but not yet ready to commit to a full one-on-one package.
- Build a unique remarketing tool — after the course is over, keep students informed about new memberships and service offerings.
Choosing an Online Course Platform
If you've ever taken an online course before, you've probably encountered one of the many dedicated course software platforms that exist. These platforms provide various features that are supposed to help you launch a course, but they can be restrictive — and expensive.
Software programs that are only for course creation may require you to:
- Host and manage your content directly on their platform, not your own website
- Use their domain
- Structure courses in a specific way or format
- Stick just to courses — no selling eBooks or building a membership community.
- Pay hefty monthly fees (one popular course platform, Kajabi, starts at $119 per month!)
By selling your course through MemberSpace, you can:
- Keep every lesson on your existing website and domain
- Offer other memberships and products
- Structure your lessons in any way you'd like, using all kinds of media — PDFs, video, audio, and images.
Plus, MemberSpace is affordable for new creators. Our plans start at just $25 a month (plus standard transaction fees) for unlimited course members.
Creating Your First Online Course with MemberSpace
Step 1: Choose a Topic
Your course should be about one thing that you're a definite expert on. Sometimes, it can be easiest to start thinking big and break it down into smaller chunks from there.
Let's pretend you're an expert in building eCommerce businesses from start to finish. It could be overwhelming to cover everything about building an eCommerce company in one course. Instead, we'll start by creating a course that focuses only on setting up a storefront. This course is ideal for people who have a business idea or plan but don't know how to take it online.
Step 2: Plan Your Course Lessons
Take your topic from step one and break it out into even smaller chunks — these subtopics will be your lessons.
Using our example about building a website for eCommerce businesses, our course lessons might be:
- Lesson 1: Choosing a website platform
- Lesson 2: Buying a domain name
- Lesson 3: Choosing a shipping partner
- Lesson 4: Elements of good website design
- Lesson 5: Writing great website copy
- Lesson 6: Staging website photos
- Lesson 7: Optimizing your website for search
If you begin writing out your lessons and find they're getting very long or involved, you may need to go back to step one and break your course topic down even further! You can always save some information for a second follow-up course. 😉
Step 3: Decide on Lesson Format
Think about how you would like to structure your course and what format would pair best with the information you want to share. Many digital courses contain a mix of written and video content.
There are many free tools that you can use to create your course.
- Canva is a free, browser-based graphic design program with lots of templates for guides, workbooks, and handouts.
- Unsplash has a great library of royalty-free photos for use in your guides or promotional materials.
- Loom and Vidyard let you record videos — including picture-in-picture walkthroughs perfect for sharing your screen — for free.
(Want more? We have a whole membership toolbox full of services we recommend!)
Step 4: Choose an Online Course Launch Date
MemberSpace allows you to launch all your protected online course content at once or release lessons over a period of time. It's up to you whether you'd like to have your complete course available when people signup or if they should just start with the first lesson.
Step 5: Build Your Online Course Webpages
Once you have your course planned, it's time to create your web pages! Before you build any new pages, make sure your website is compatible with MemberSpace.
You will need to create:
A public landing page to advertise the course
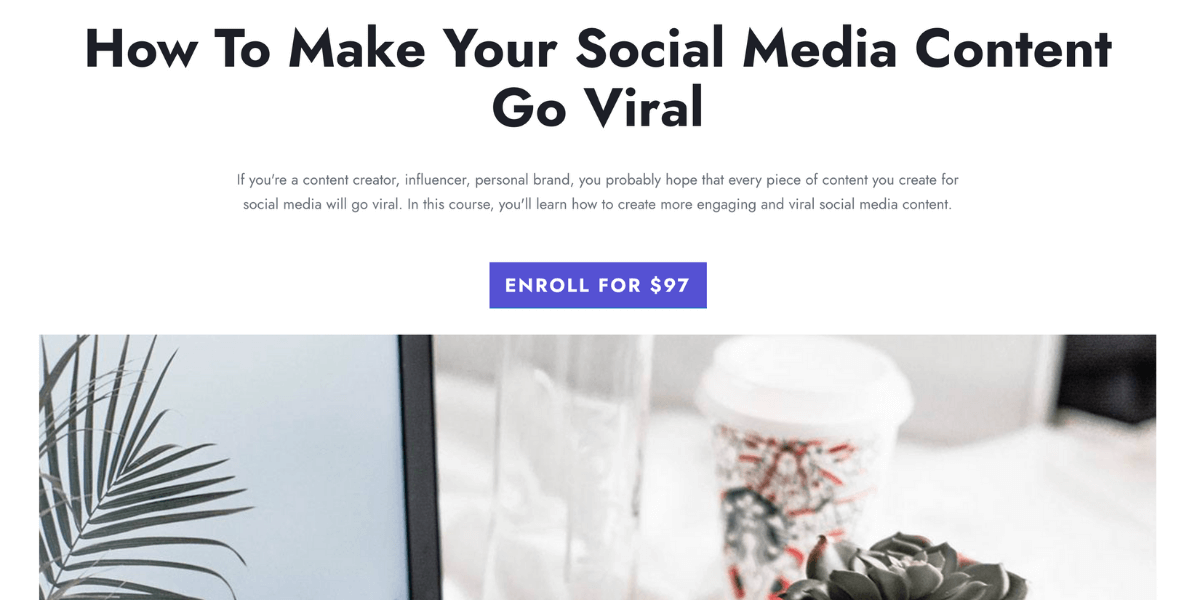
A "secret" course landing page that lists every lesson
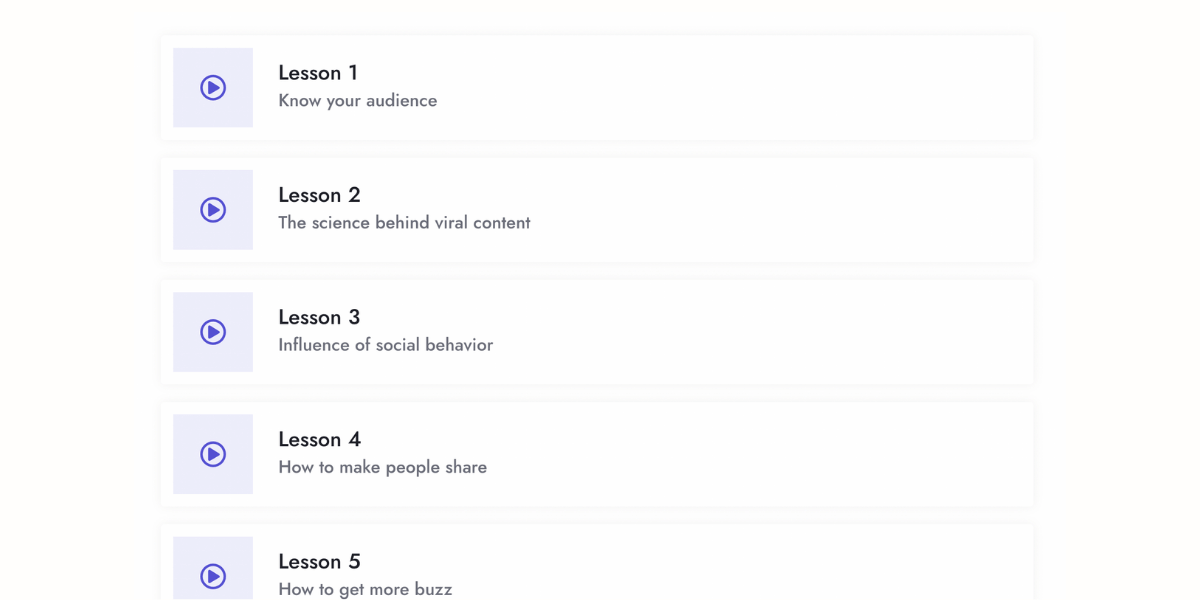
Individual lesson pages that contain the educational content

Nest these pages underneath each other, creating a hierarchy known as a subdirectory. For example:
Public landing page:
- www.yourwebsite.com/course
"Secret" course landing page:
- www.yourwebsite.com/course/lessons
Lesson pages:
- www.yourwebsite.com/course/lessons/lesson-1
- www.yourwebsite.com/course/lessons/lesson-2
- www.yourwebsite.com/course/lessons/lesson-3
Setting Up MemberSpace to Sell Online Courses
If you're new to using MemberSpace, you'll need to:
- Choose a plan
- Install MemberSpace on your website
- Connect or create a Stripe account
Once your MemberSpace account is ready to go, it's time to begin protecting your content and setting up membership plans.
Protecting Online Course Pages
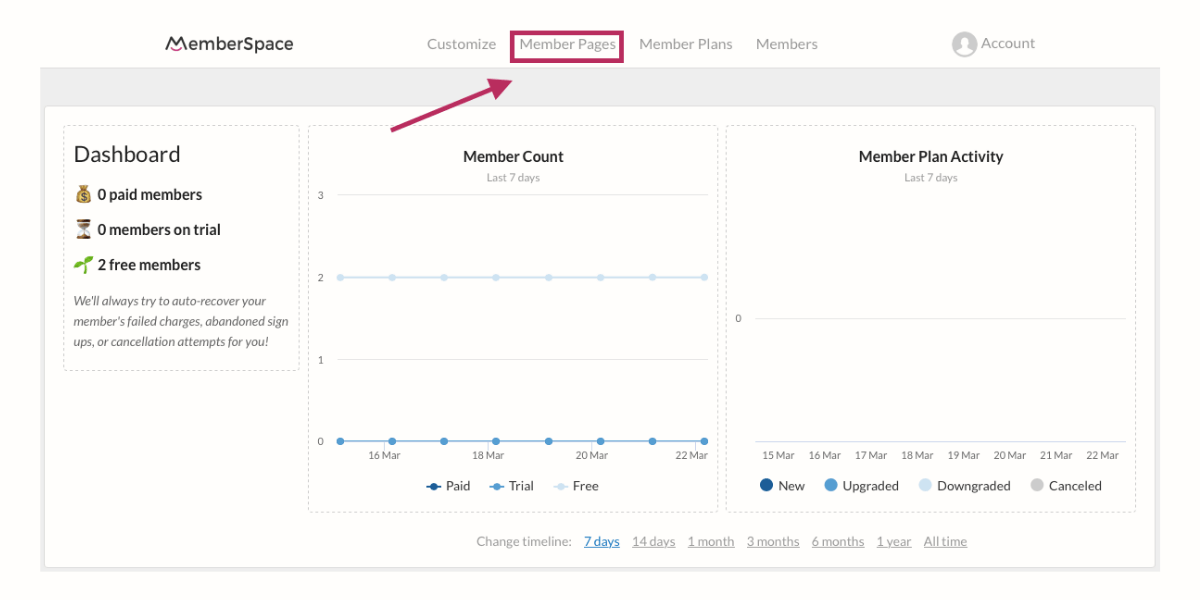
Log into your MemberSpace account and click "Member Pages" at the top.
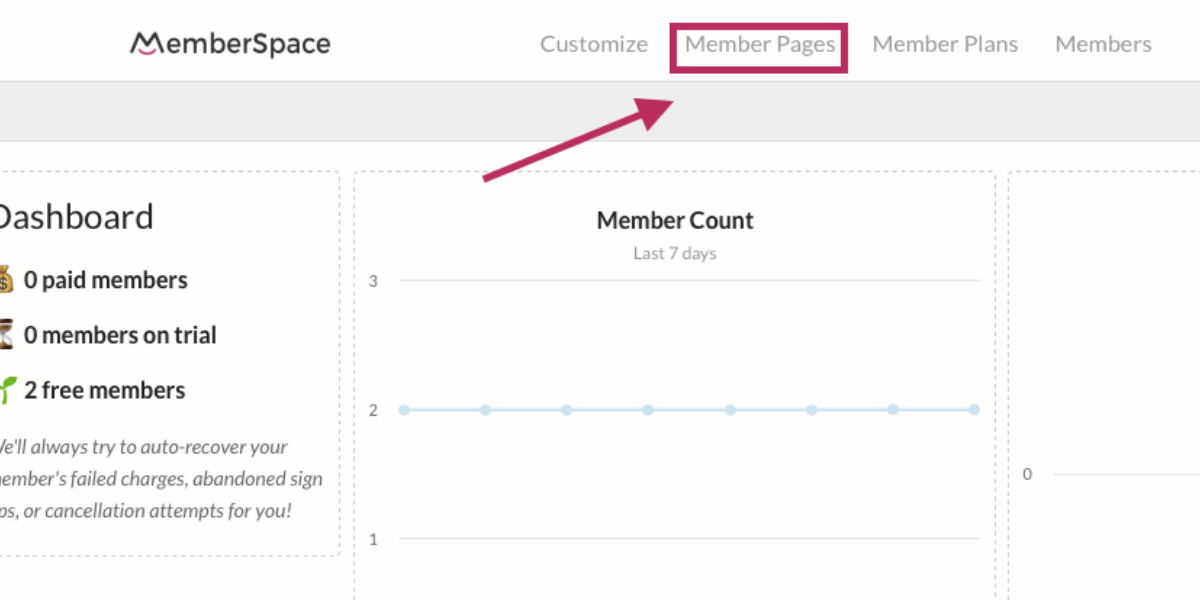
Click the big pink button that says "Protect Member Pages."
Go back to your website and locate the URL that belongs to your public landing page. Locate just the part at the end — from the first slash:
www.yourwebsite.com/courses/
Or you can copy and paste the full URL and MemberSpace will take care of it all once you save the information
Paste this into MemberSpace. End with a closing slash and an asterisk:

Going forward, if MemberSpace sees /courses/ in the middle of any URL you add, it will automatically protect the page while leaving your top-most landing page free for the public to view.
Click the pink "Update now" button to proceed.
Setting Up Membership Plans
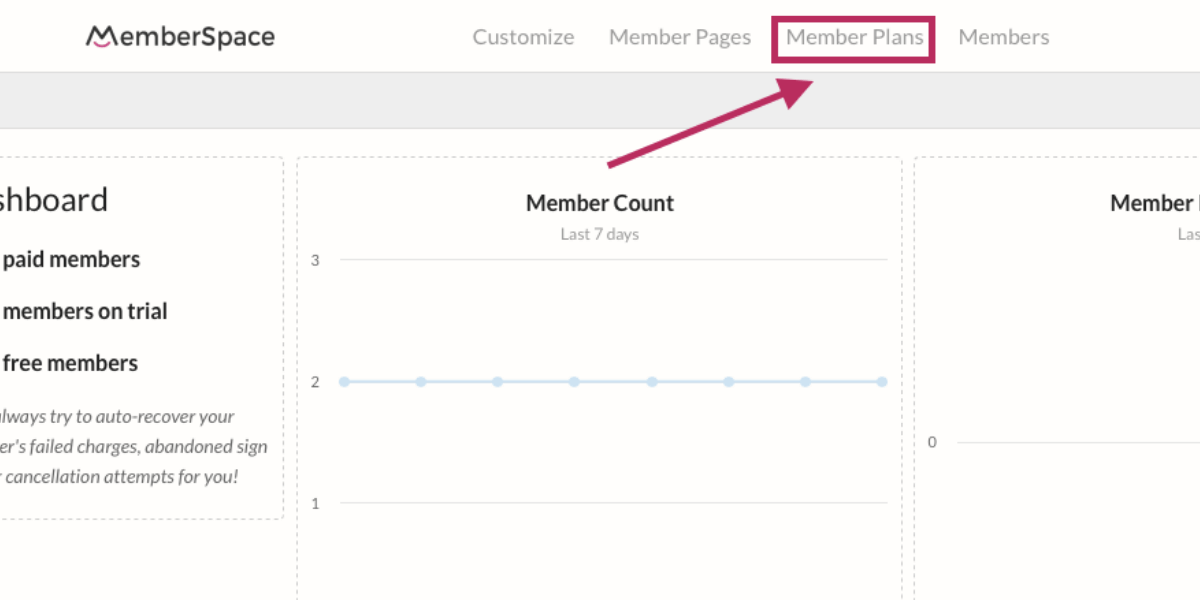
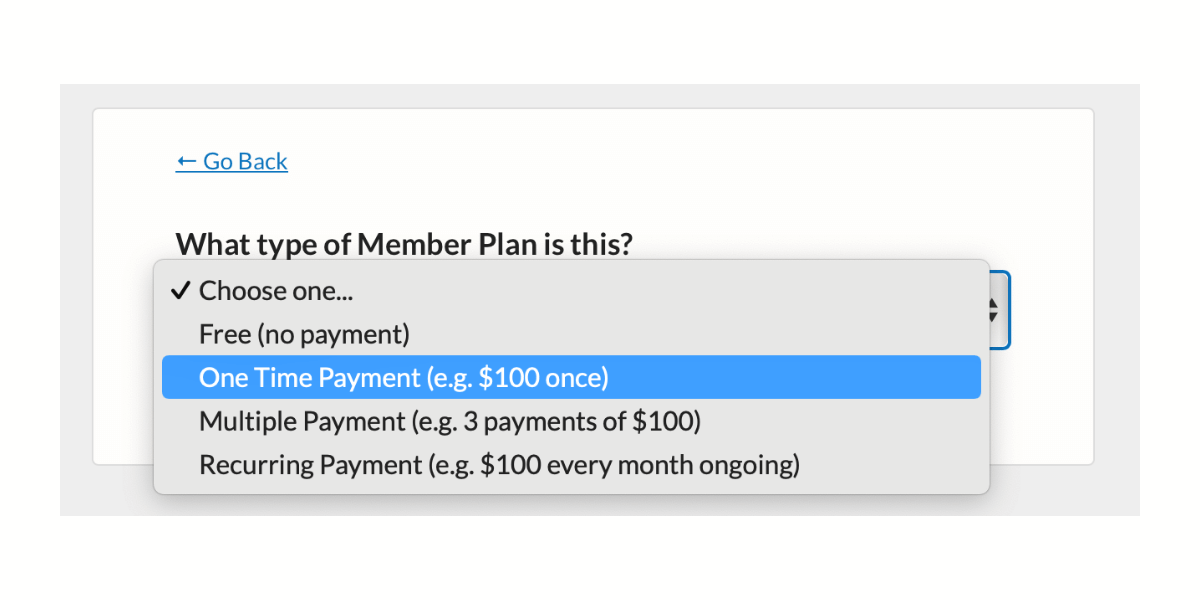
Go back to the top of your MemberSpace dashboard and click "Member Plans."
Click on the pink "Create Member Plans" button and select a plan type from the drop-down menu. You can opt to sell your entire course for a one-time flat rate payment, break it up into multiple payments, or charge a recurring payment. In this example, we're choosing "One Time Payment."
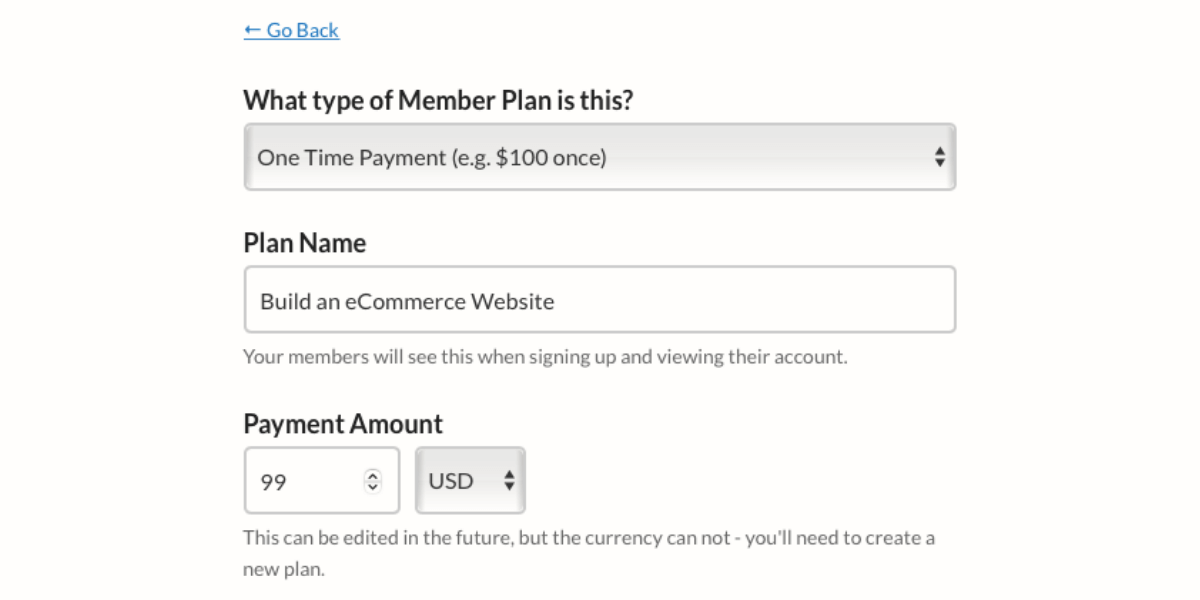
Give your plan a name and fill out some details about the price.
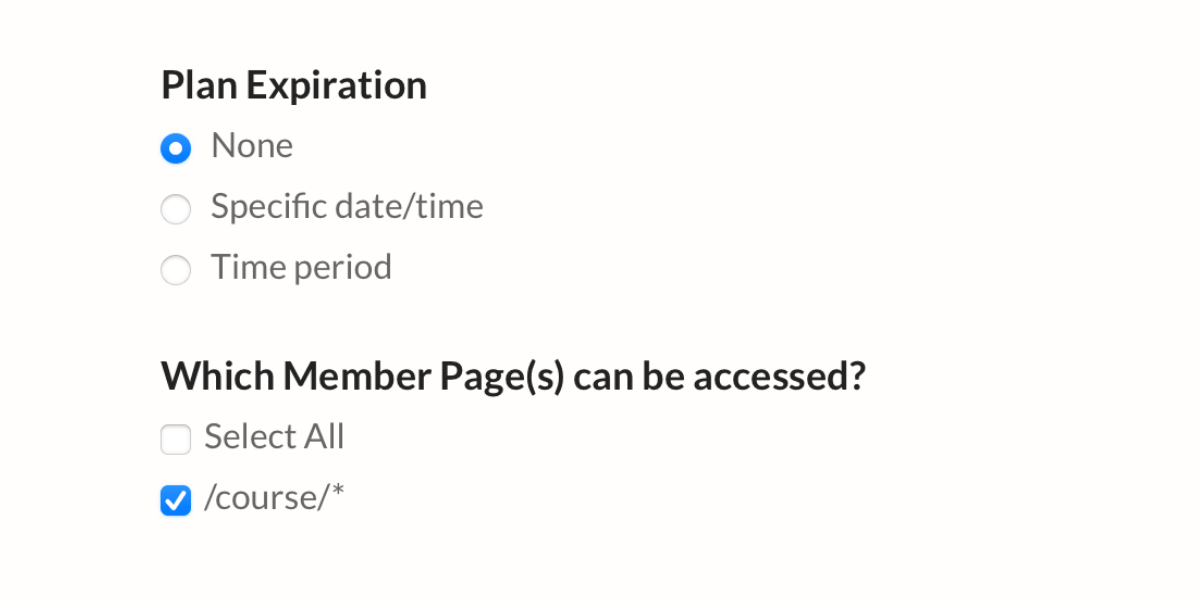
Under "Which Member Page(s) can be accessed?", click the box next to the URL we added in the previous step. This grants plan members access to all the course content. You can also opt to give your plan an expiration date which will limit access to the course during a specific time period.
Go back to your course website and grab the URL for the "secret" landing page that contains a list of every lesson. Paste it in both of the fields shown below.

Keep "Enable Plan" and "Make Plan Public" toggled on.
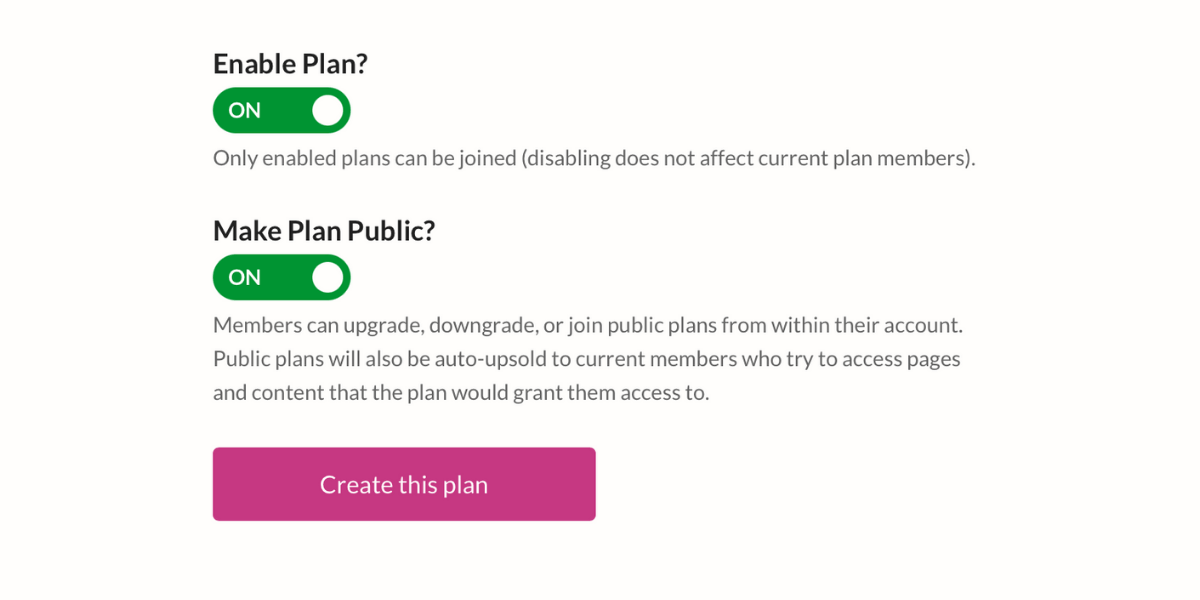
Finally, click the gray "Get sign-up link" button next to your plan name.
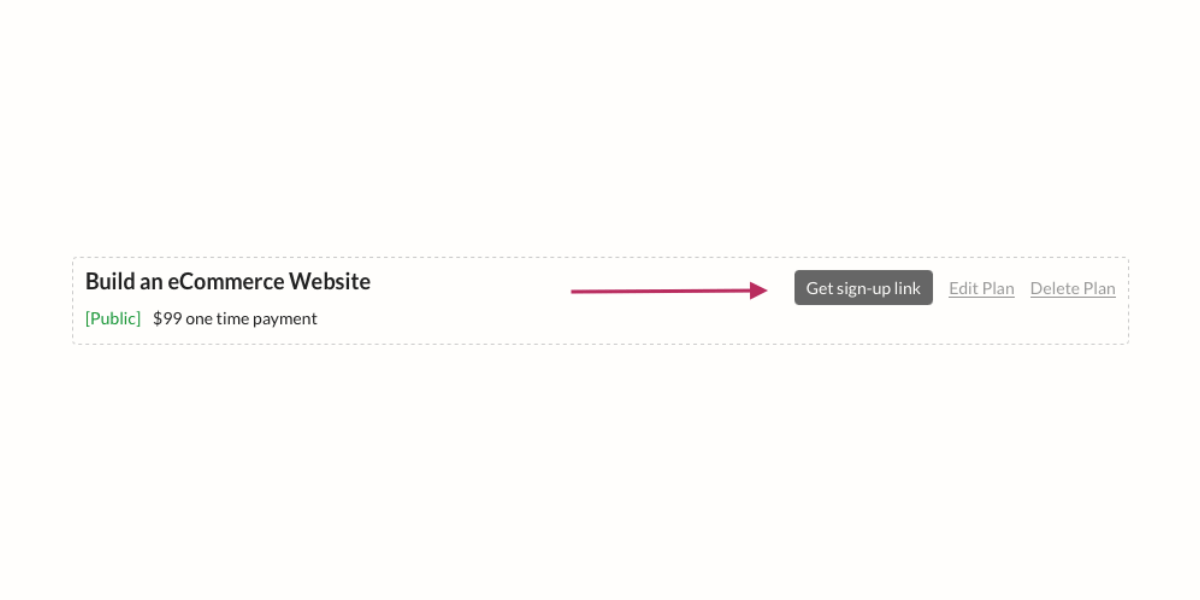
Add this link to your public course landing page, so visitors can sign up.
Upload and Protect Online Course Lessons
There are two ways to add content like workbooks or videos to your course pages:
- You can link to private videos (e.g. YouTube) and documents you've uploaded into your CMS.
- You can store those same documents and video links in MemberSpace and use our Content Links for more security.
When using Content Links, MemberSpace generates a unique URL for each of your lesson files. By using these links on your website you can ensure that content is only visible to paying course subscribers who are logged in to the site.
Create Content Links
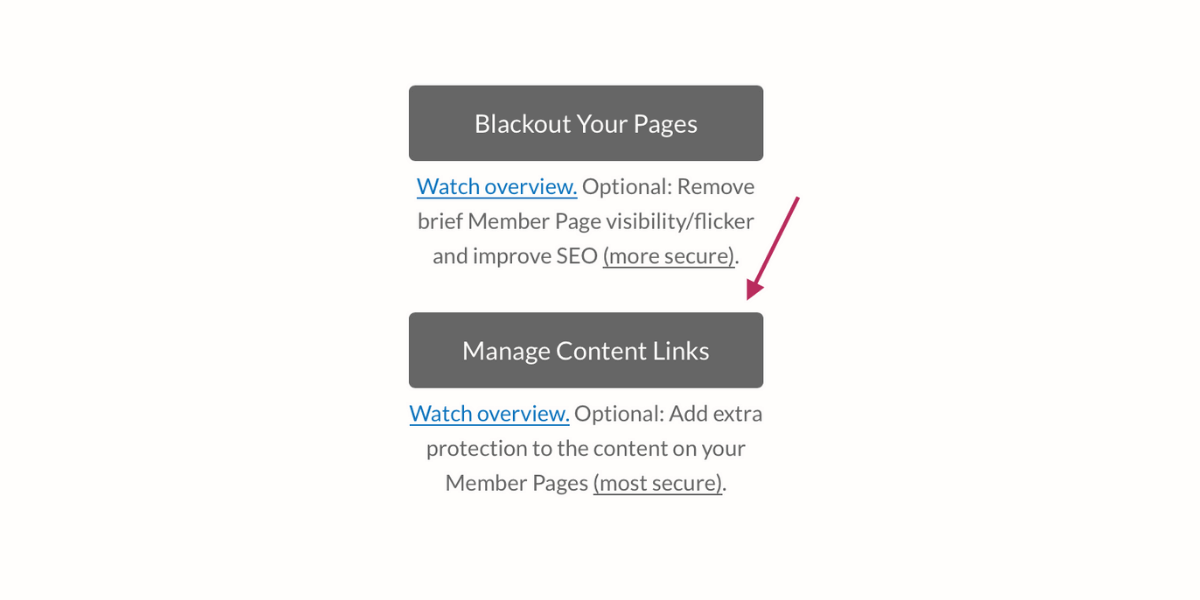
To create a Content Link, click on "Member Pages" at the top of your dashboard.
Next, click the gray "Manage Content Links" button.
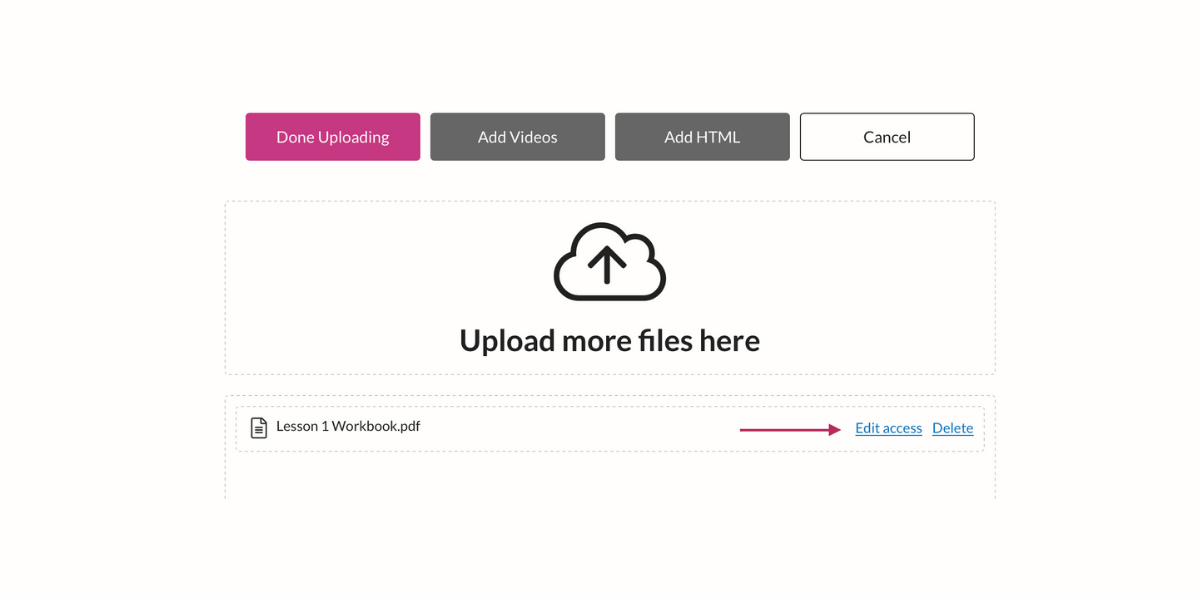
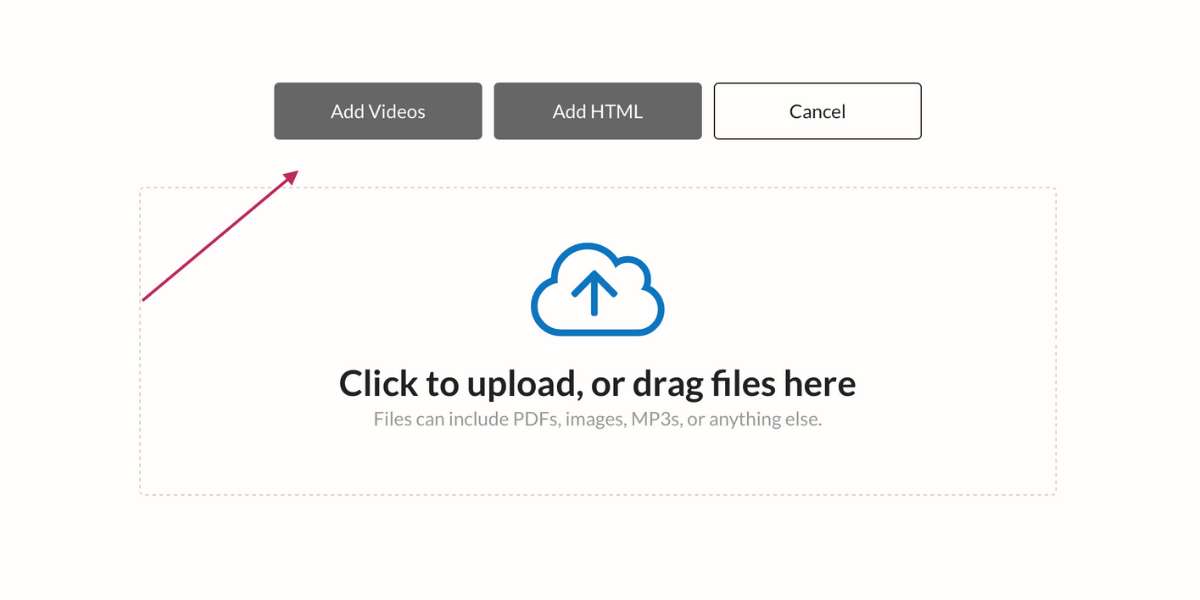
Drag and drop any PDF or image files into the middle of the screen.

Once your files are uploaded, click on "edit access" next to the file name.
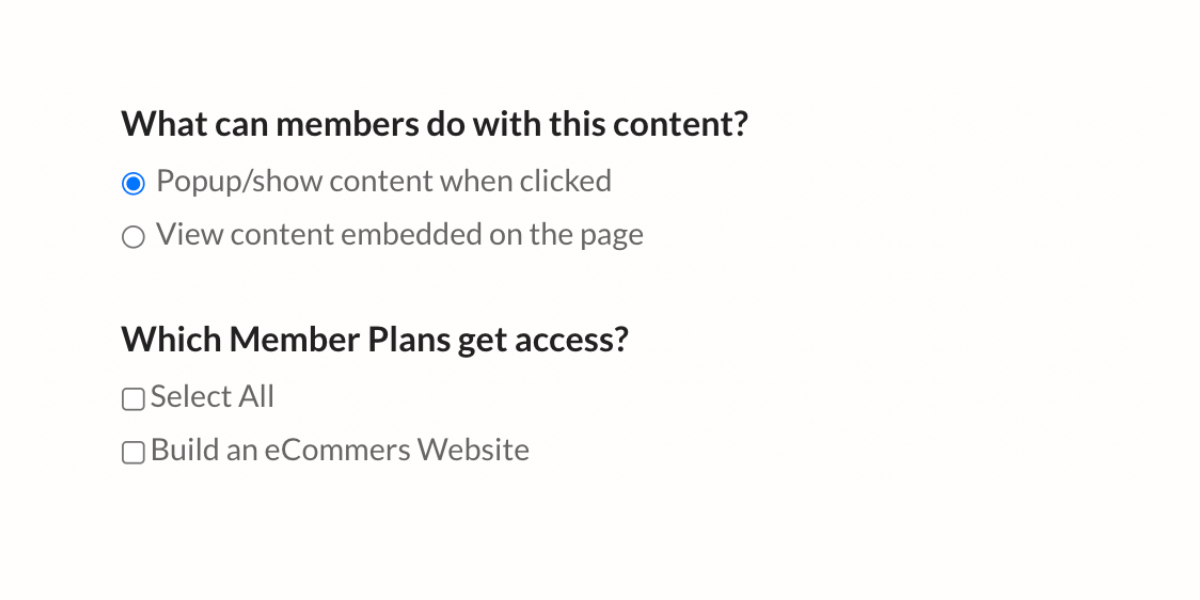
Here, you can specify who should be allowed to view this content — and when! Because this is part of our first course lesson, we are opting to have it available immediately.
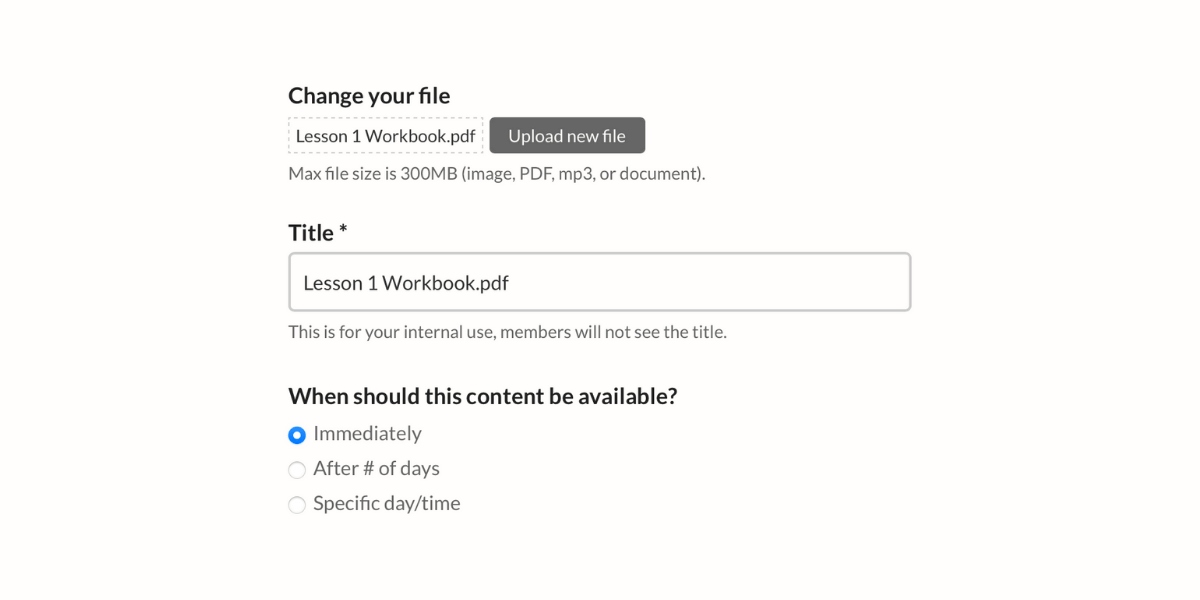
If you'd like to drip content to students over time, you can add links as you go or load future lesson content into MemberSpace now. Just click "specific day/time" and tell MemberSpace the date you'd like to make it live for members to view.
Or you can select the number of days after someone signs up to make that content available.
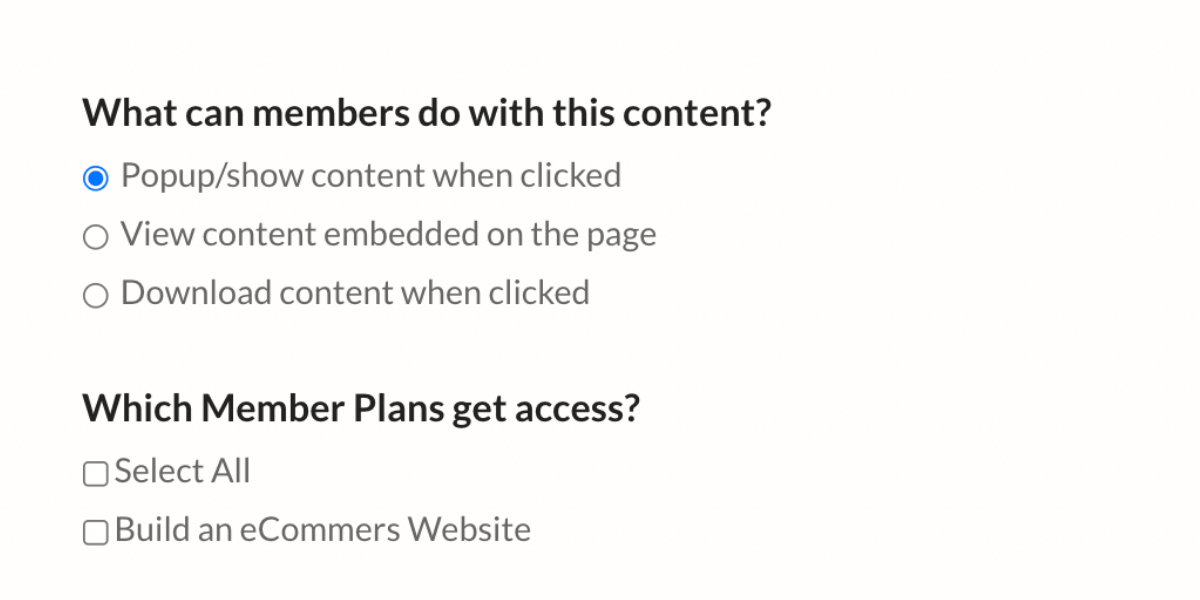
Select how you'd like the content to be viewed and which Member Plan should have access to this course content.
Save your changes. If you have any video files to include as part of your course, go back to the main Content Links area and click the "Add Videos" button.
Your video must be hosted on YouTube, Vimeo, or Wistia. These services allow you to upload videos without making them public in the video streaming app itself.
Copy and paste your video link into MemberSpace.
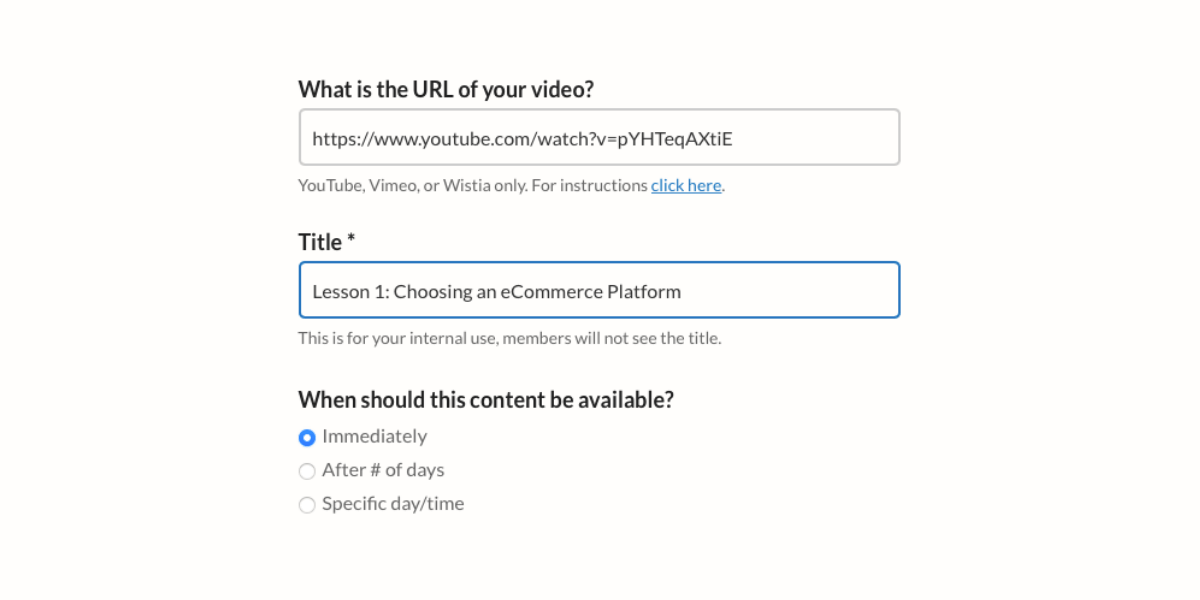
Decide how you would like your video to display on the course page, and click the box next to the Member Plan that should have access.
Click the pink "add now" button. When you're finished adding all of your content links, click "done uploading."

You will now see a list of all the videos and files you added. Click the "copy" link next to one of the files. This automatically copies a unique, protected MemberSpace content link.
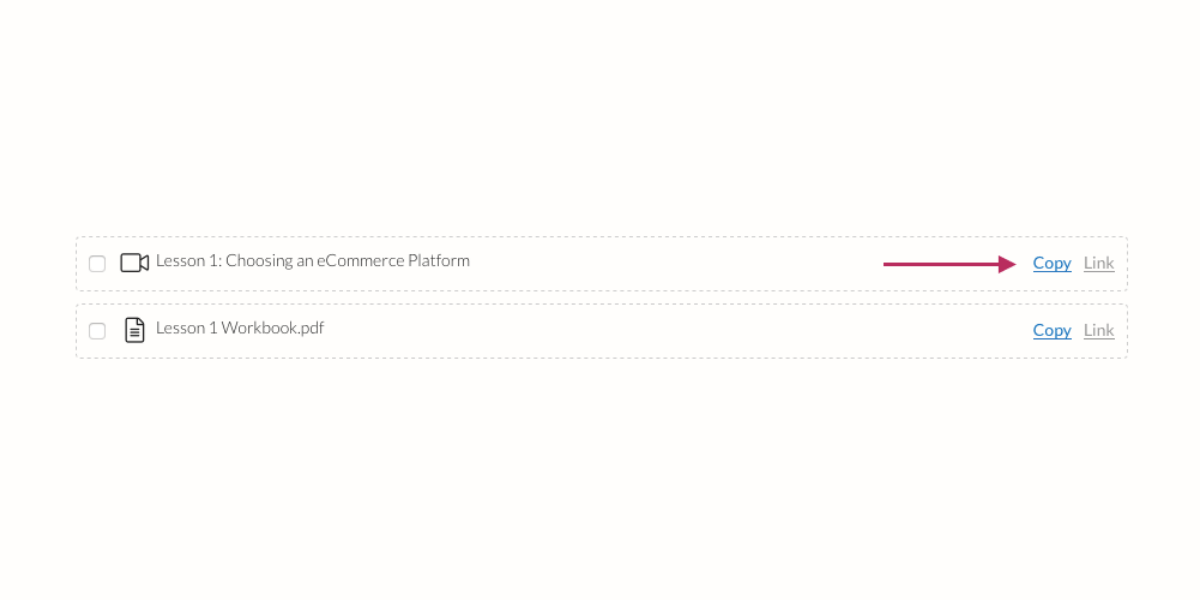
When placing downloads, documents, or videos on your lesson webpages, use these MemberSpace links instead of your original documents or video links. This way, your content can only be shared with or accessed by logged-in, paying course members.
Launching Your New Online Course
Congratulations! You have now successfully set up your first online course!
It's a good idea to try out your new course membership pages before launching to the public. Set up a free test plan or temporary 100% off coupon and use it to ‘join' your course.
Once you are happy with how everything looks, it's time to launch! There are no limits to how you can promote your course when using MemberSpace, so share your landing page link on social media, in an email signature, or anywhere else you can paste a URL.
Share your course landing page with us on Twitter, Facebook, LinkedIn, or in the private MemberSpace community. We'd love to see what you create!
.png)
