Why you should black out your Member Pages on Webflow using Memberspace
There are three main reasons to black out your Member Pages:
1. When a visitor goes to the page they will see its contents for a second or so before the automatic redirect happens. If you don't want visitors to see any information on the page whatsoever, then blacking out the page accomplishes that since the page will be completely black until the redirect occurs.
2. If some tech-savvy person wants to get around your page protection without becoming a member they can disable Javascript in their browser which will prevent our automatic redirect from happening. However, if your page is blacked out, the person will simply be looking at a black page which obviously isn't super useful for them :)
3. Most people don't want their Member Pages indexed by search engines (like Google). The best way to prevent indexing is by blacking out your Member Page which automatically sends a strong "do not index" signal to Google and other search engines. This does not necessarily work 100% of the time since search engines can choose to ignore the signal, but that very rarely happens.
NOTE: For members of yours with access to the Member Page, they will not see it blacked out.
How to black out your Member Pages
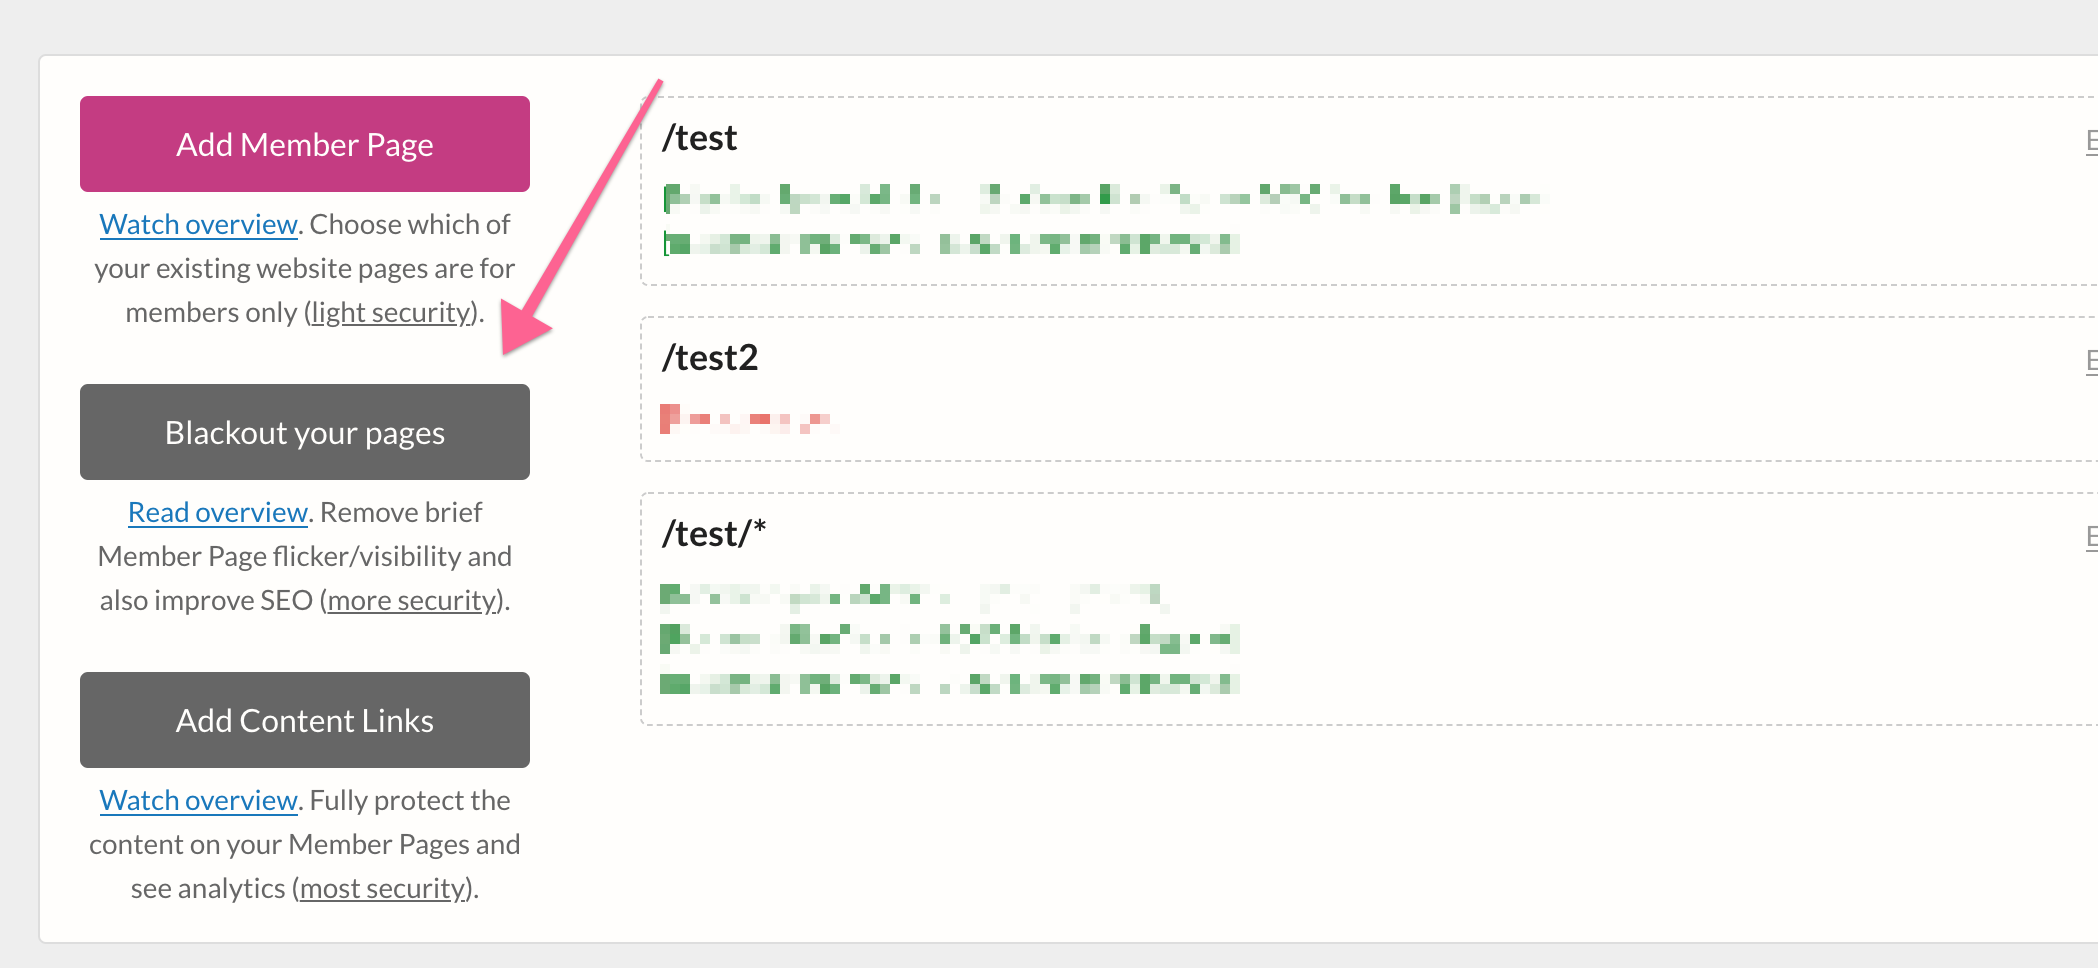
1. Click the "Blackout your pages" button in your MemberSpace backend
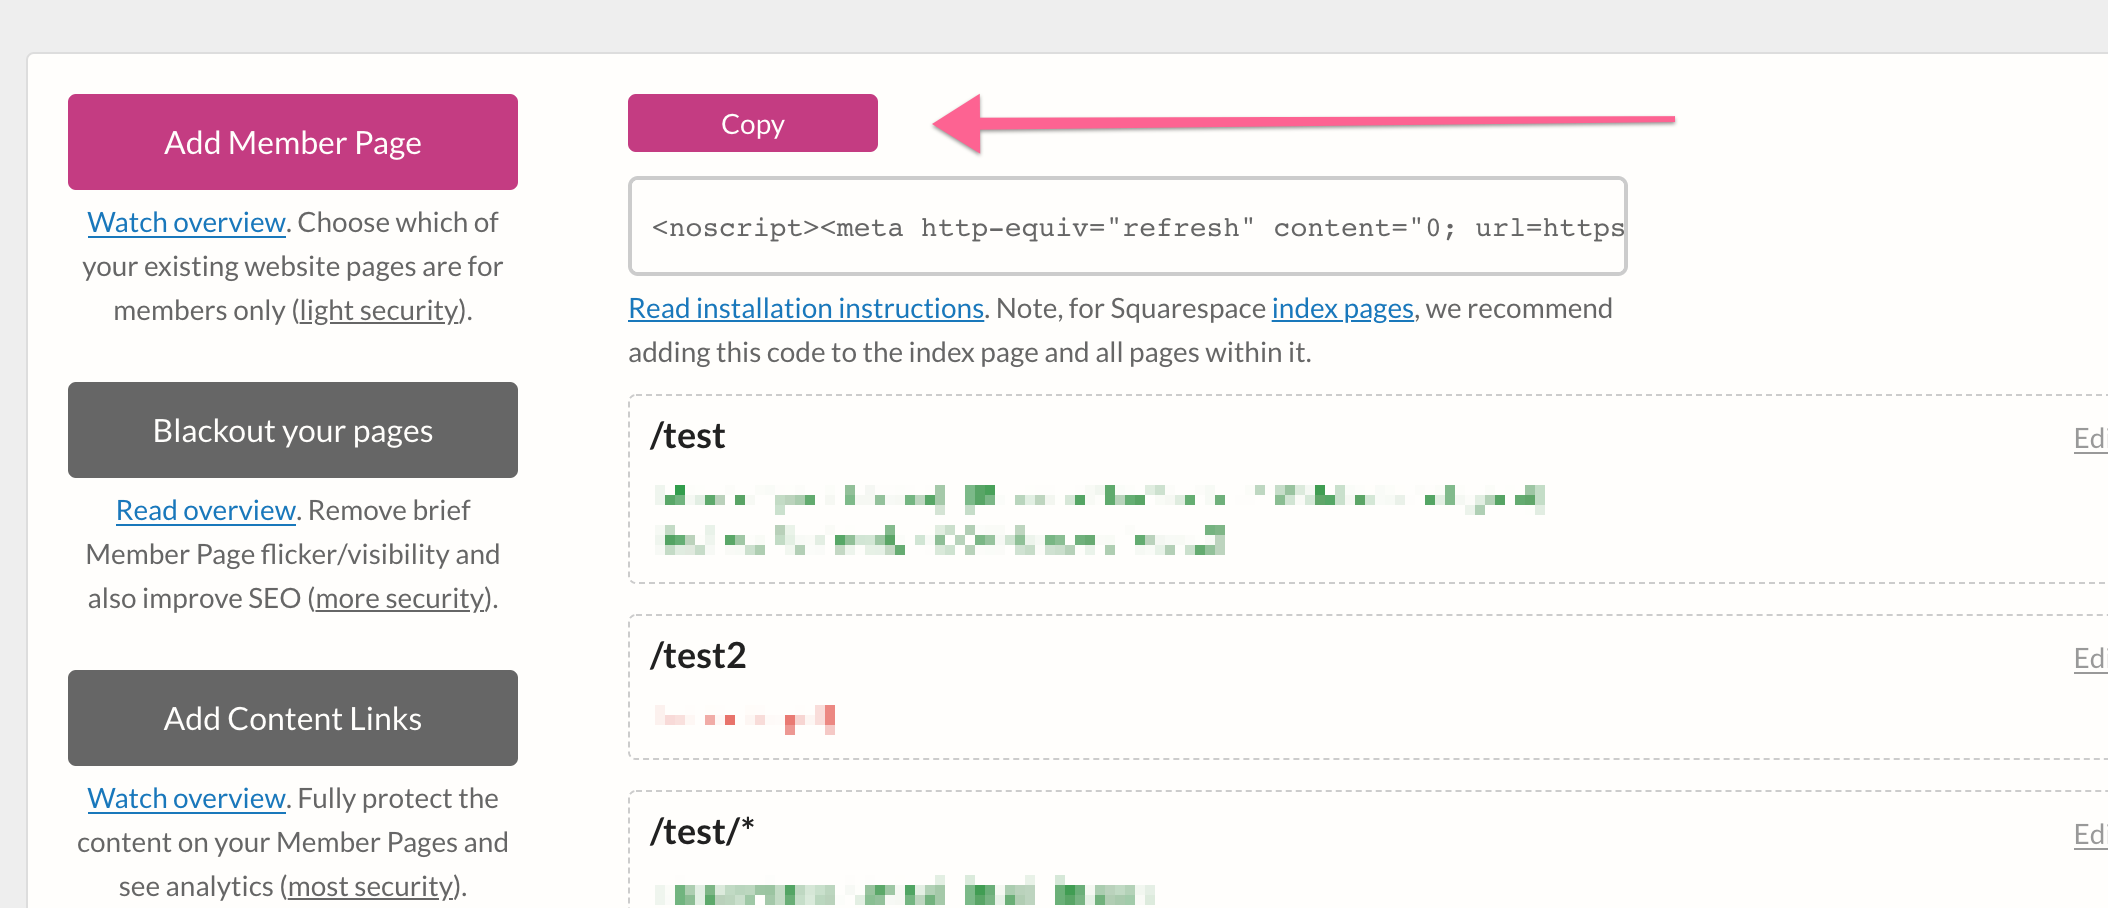
2. Click the "Copy" button:
3. Make sure you are logged into your Webflow backend.
4. Click the Pages icon on the left:

5. Find the page you want to black out and then click the gear icon to the right of the page name:

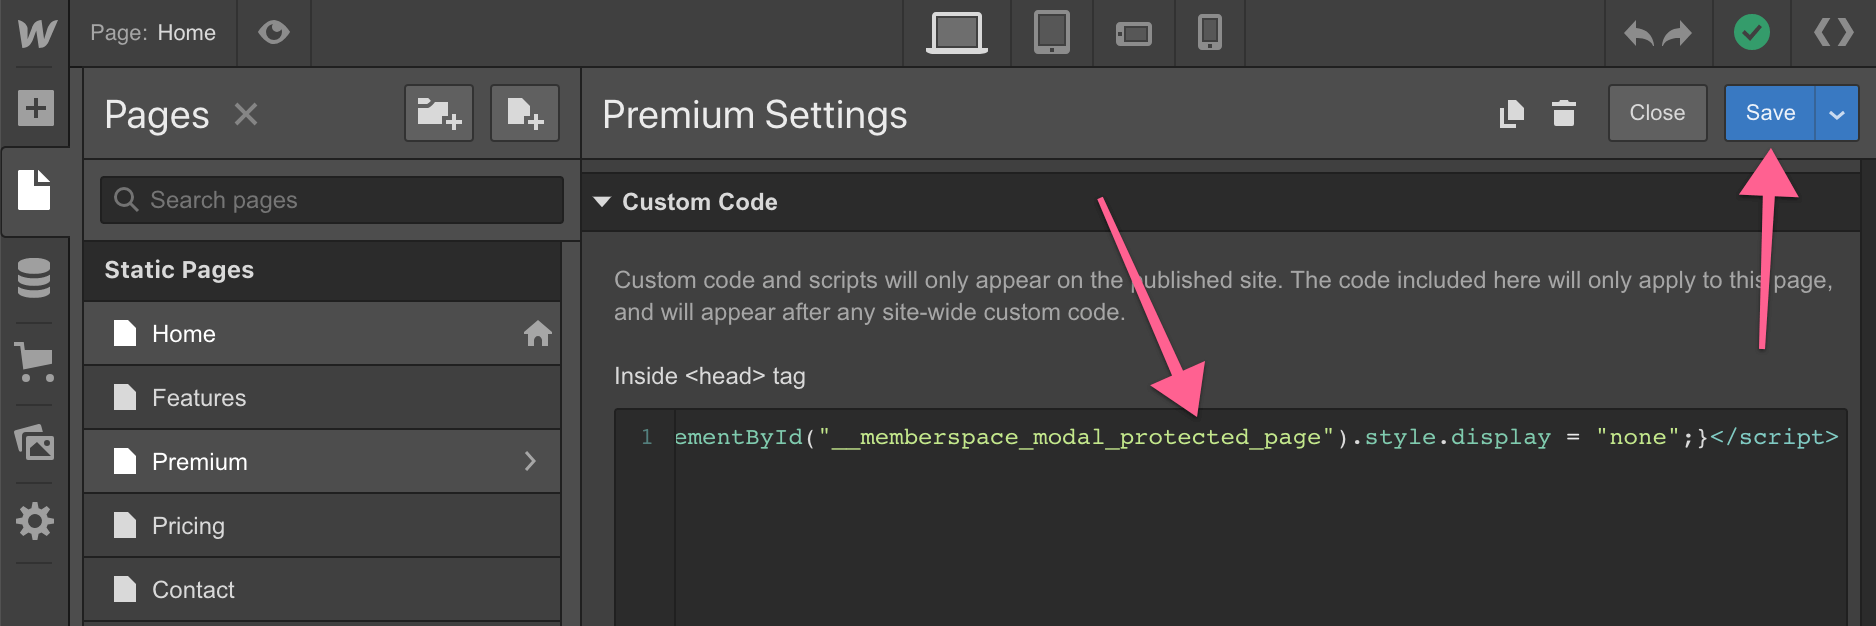
6. Scroll down to the "Custom Code" section, then paste what you copied into the "Inside <head> tag" section, then click "Save" in the top right:
7. Lastly don't forget to "Publish" your changes

.png)