
Teammate recognition can improve productivity and promote collaboration. An easy and often overlooked way to recognize teammates is by celebrating them on their birthday and letting them know that they are invaluable team members.
In this tutorial, we’ll learn to build a Slack App so that your entire team never misses out on the opportunity to celebrate teammates’ birthdays. 🙌🏼
No more overloaded calendars — everything is stored in Google Sheets and birthday messages are always on time.

What it does
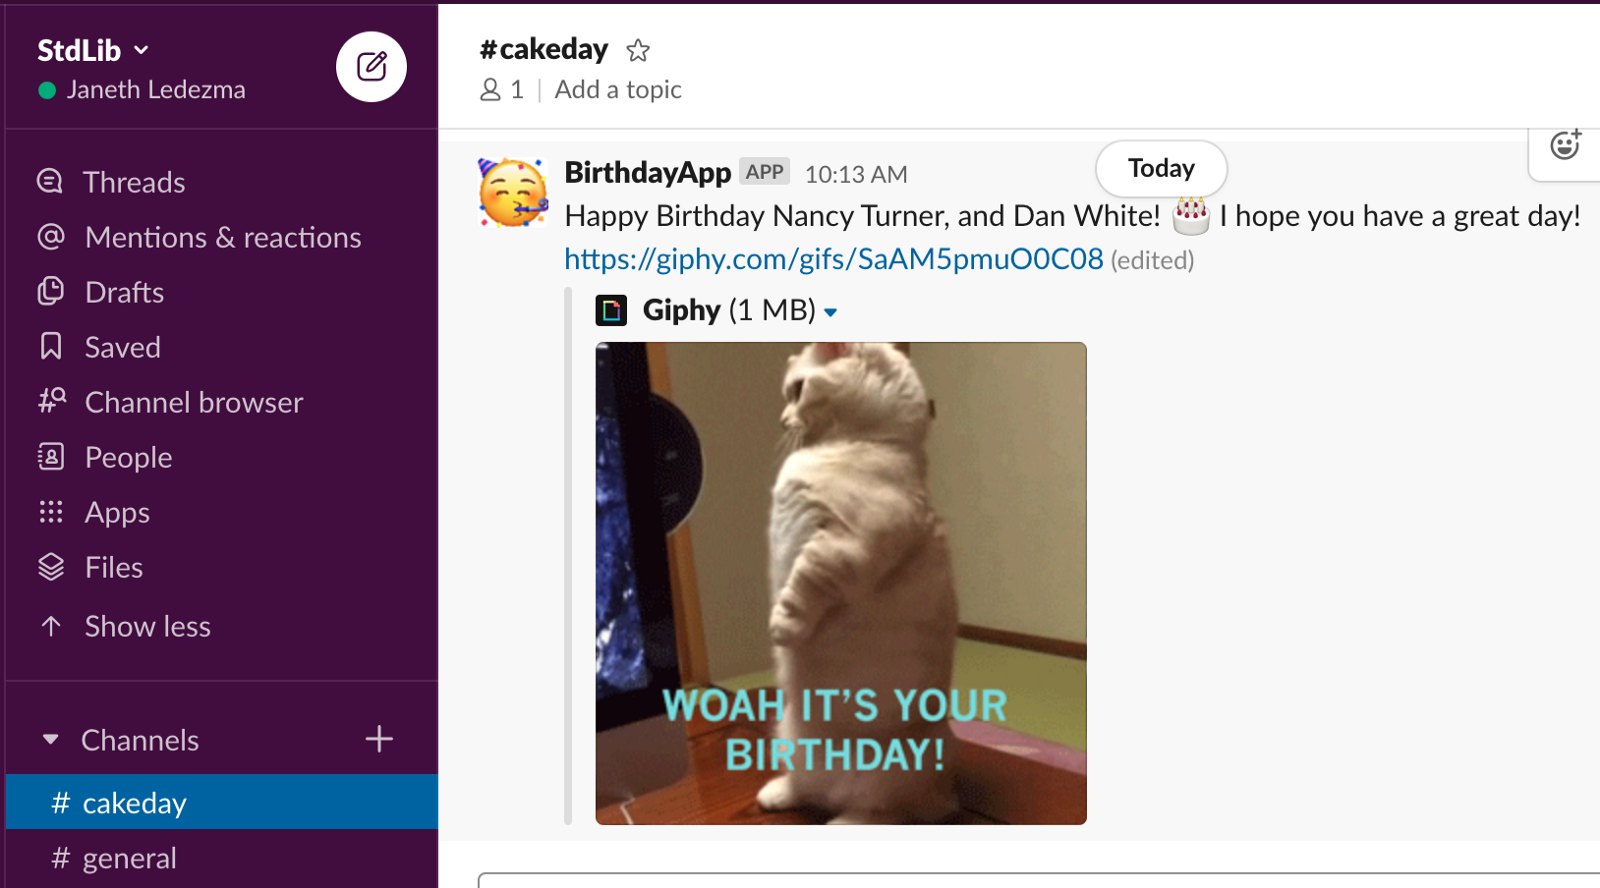
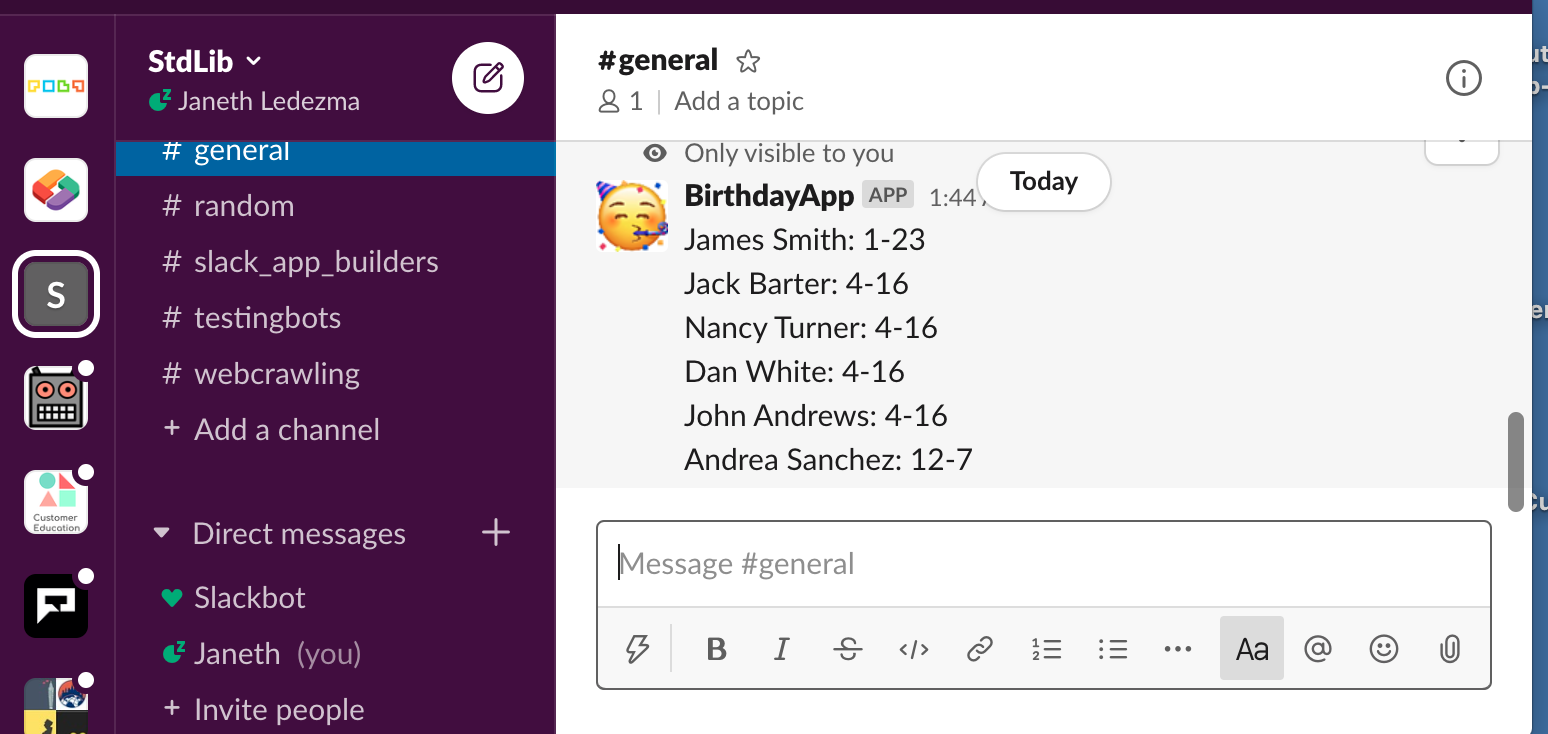
The Slack app will kick off birthday celebrations once a day at 8:00 am PST by posting a message to a specified channel; acknowledging teammates who were born on that day and month.
The Slack app template is preprogrammed with two handy commands. Workspace members can quickly query a Google spreadsheet for a list of registered birthdays with:
/cmd list — returns all the stored birthdays in a private message visible to the invoking user.

Members can also add birthdays to the Spreadsheet directly from Slack using:
/cmd add <First and Last Name> <Birth Month> <Birth Day> — adds Full Name, Birth Month, and Birth Day to a Spreadsheet.
/cmd add Andrea Sanchez 12 07
- Make sure to add both first and last name.
What You’ll Need Beforehand
Table of Contents:
- Google Spreadsheet Setup
- Install Slack App
- Test Your Slack App
- Changing the Slack Channel and Slack Message
- Changing the Time Interval
- Support
- Acknowledgments
Google Spreadsheet Setup
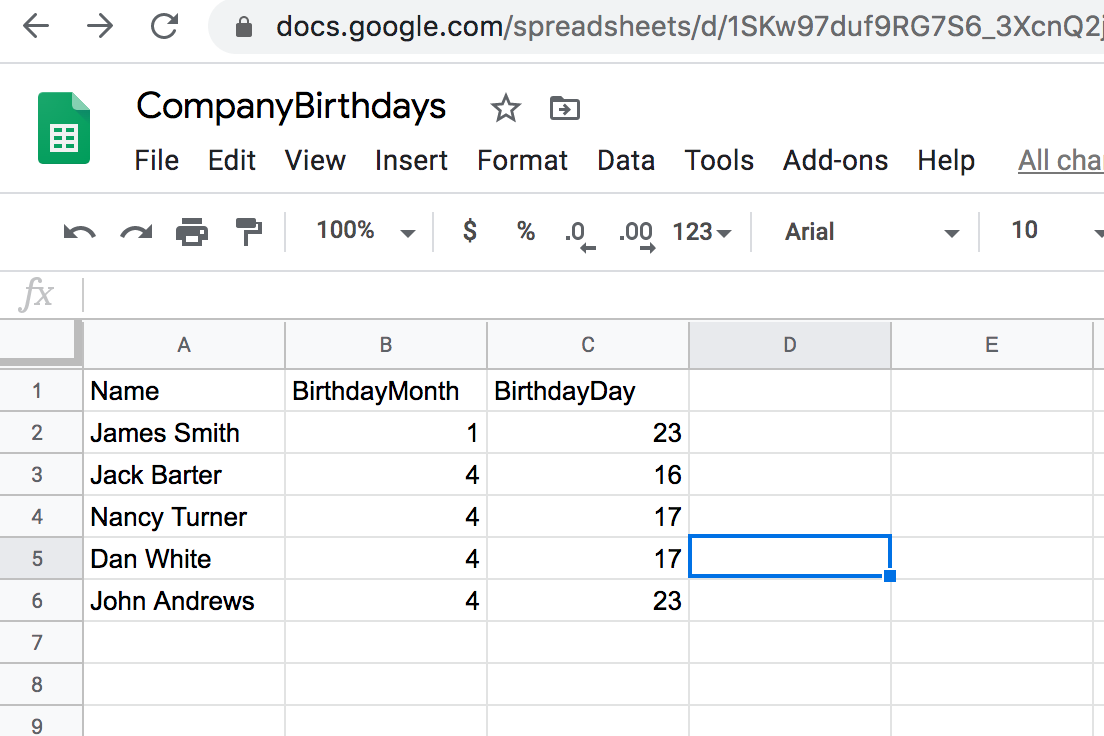
Copy this Google Spreadsheet and title it CompanyBirthdays or something similar. Make sure it’s set up with three fields for Name BirthdayMonth and BirthdayDay. Fill in a few rows with test data as I have done. Make sure to input the current Month and current Day for at least one of the rows — we’ll need to test-run our application before deploying it.

Great! You’re ready to install your Slack app.
Install Slack App using Autocode
Head on over and copy my Slack app template using this link:
https://autocode.stdlib.com/github/JanethL/BirthdaySlackApp/?filename=README.md
You will be prompted to sign in or create a free account. If you have a Standard Library account click Already Registered and sign in using your Standard Library credentials.
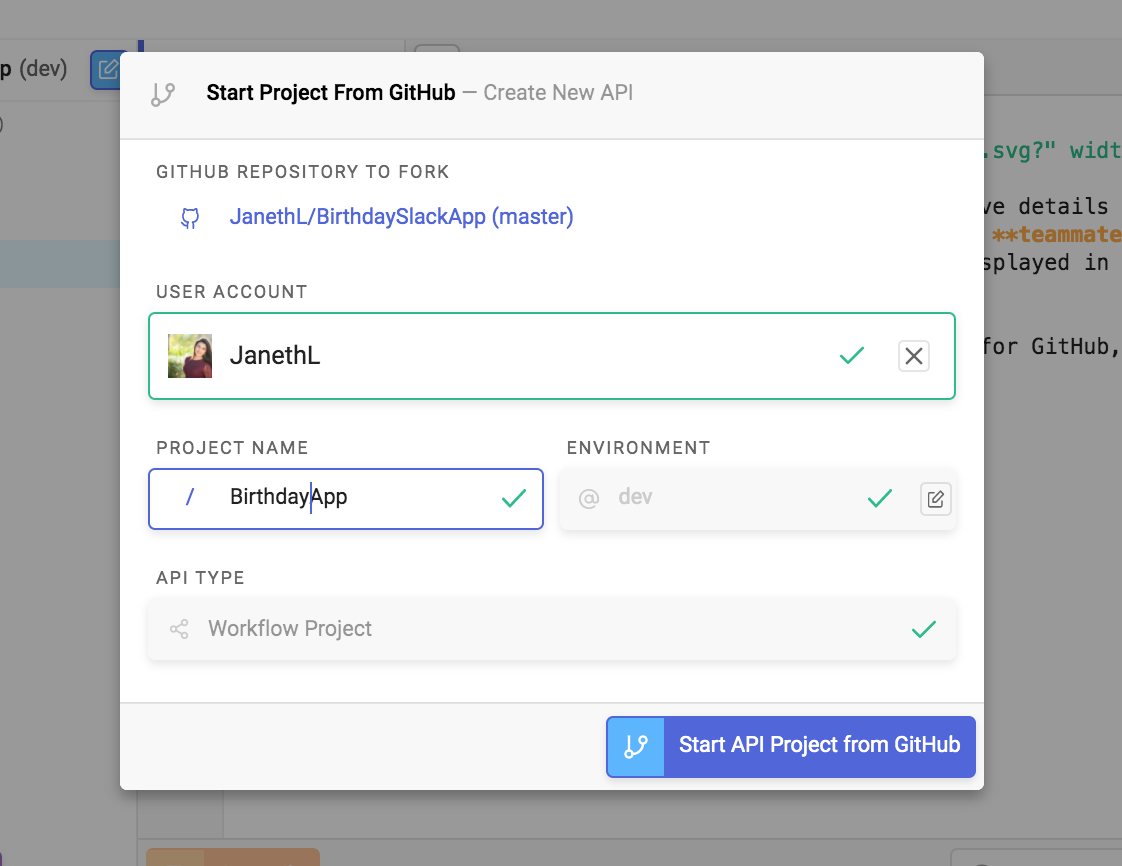
Give your project a unique name and select Start API Project from Github:

Autocode automatically sets up a project scaffold to save your project as an API endpoint.

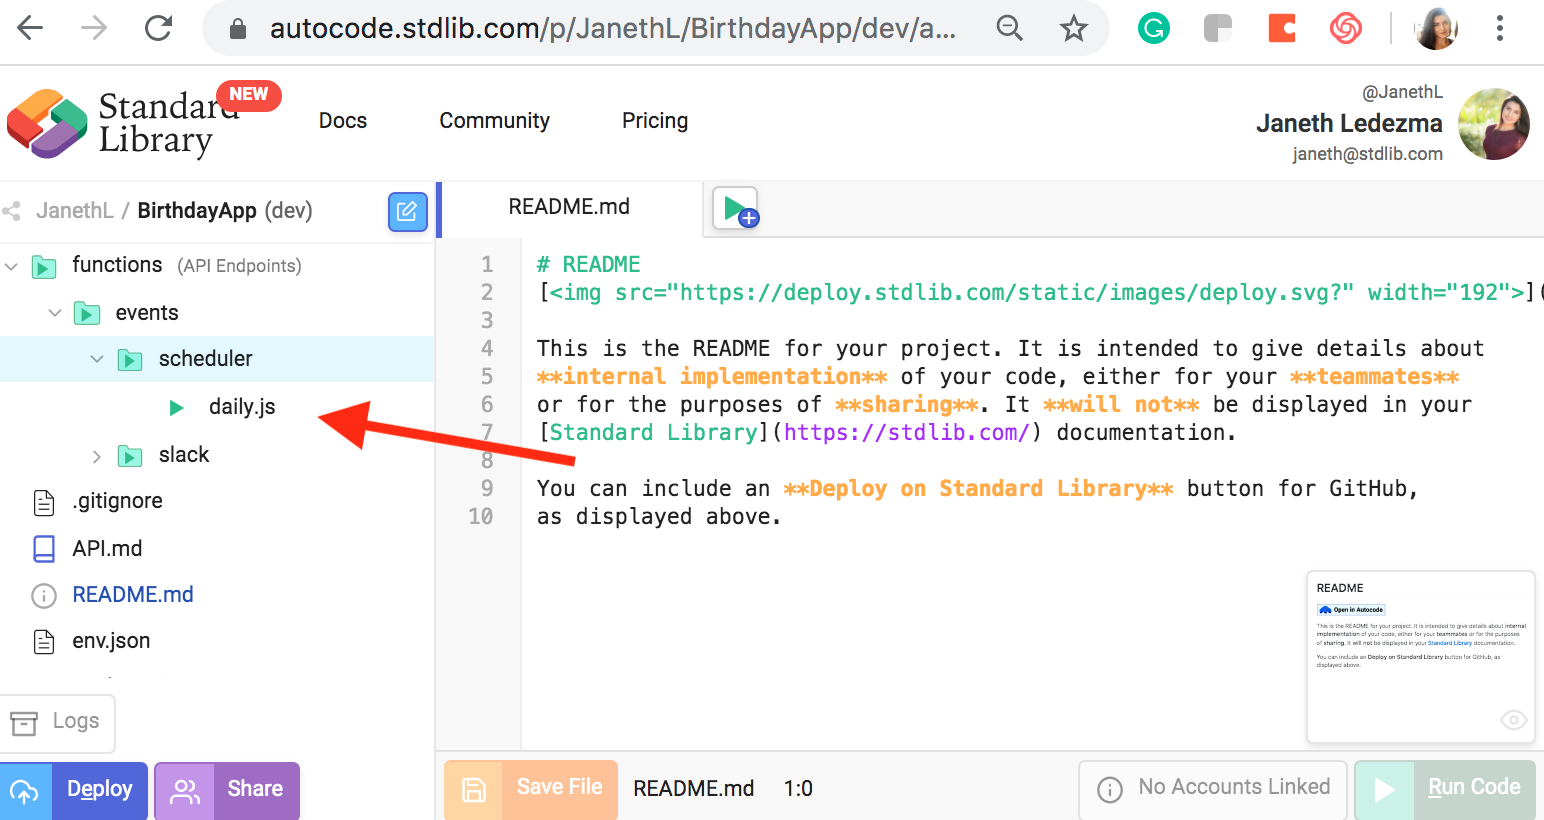
To deploy your API to the cloud navigate through the functions/events/scheduler folders on the left and select daily.js file.

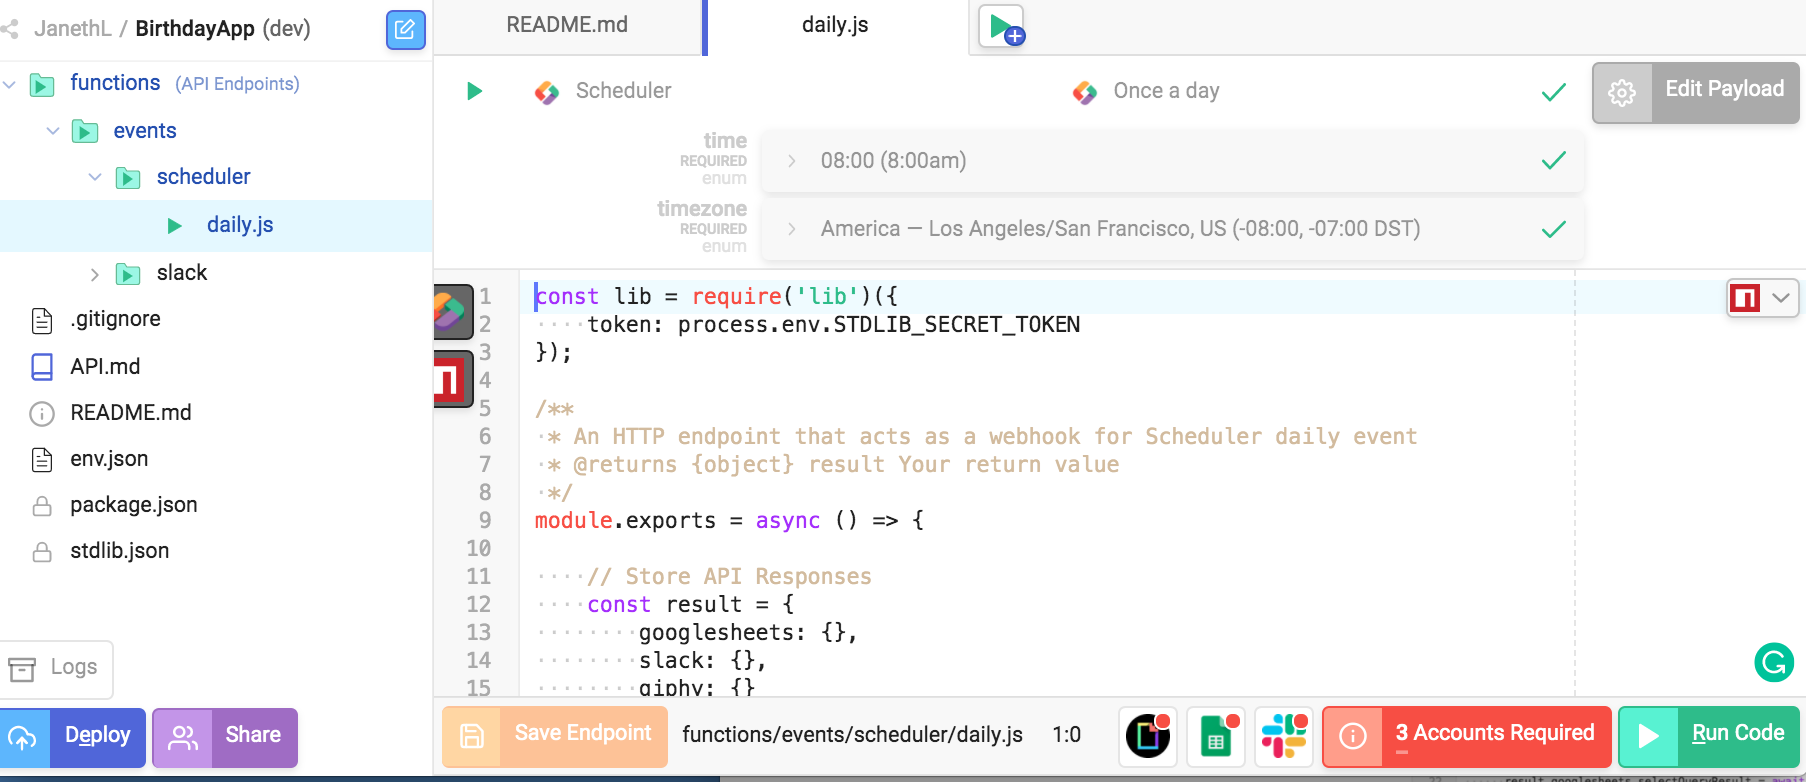
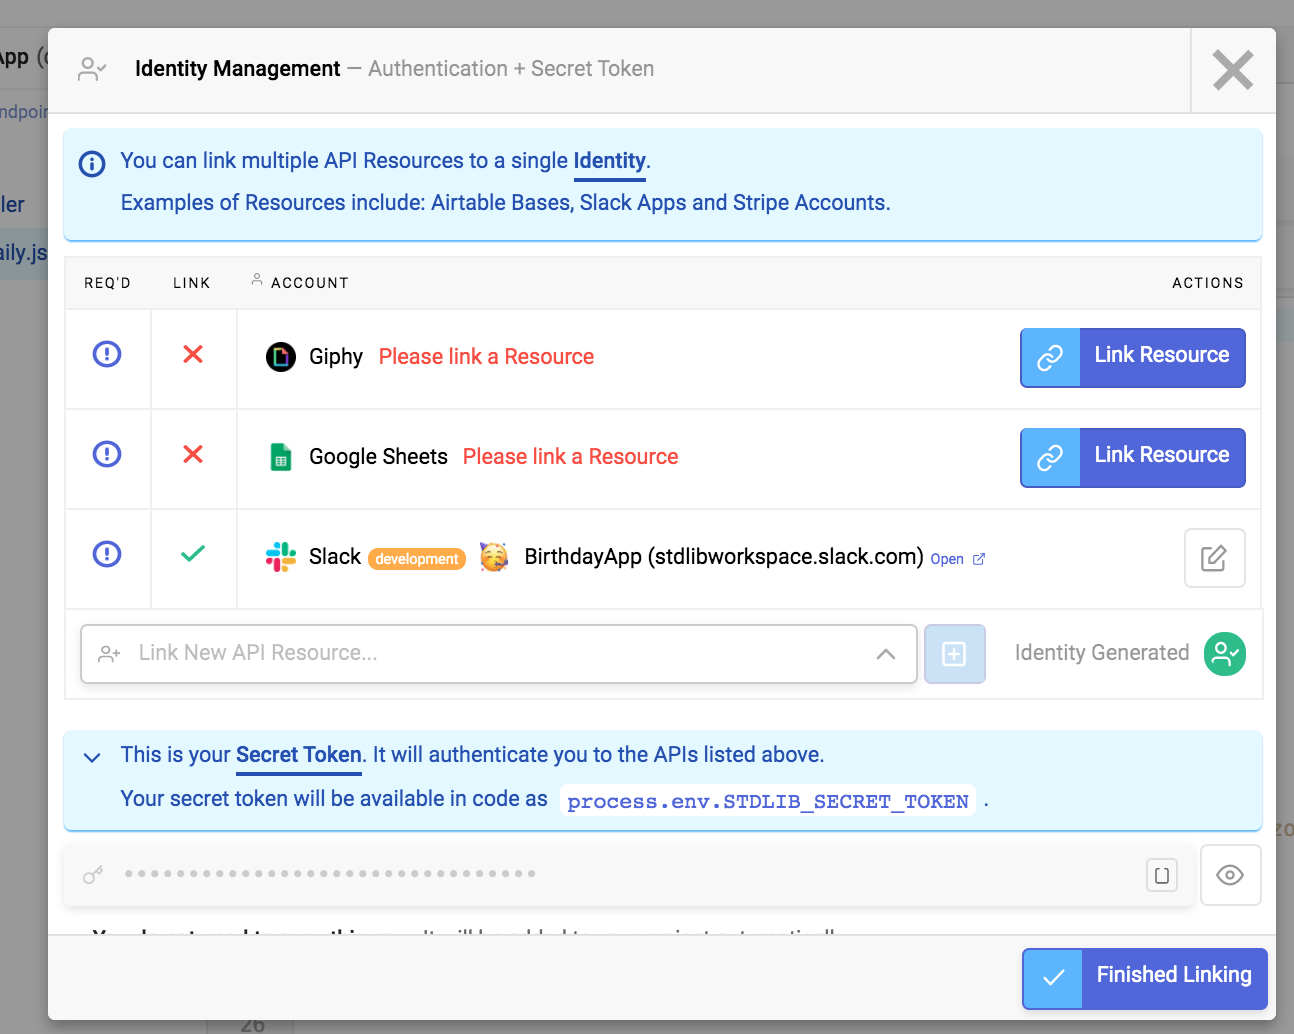
Select the red Account Required button, which will prompt you to link a Slack, Giphy and Google Sheets account.


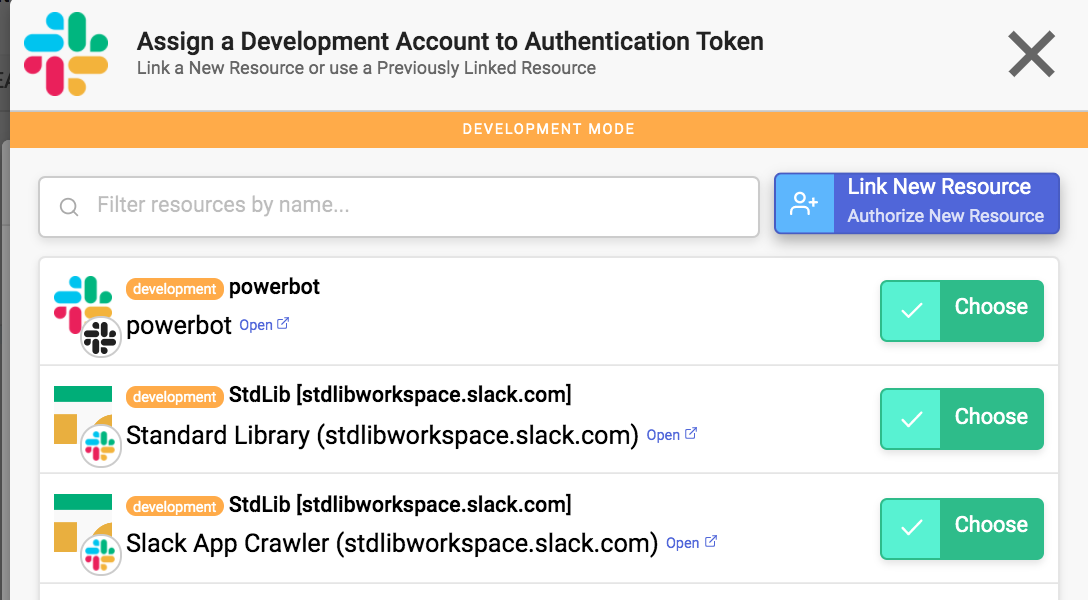
Let’s start by linking a Slack Resource.
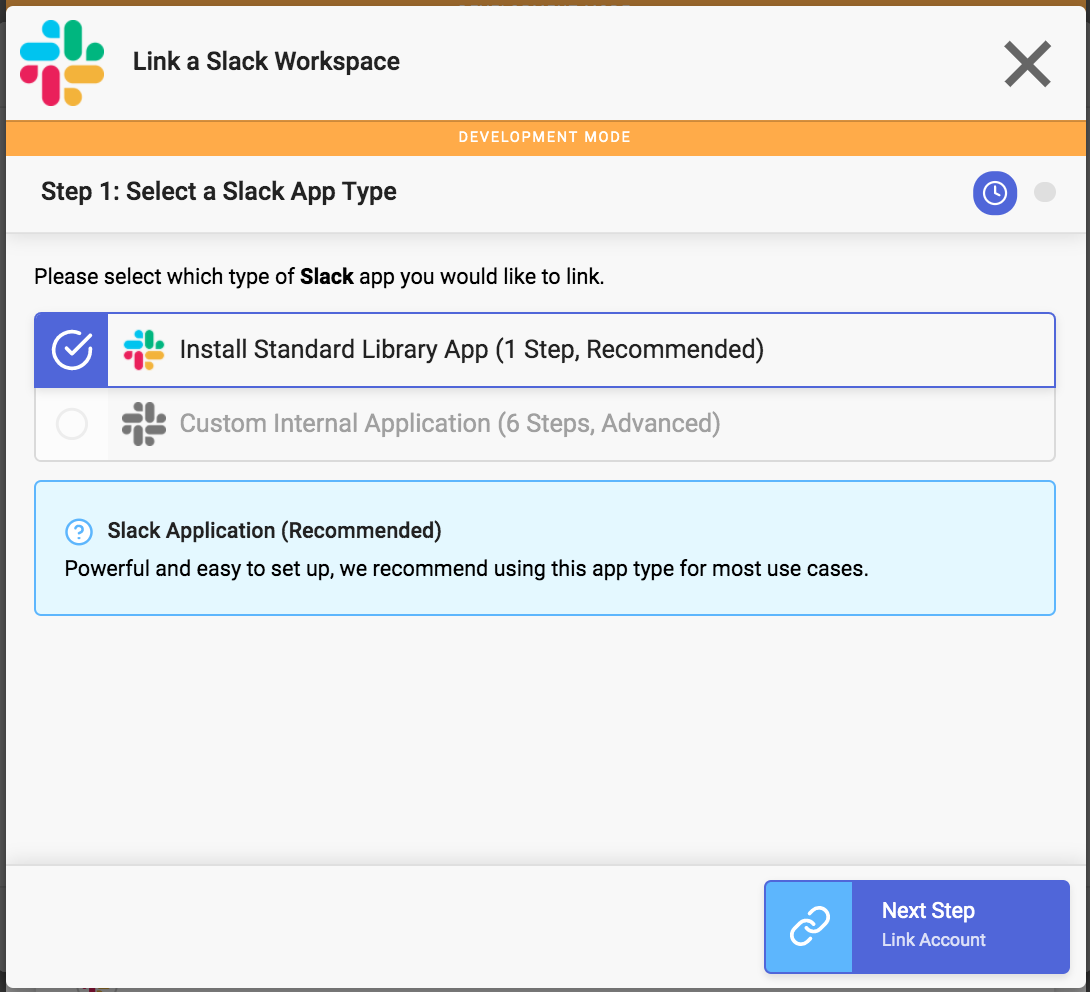
Select Link New Resource to link a new Slack app.

Select Install Standard Library App.

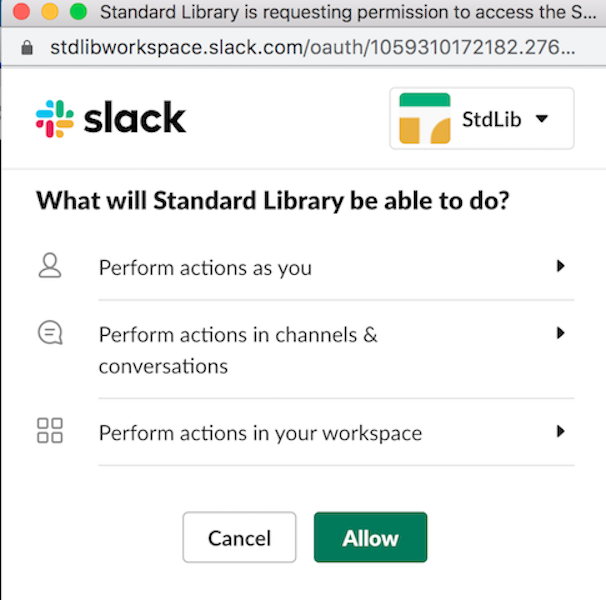
You should see an OAuth popup. Select the workspace you’d like to install your Slack app in and click Allow.

Give your Slack app a name and image if you’d like.

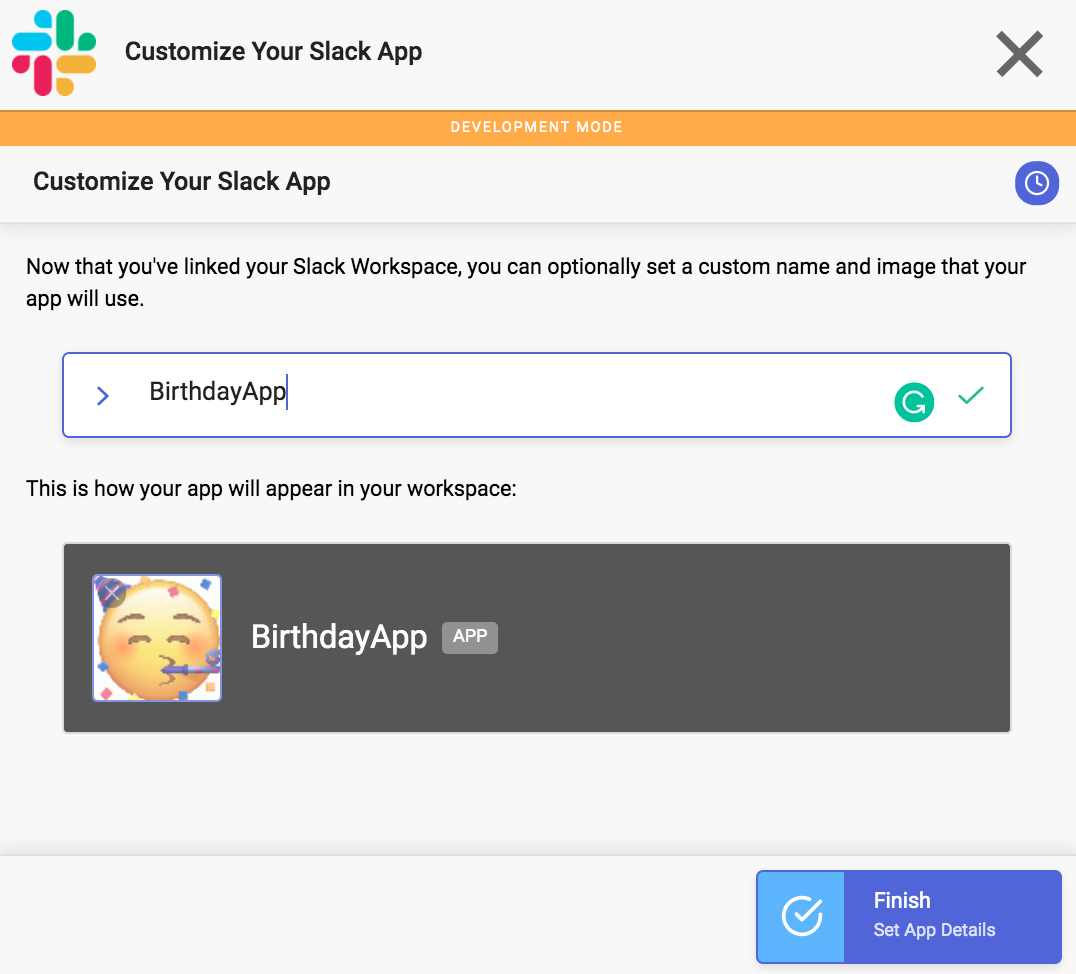
Select Finish. The green checkmark confirms that you’ve linked your Slack account. Next select Link Resource to connect to your Google account through a similar authentication flow.

Once you choose the Google account where you’ve created your spreadsheet select Allow. Find and Select the CompanyBirthdays Spreadsheet. Continue to Finish Linking.


And finally, follow the instructions to finish linking your Giphy Account to your Standard Library token.


Once you’re done linking Slack, Google Sheets and Giphy select Finished Linking.

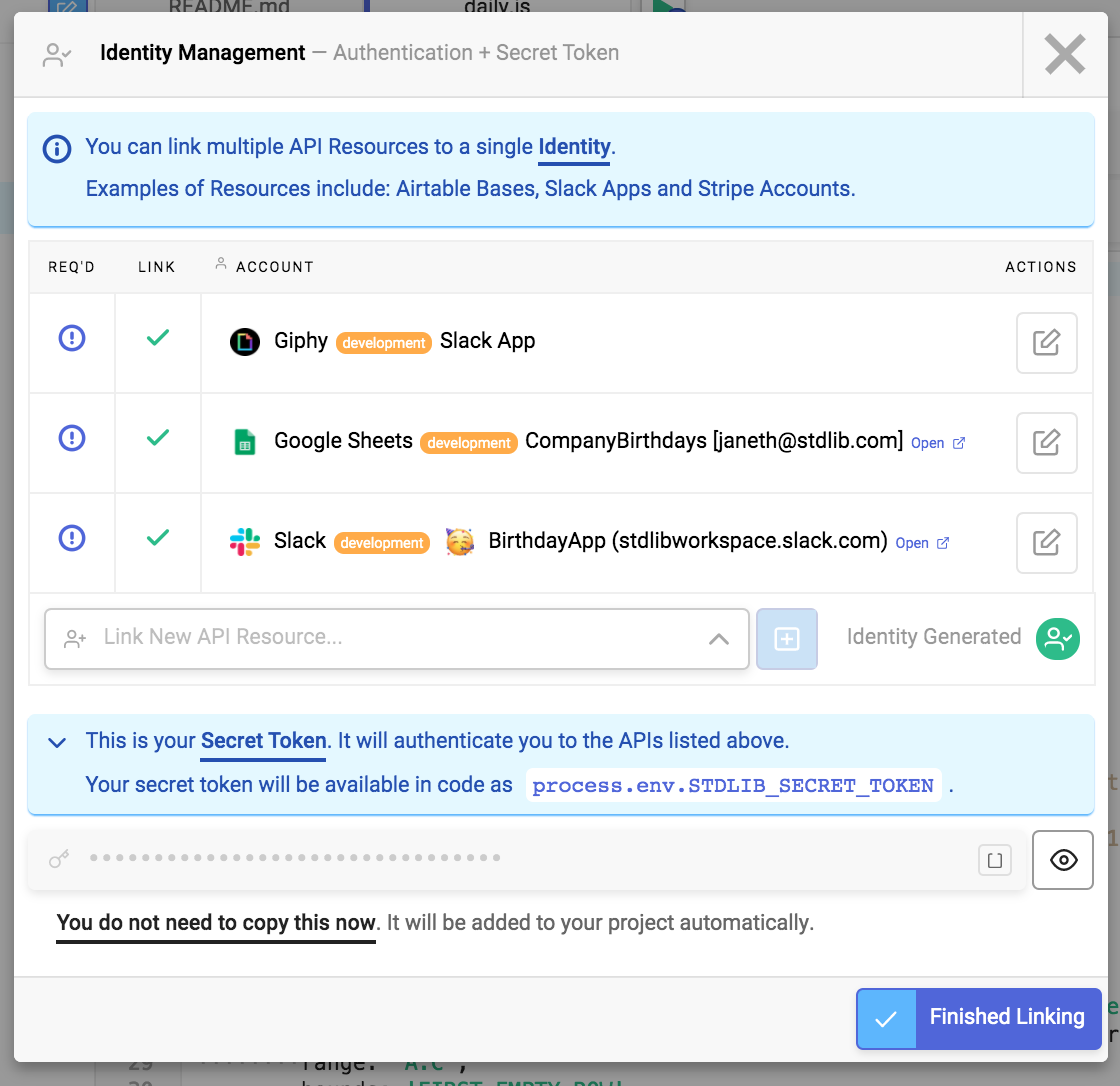
You’re now ready to test run the code and verify that you’ve linked your application to the correct accounts.
Test Your Slack App
Select the green Run Code button to test your Slack project.

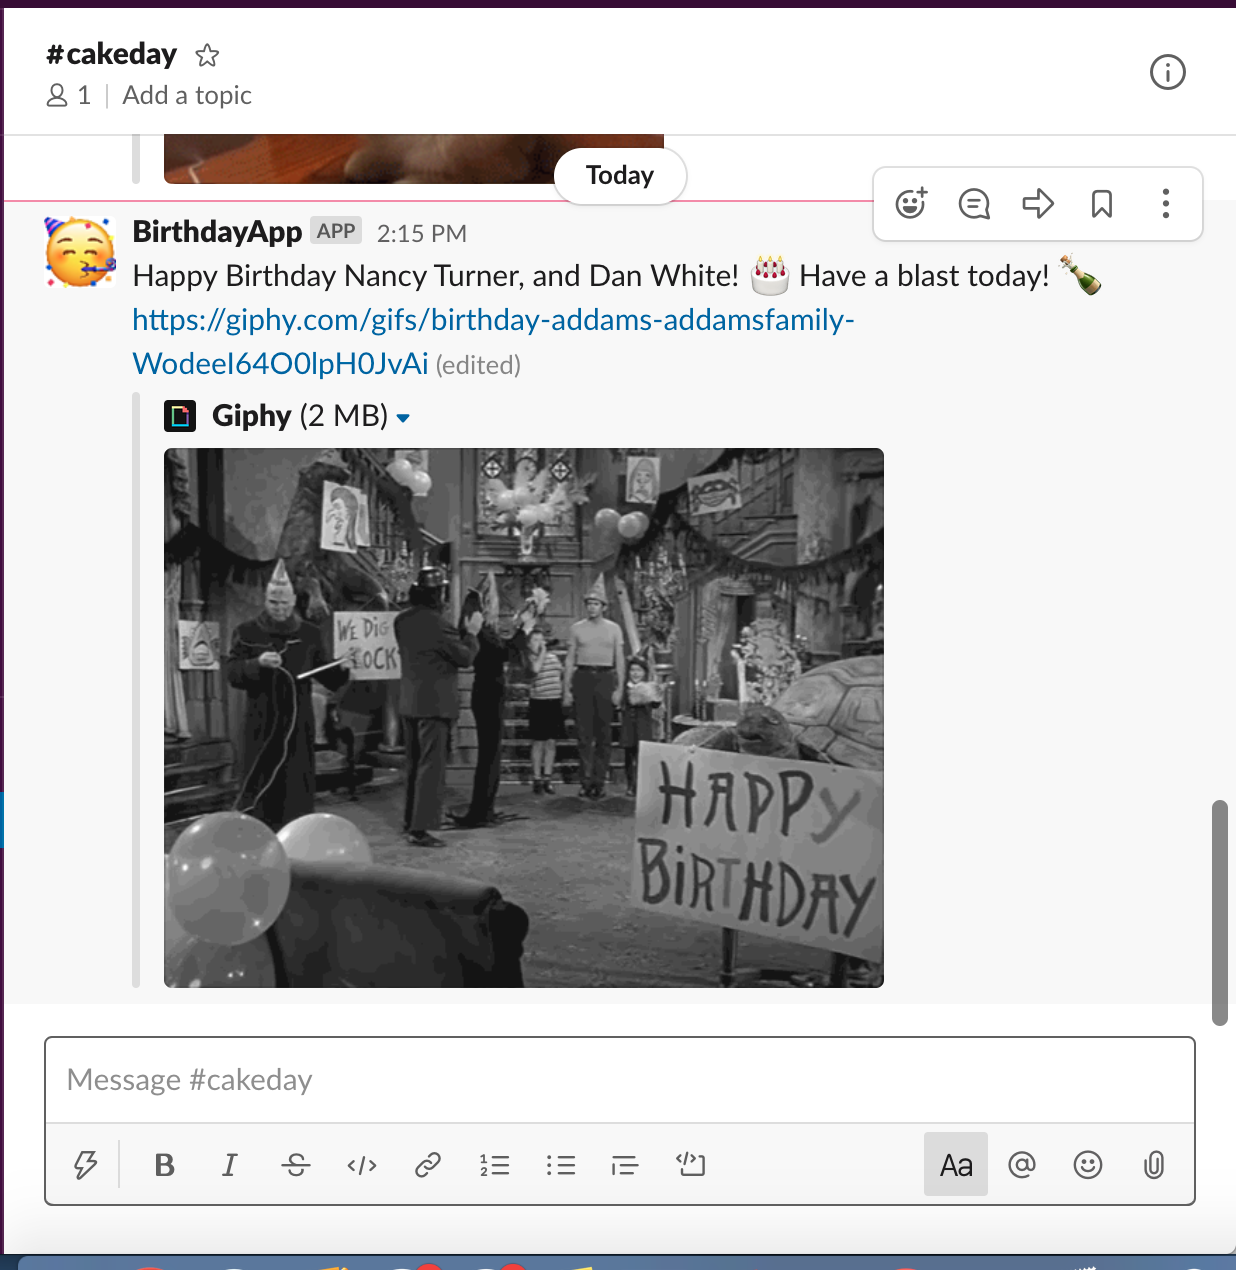
You should see the following message appear in your #general channel.


🚀 Deploy your Slack App
To deploy your Slack App select Deploy in the bottom-left of the file manager.


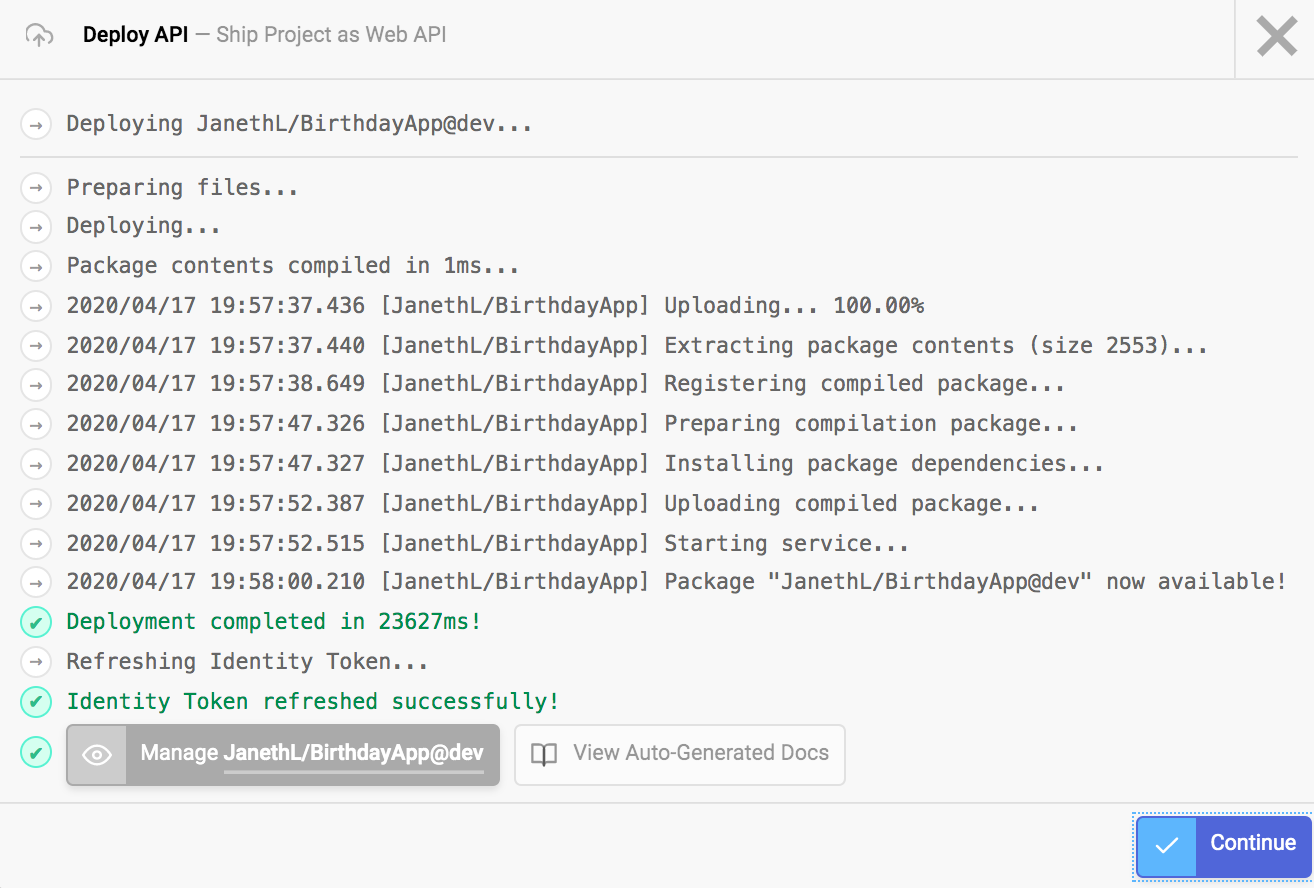
Your Slack App is live! It is set to post a message in the #general channel every day at 8:00 am PST. Your Slack App is now available for use in the Slack workspace you authorized it for.
Your Slack app should respond to:
/cmd list returning a list of all the names and their respective birth months and birthdays. Notice the message is only visible to you so that your request won’t disturb your workspace.
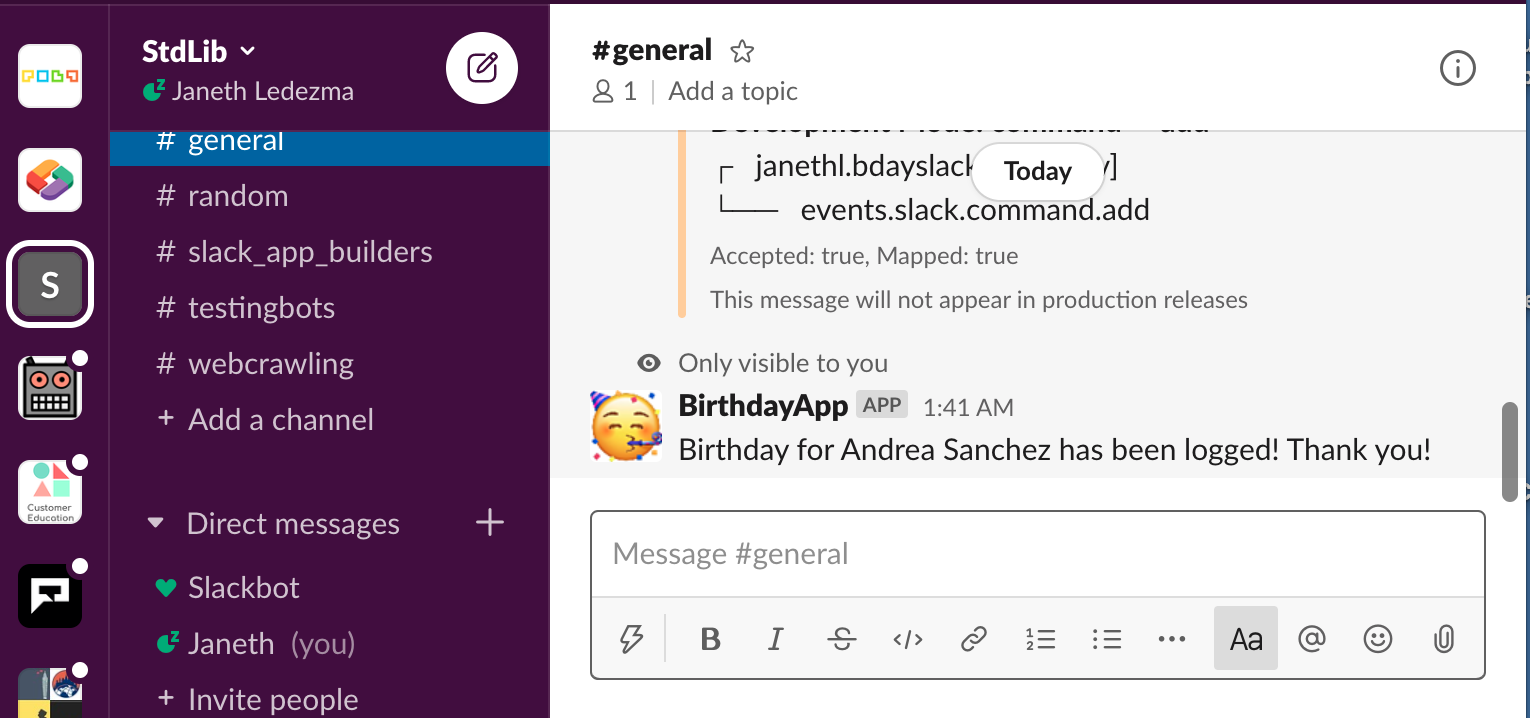
If you’d like to add a birthday to the spreadsheet use /cmd followed by first name, last name, birth month and birthday:
/cmd add Andrea Sanchez 12 07
You should receive a confirmation message once you hit enter — the confirmation message is only visible to you :
To verify that the birthday logged you can check your spreadsheet or run /cmd list again:

Congrats! Now that your app is live you can return to Autocode and change the channel that the Slack app posts messages to, change the message, change time, etc.
Changing the Slack Channel and Slack Message
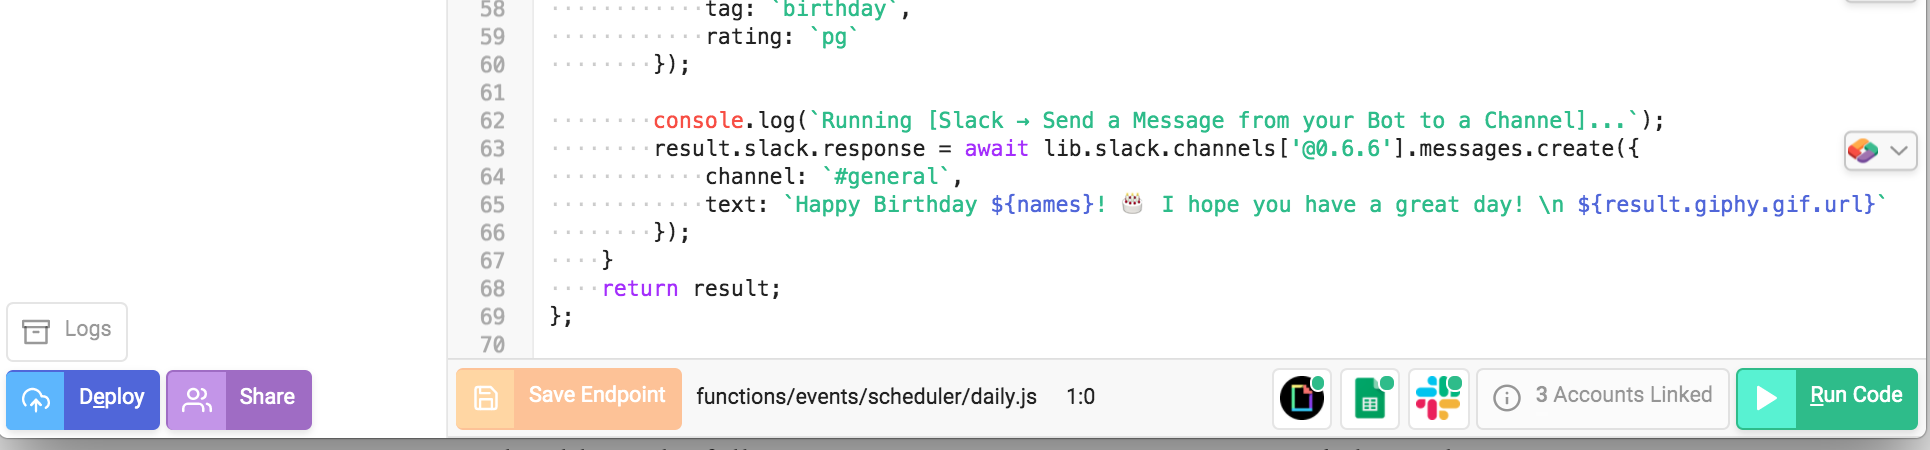
Navigate through functions/events/scheduler folder and open daily.js file.

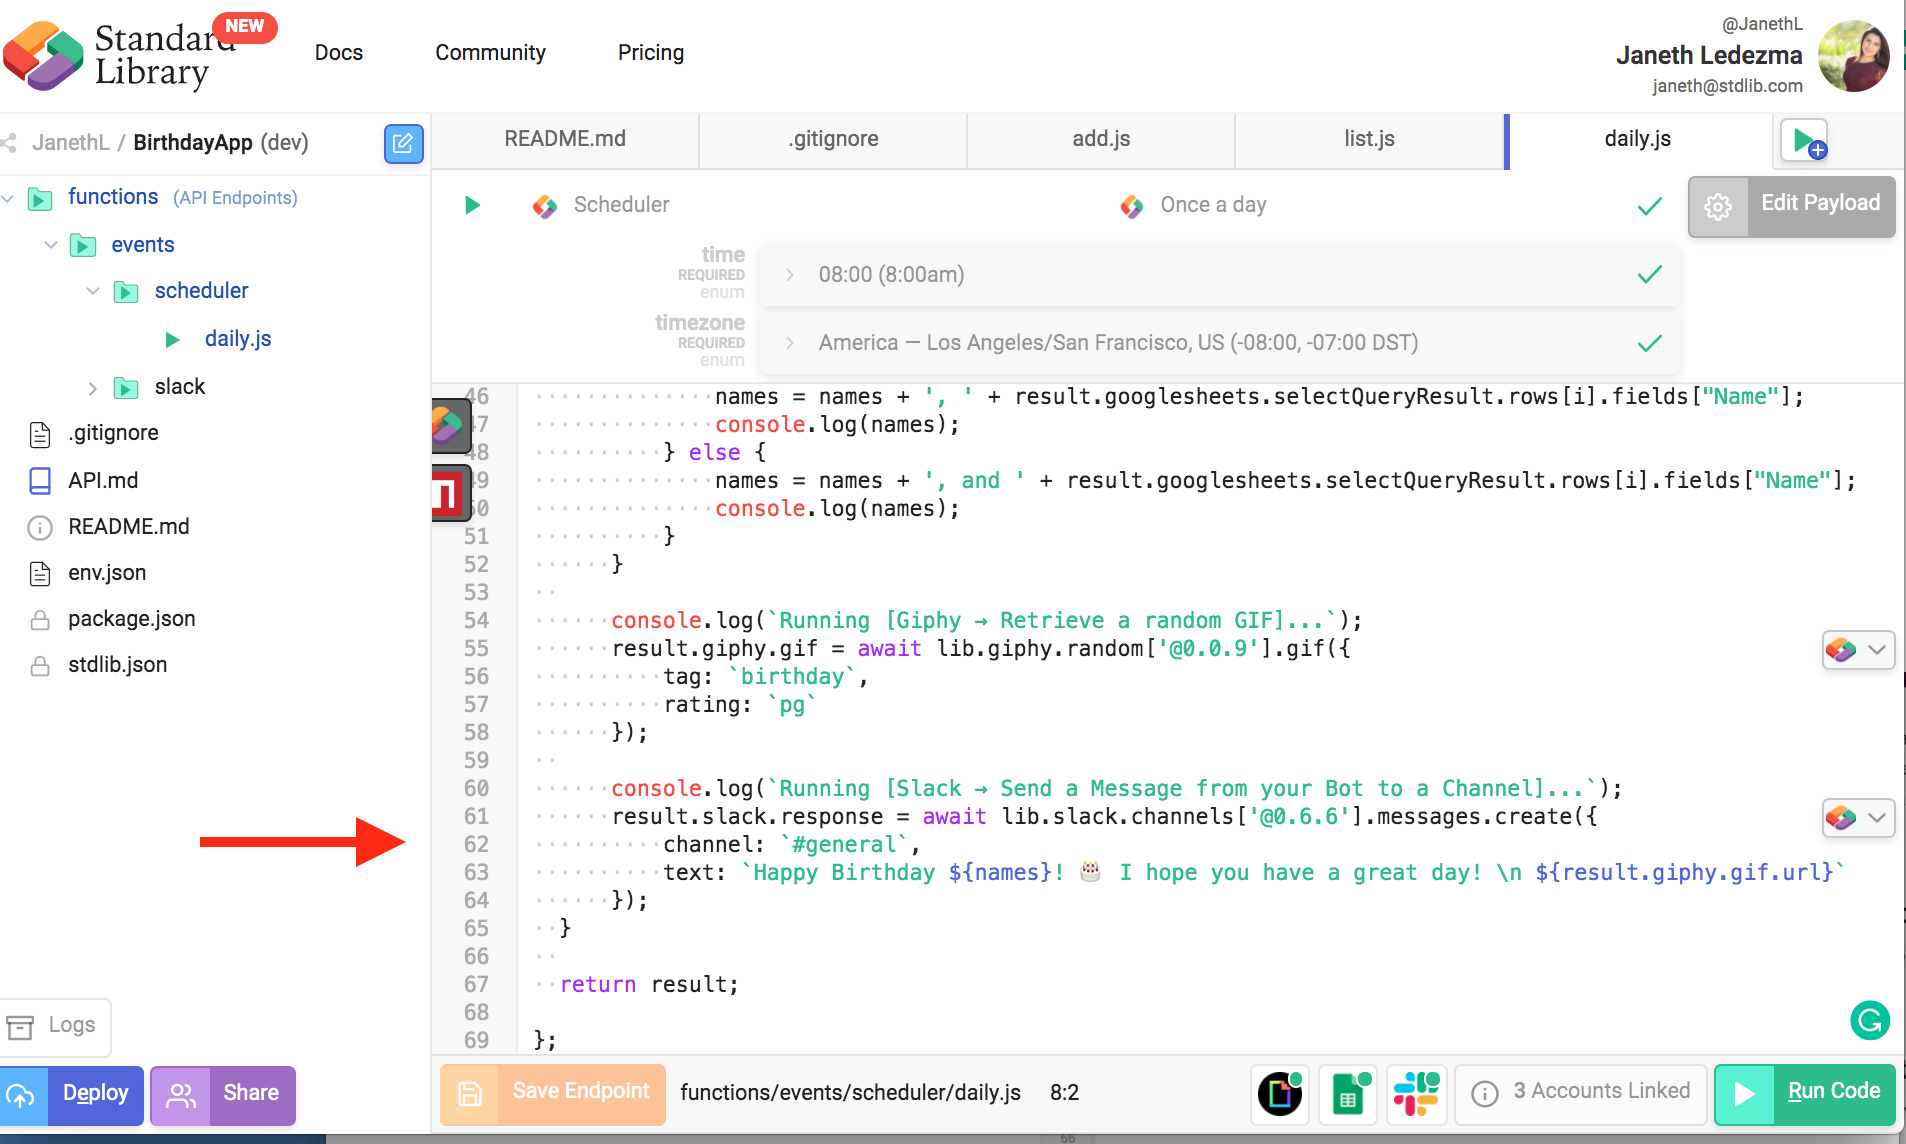
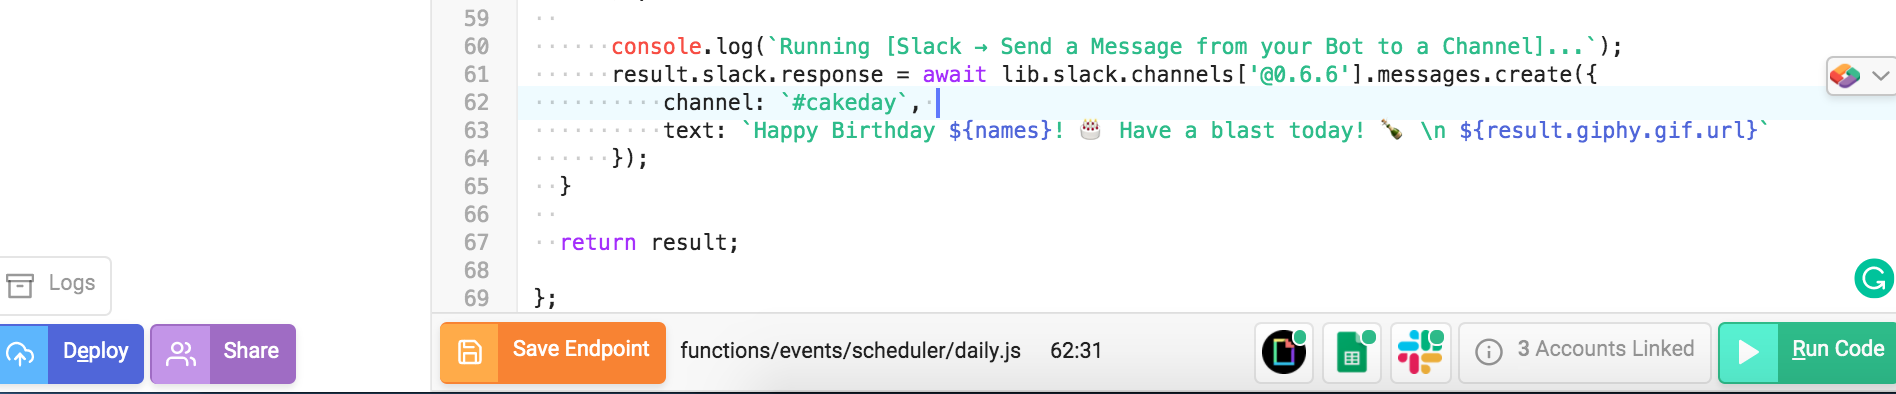
Find Line 62 to change the value of channel to the name of any channel in your workspace. Include a # before the name.
Find Line 63 to delete and add your own custom message inside the text key. The variable ${names} is passing in names found in your spreadsheet if they match the given conditions. And the variable ${result.giphy.gif.url} is passing in the URL retrieved from the function on line 54 which makes an API call to lib.giphy.random[@0.0.9]

You can test run your changes at any time by selecting the Run Code button.

After you finish making your desired changes make sure to Save Endpoint and press Deploy for your changes to take effect.
Changing the Time Interval
To change the time interval navigate through functions/events/scheduler folder and open daily.js file.
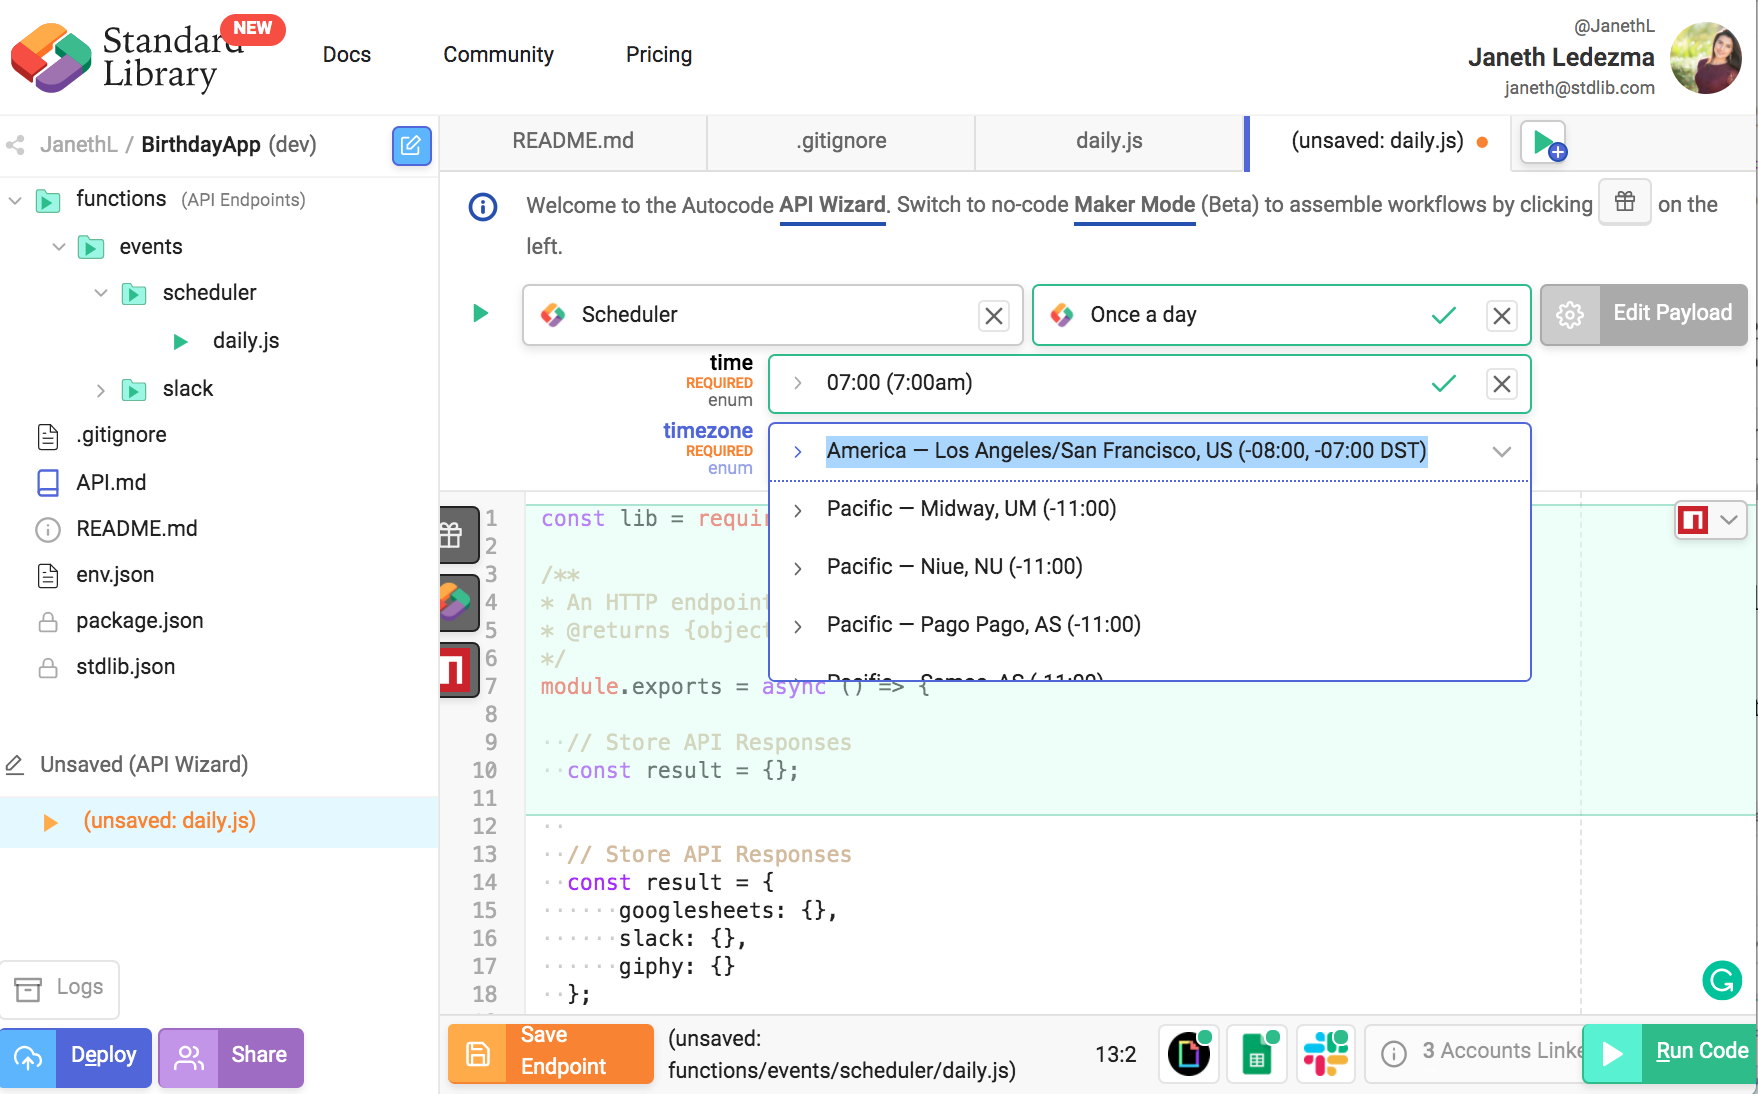
You will notice that the code is programmed to run at 8:00 am America — Los Angeles time. To change the time your Slack app posts birthday messages right click on the daily.js file and select Clone API Endpoint.


Use the API Wizard to select Scheduler as your event source and then select the frequency you’d like to have your Slack app post inside a channel. Select the time and timezone and make sure to hit the Save Endpoint button.

- Delete the extra const result = {}; statement on line 10.
- Delete the extra return result; statement on line 70
- Select Save Endpoint
Autocode automatically saves your new endpoint file as daily0.js inside /scheduler folder. Delete your first file if you don’t want your app to run at both intervals and rename the new file to daily.js by selecting Rename API Endpoint.


Make sure to deploy your app again for the changes to take effect by selecting Deploy in the bottom-left of the file manager.

Support
- Via Slack: libdev.slack.com
- You can request an invitation by clicking Community > Slack in the top bar on https://stdlib.com.
- Via Twitter: @StandardLibrary
- Via E-mail: support@stdlib.com
.png)
