
If you have a landing page or website created in Webflow, chances are you added some sort of contact form to reach interested users or prospects. Nothing gives your site more validation than people leaving their contact information, so you'll probably want to use that to make the most out of your site's traffic.
In this short article we'll show you how to send automated emails when someone submits a Webflow form using Palabra.
But why send just one email? We'll show you how to set up an entire automated sequence to welcome and engage your prospects using a no-code tool in just 5 minutes.
Note: Pretty obvious, but you need to have an existing Webflow site including a form to use this guide. You can learn how to do that here.
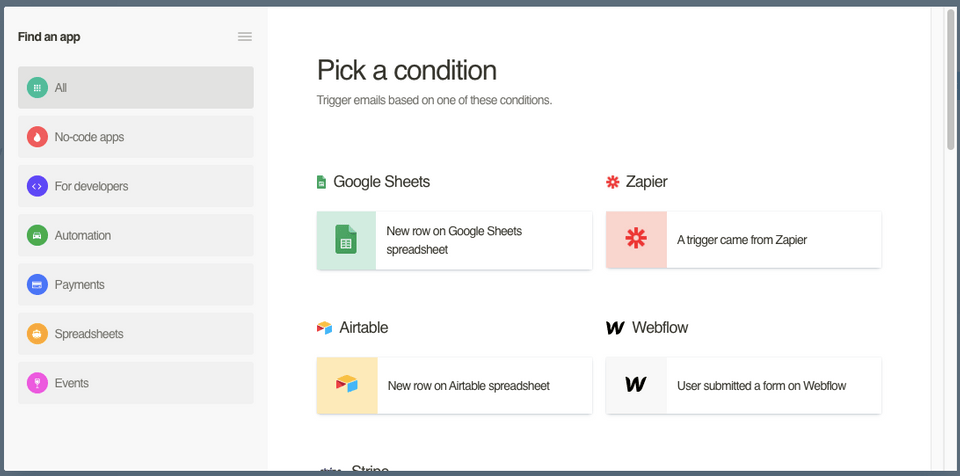
Step 1: Create an email trigger from a Webflow form
To start, create a trigger and add a condition. Select "User submitted a form on Webflow" to set up the integration.
Step 2: Connect your Webflow site to Palabra
After you select the trigger, click on the card and give Palabra access to your Webflow website. Then pick from the list the website where you have the form you want to connect:
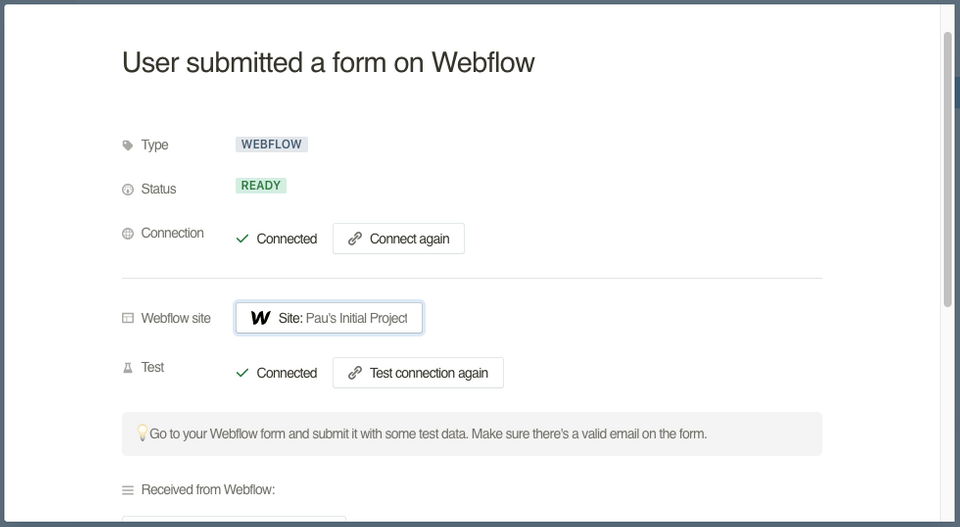
You'll need your Webflow form to include an email input to trigger the sequence. If you don't have one, just add it to your Webflow site and then select "Test connection again".
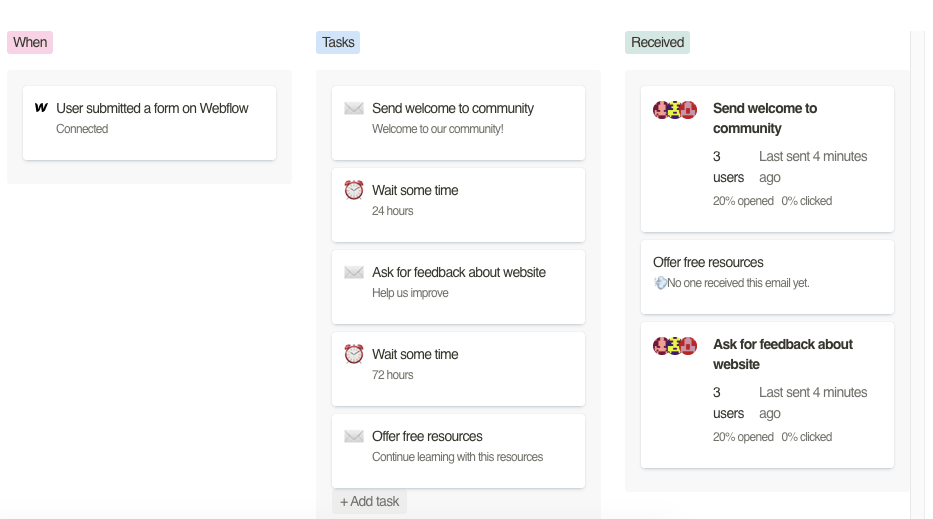
Step 3: Select your email sequence
In the "Tasks" column, you can add an email from the template list, or add a specific action, like wait some time.
Here you can select different actions and set up a whole sequence. For this example I created a simple welcoming sequence for a Webflow landing page to a community:

In this example I would be welcoming prospects to my community, sending them some resources the next day, and then waiting a few days to ask for feedback.
You can easily edit any template by clicking on each card. It will save automatically.
Step 4: Start sending automated emails
This step is really really short. Once you are ready, just click "Start actions" and wait for Palabra to do the work for you.
And that's it. You already automated a welcoming sequence. Congratulations.
Pro tip: Try out different sequences
Once you get your sequence going, you will find a third column with your sequence's performance. You'll get a full list of contacts that received each email, and stats to know who opened them and who clicked on your call to action:
Try out changing your templates or the order in which emails get sent to see if your open ratio improves.
Hope you enjoyed this tutorial! If you are curious about what else you can do with Palabra or would just like to try it go ahead an create an account here.
.png)
