Tutorial submitted by MemberSpace. In this tutorial you’ll learn how to create a private podcast for your membership or company.
Contents
- Why Create a Private Podcast?
- How Does a Private Podcast Work?
- Getting Started with Your Private Podcast
- How to Create a Private Podcast Page on Your Website
- How to Create a Private Podcast Feed for Mobile
Why Create a Private Podcast?
A podcast is a great way to share your message, build an audience and grow your business. So why would anyone want to create a private podcast? There are a few scenarios where creating a private podcast makes sense:
- You run a membership site and want to create a private podcast with special content exclusively for your members.
- You have a podcast and want to create a private advertising-free version of the podcast for your paying subscribers.
- You want to improve internal communication in your company and use a private podcast to share company-wide messages or audio training.
How Does a Private Podcast Work?
There are two ways you can set up a private podcast. You can:
- Create a private podcast page on your website for members only
- Create a private podcast feed for mobile podcast player apps
In this tutorial, we’re going to show how you can easily set up both of these.
Getting Started with Your Private Podcast
Firstly, you’ll need to create a new podcast with your podcast hosting service. We’re fans of Transistor, which we use for our Member Maker podcast, so that’s what we’ve used for this tutorial. However, you could use another podcast hosting service to set up a private podcast page if they have that functionality.
You can create a new podcast in Transistor in two ways. Let’s look at each of these options and help you choose the right one for you:
OPTION 1: CREATING A ‘STANDARD’ PODCAST IN TRANSISTOR
Choose this option if: you just want a private podcast page on your website.
Step 1: Create a New Podcast
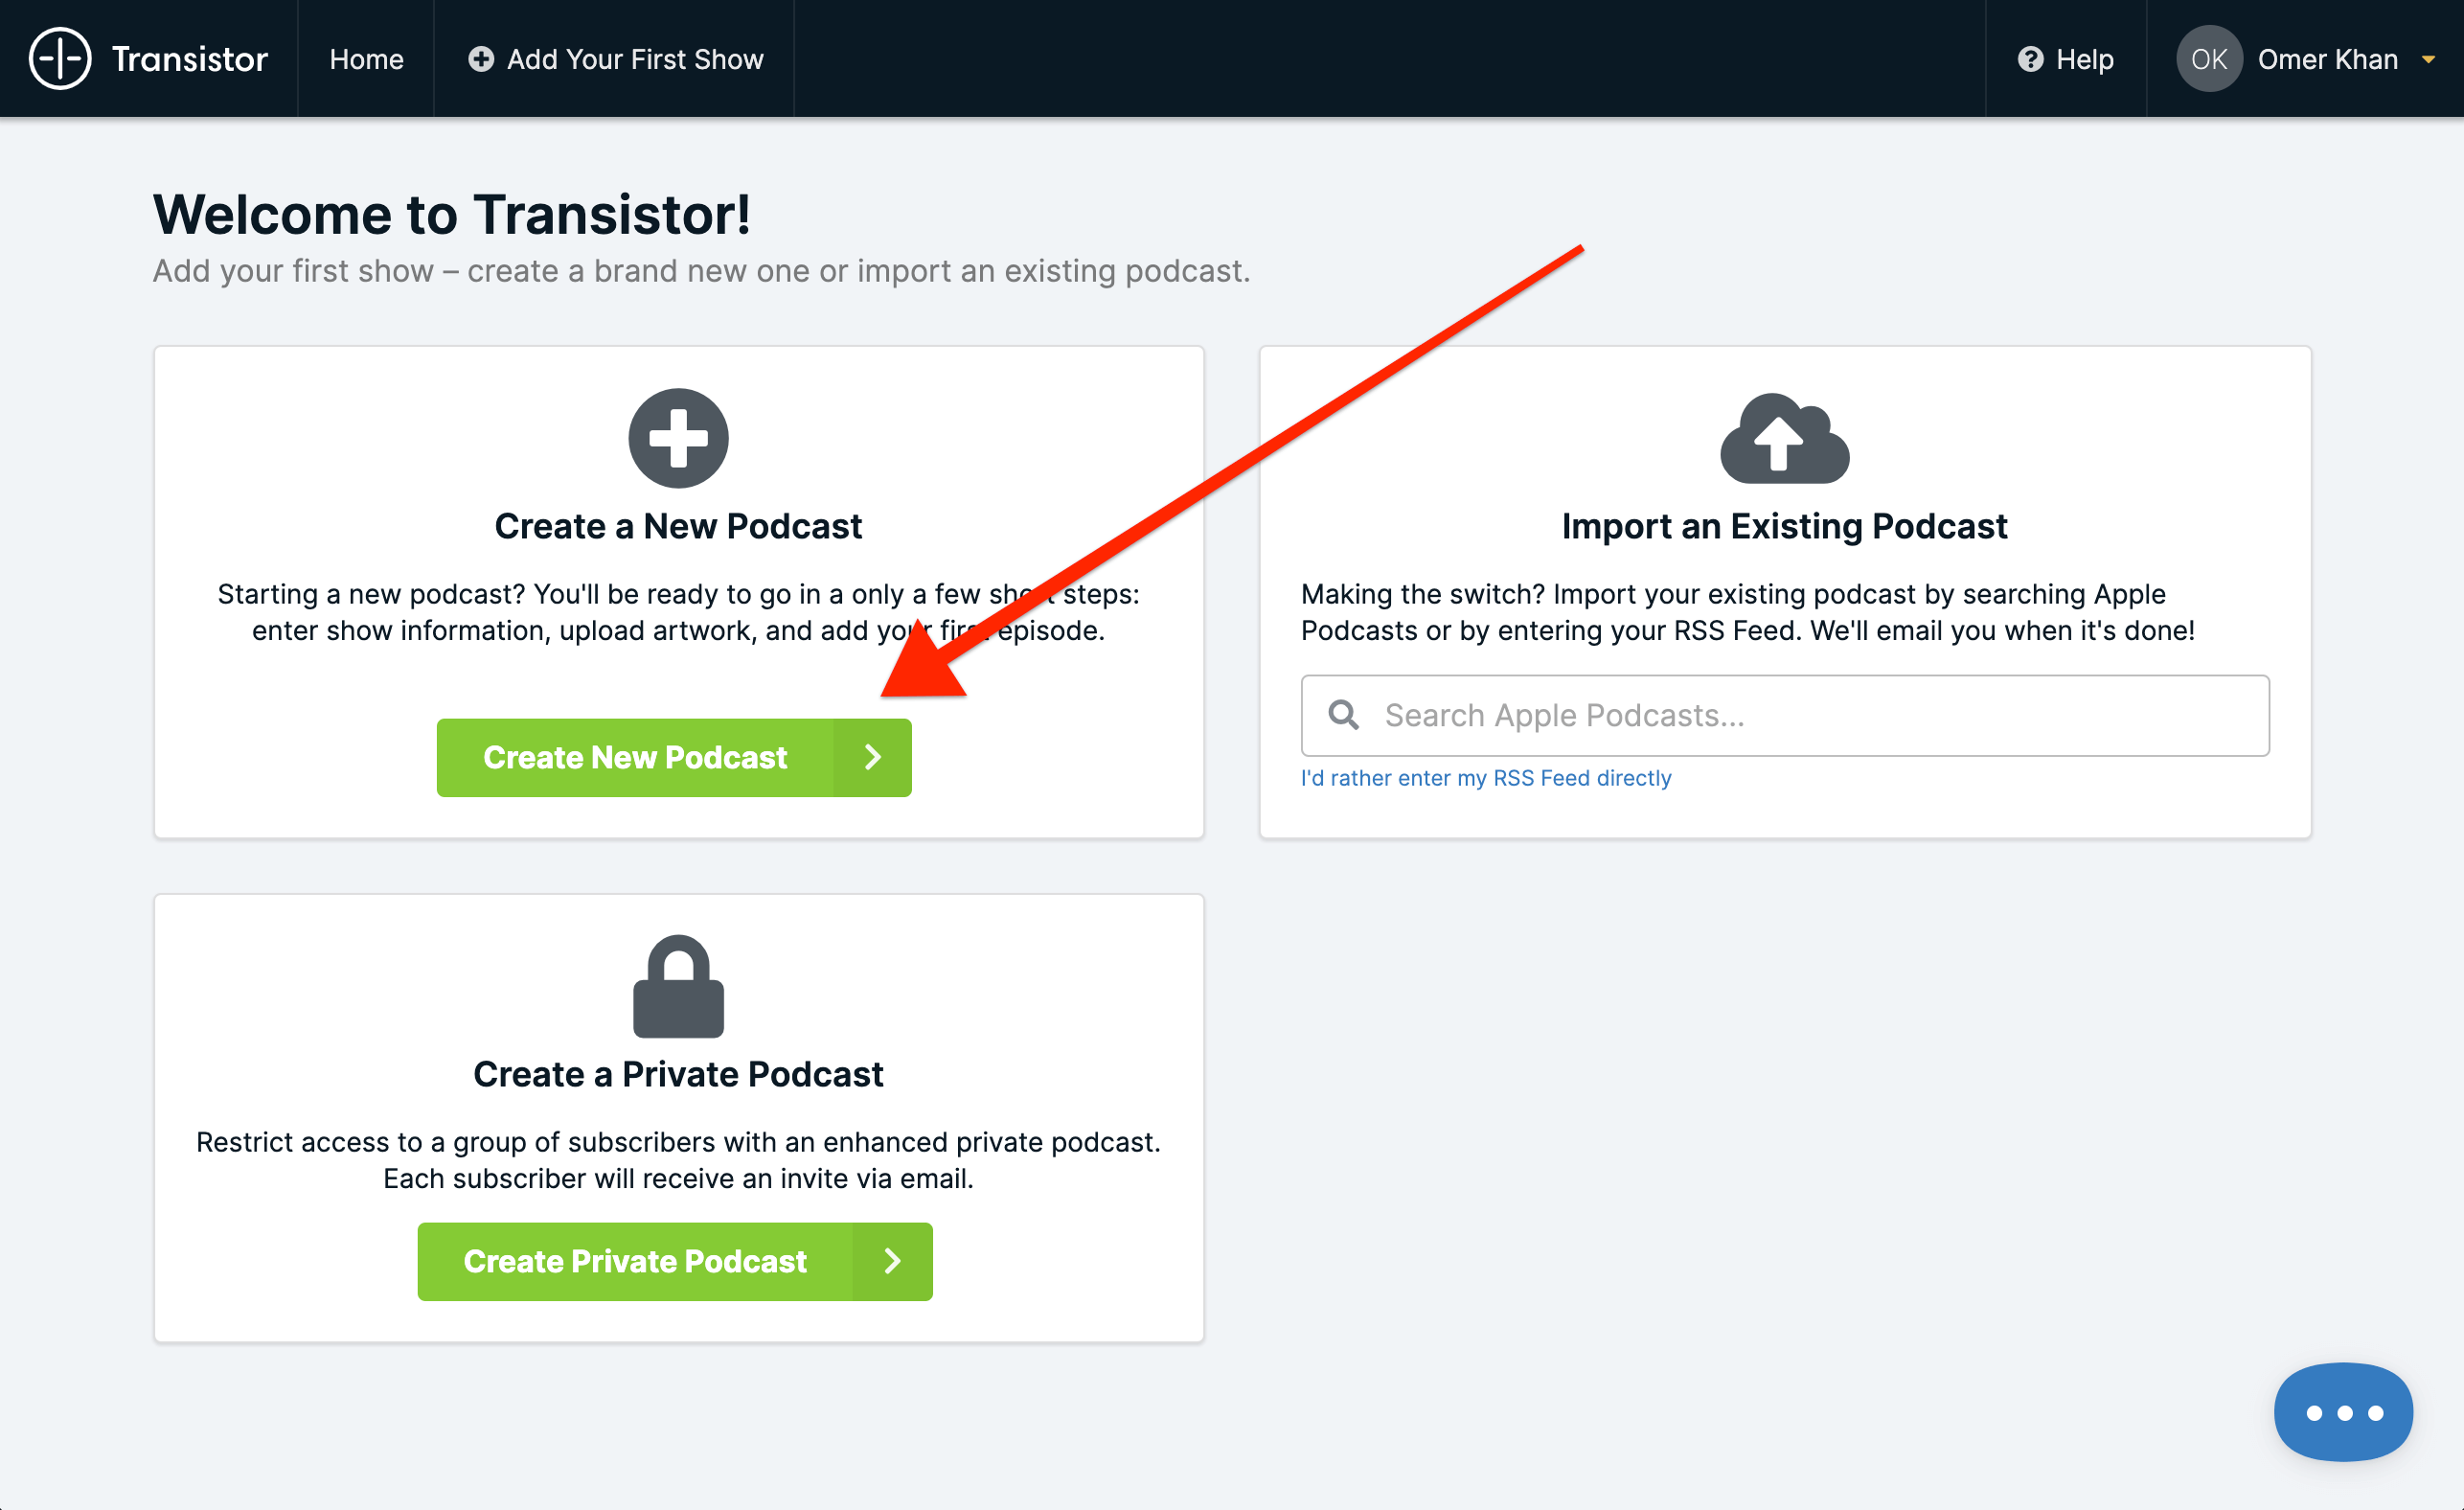
From the Transistor dashboard, click the “Create a New Podcast” button.
Step 2: Add Basic Info About Your Podcast
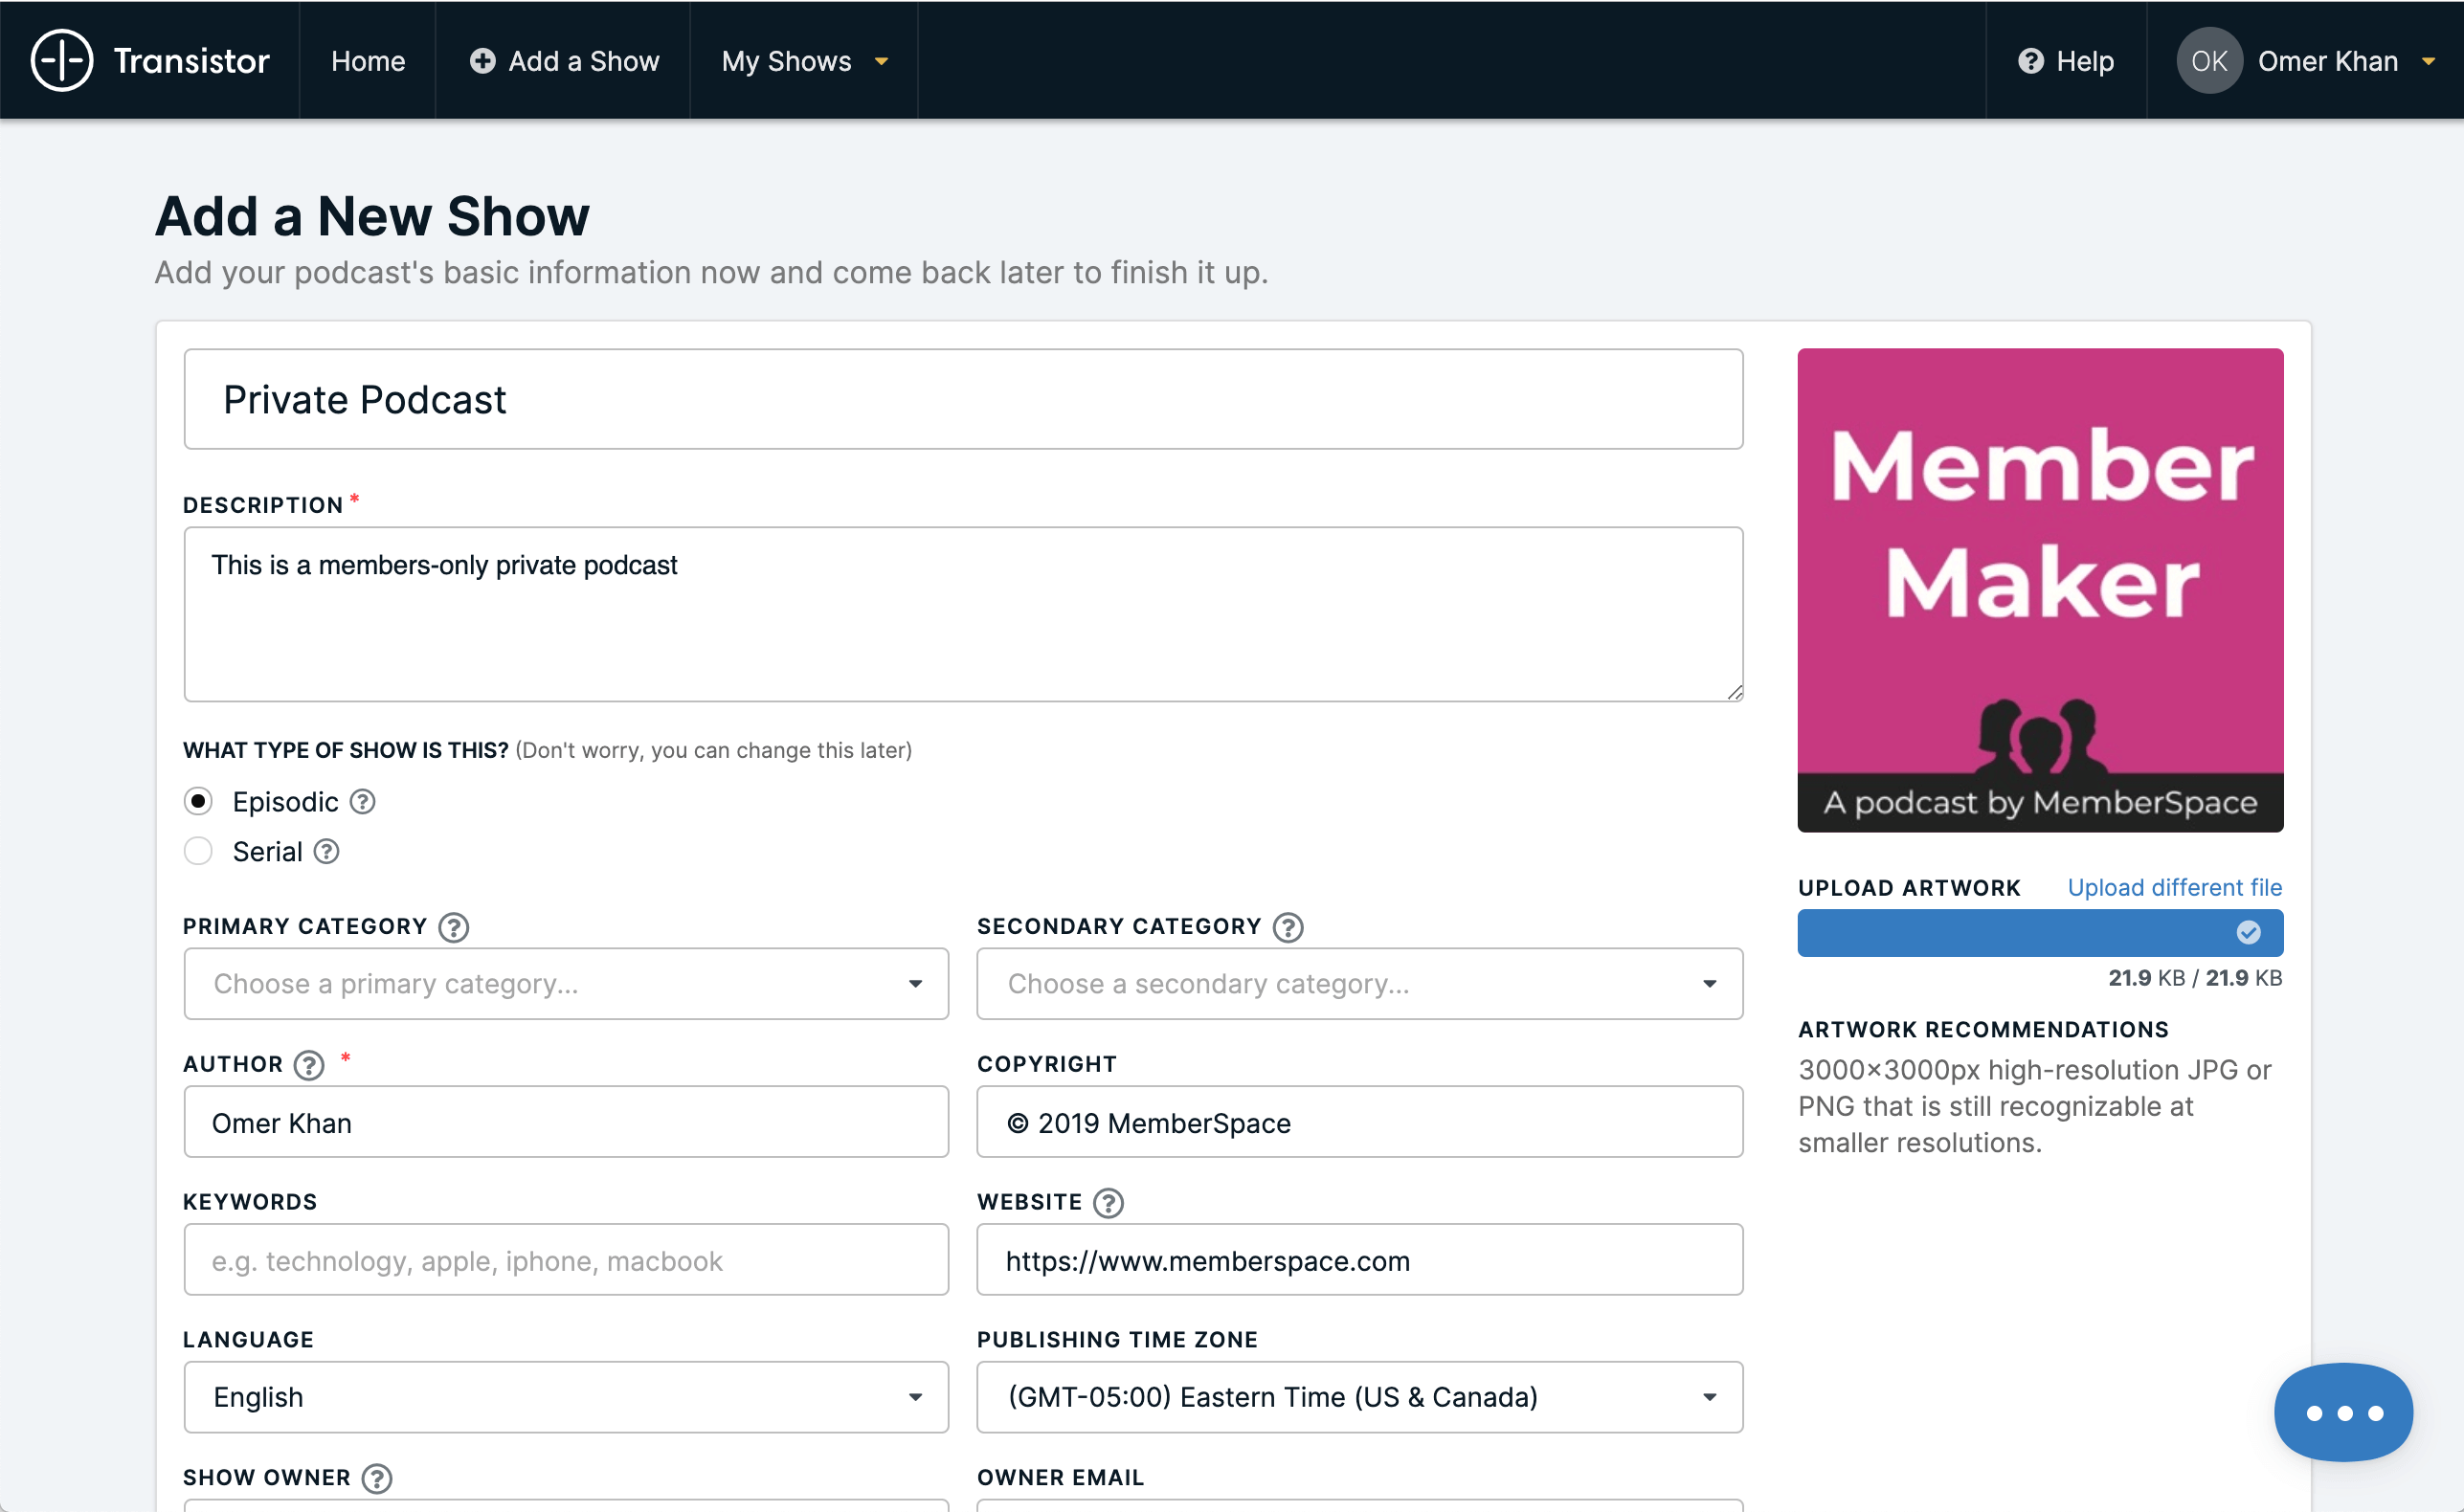
On the “Add a New Show” page, add your podcast’s basic information. Since your private podcast won’t get published to services like iTunes, you can skip some of the fields e.g. primary category, secondary category, keywords etc.
Step 3: Upload Your First Episode
Record, edit and upload your first episode. And add basic information about your episode e.g. title, description, publishing date etc.

OPTION 2: CREATING A 'PRIVATE' PODCAST IN TRANSISTOR
Choose this option if: you also want a private podcast feed for mobile devices.
Important: for this option you’ll need to upgrade your Transistor account to the “Professional” plan or higher.
Step 1: Create a New ‘Private’ Podcast
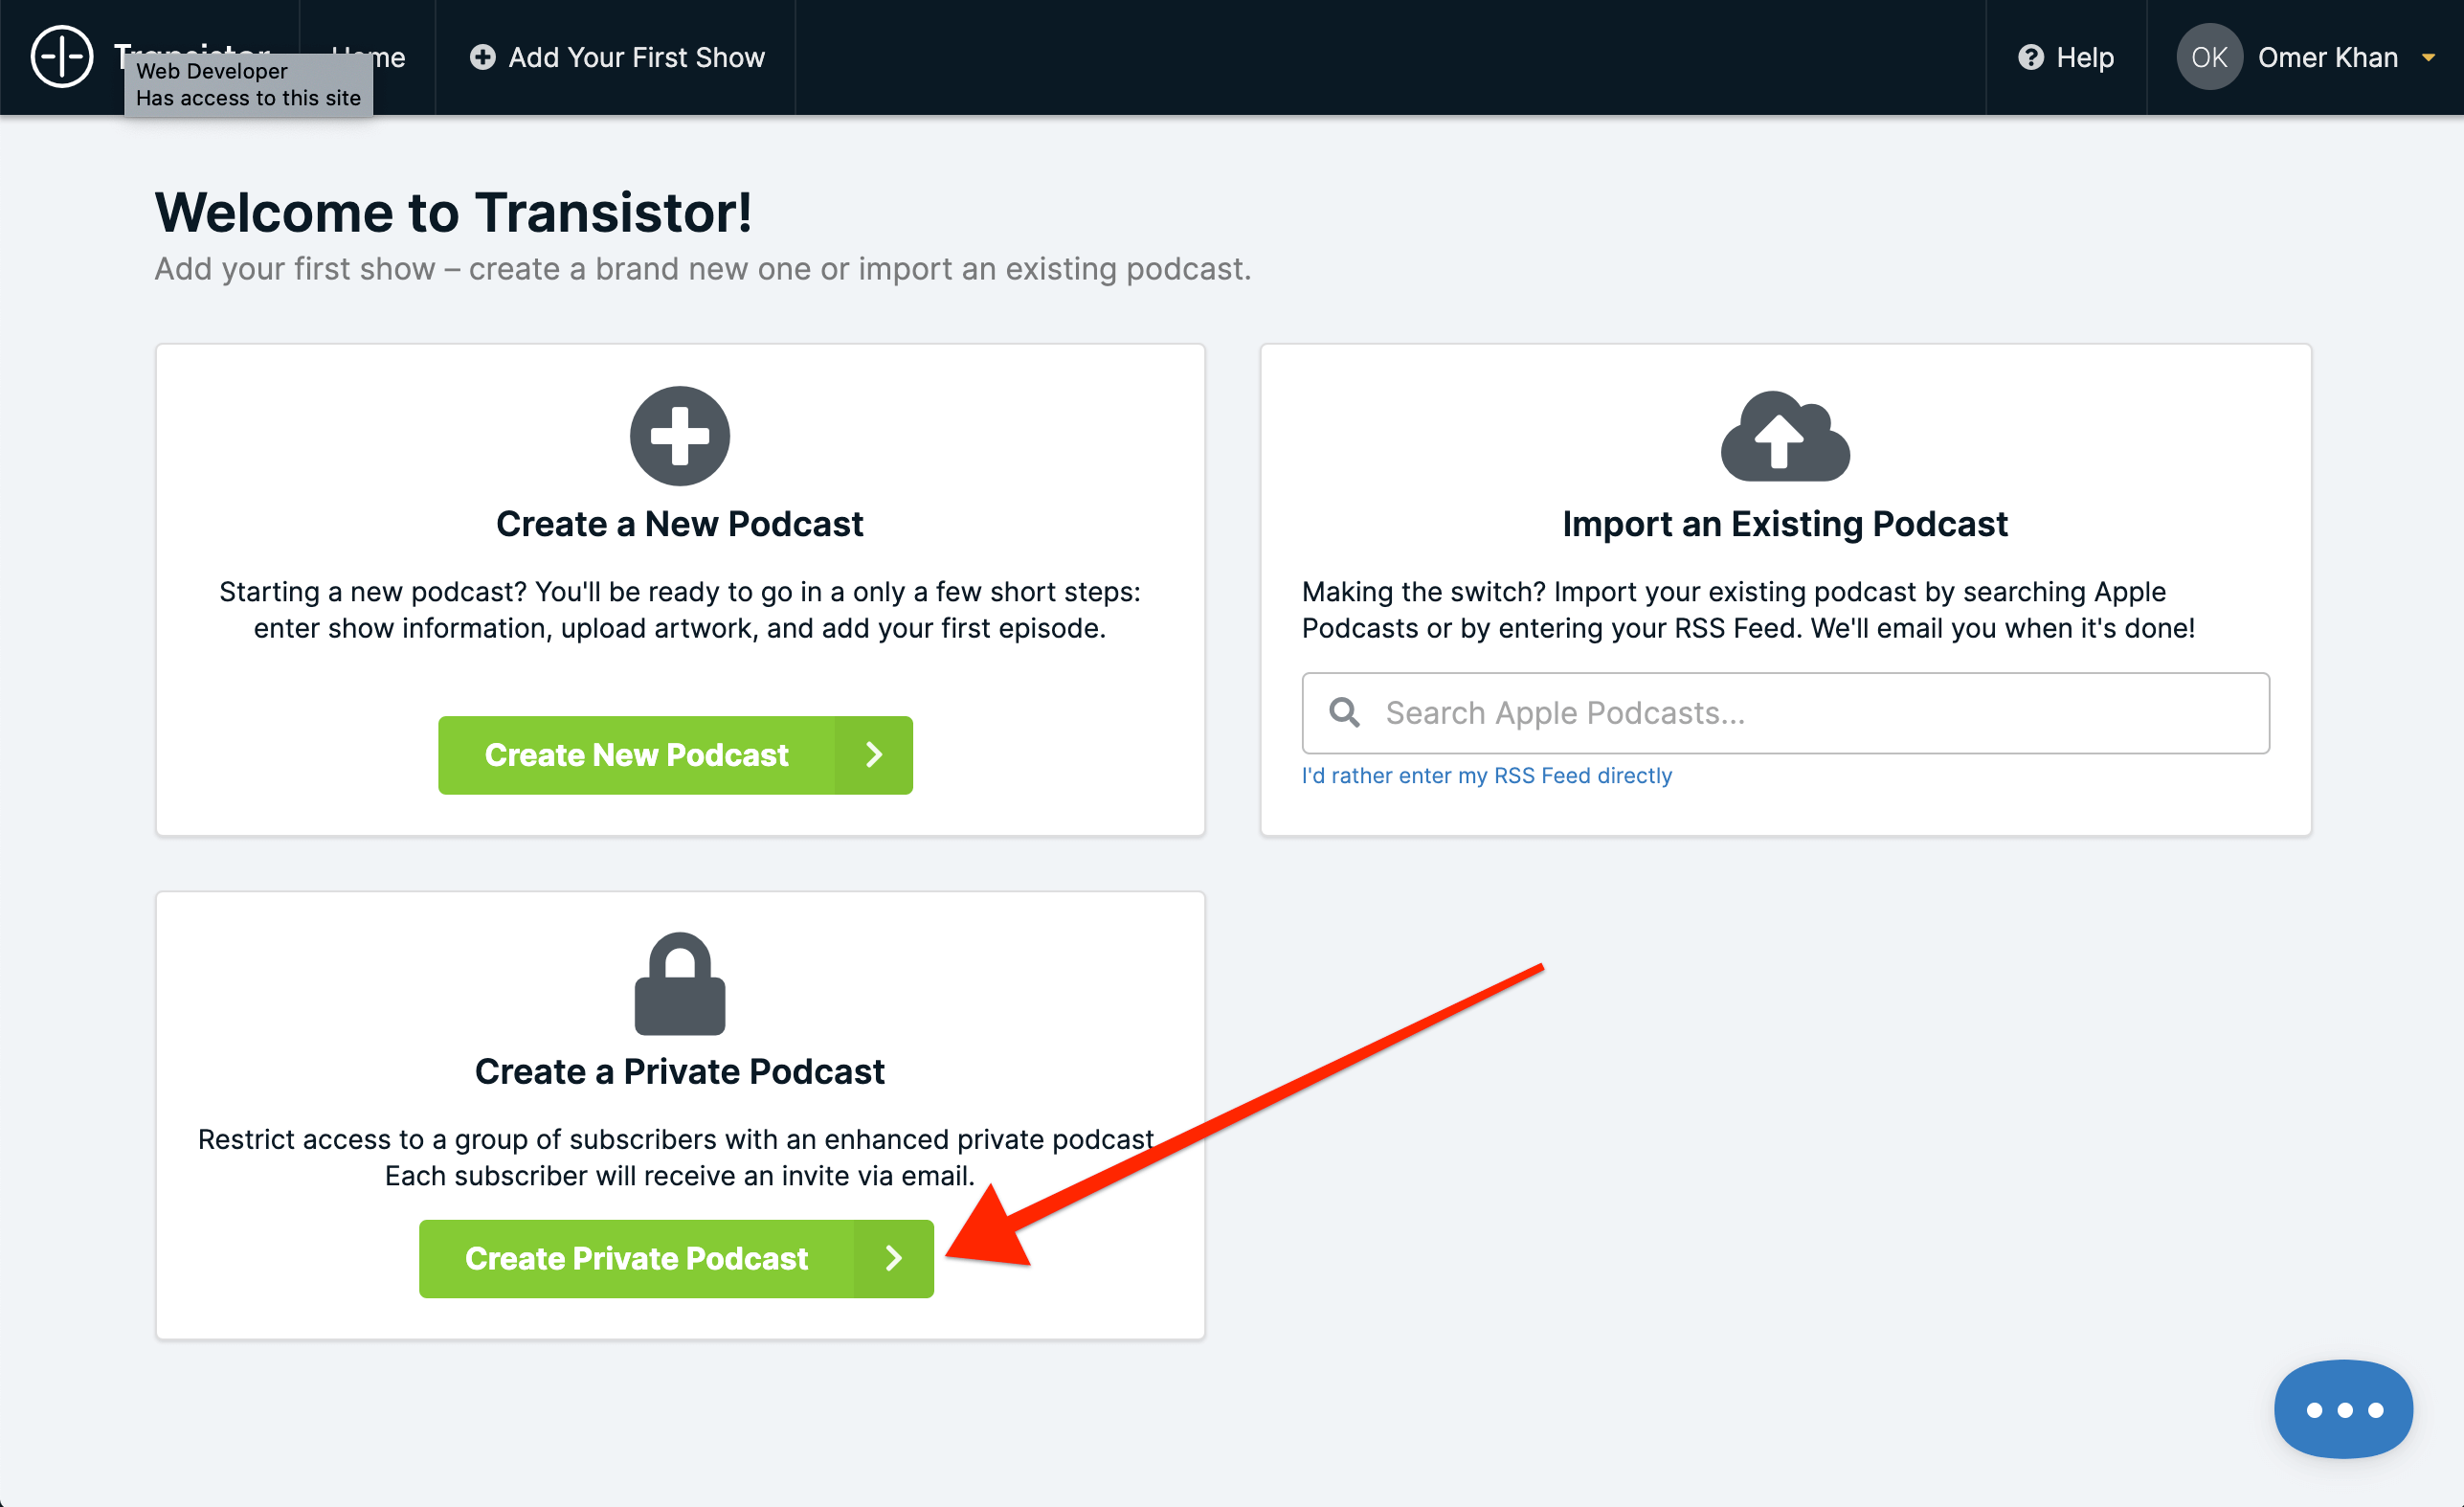
From the Transistor dashboard, click the “Create a New Private Podcast” button.
Step 2: Add Basic Info About Your Podcast
On the “Add a New Show” page, add your podcast’s basic information.

Step 3: Upload Your First Episode
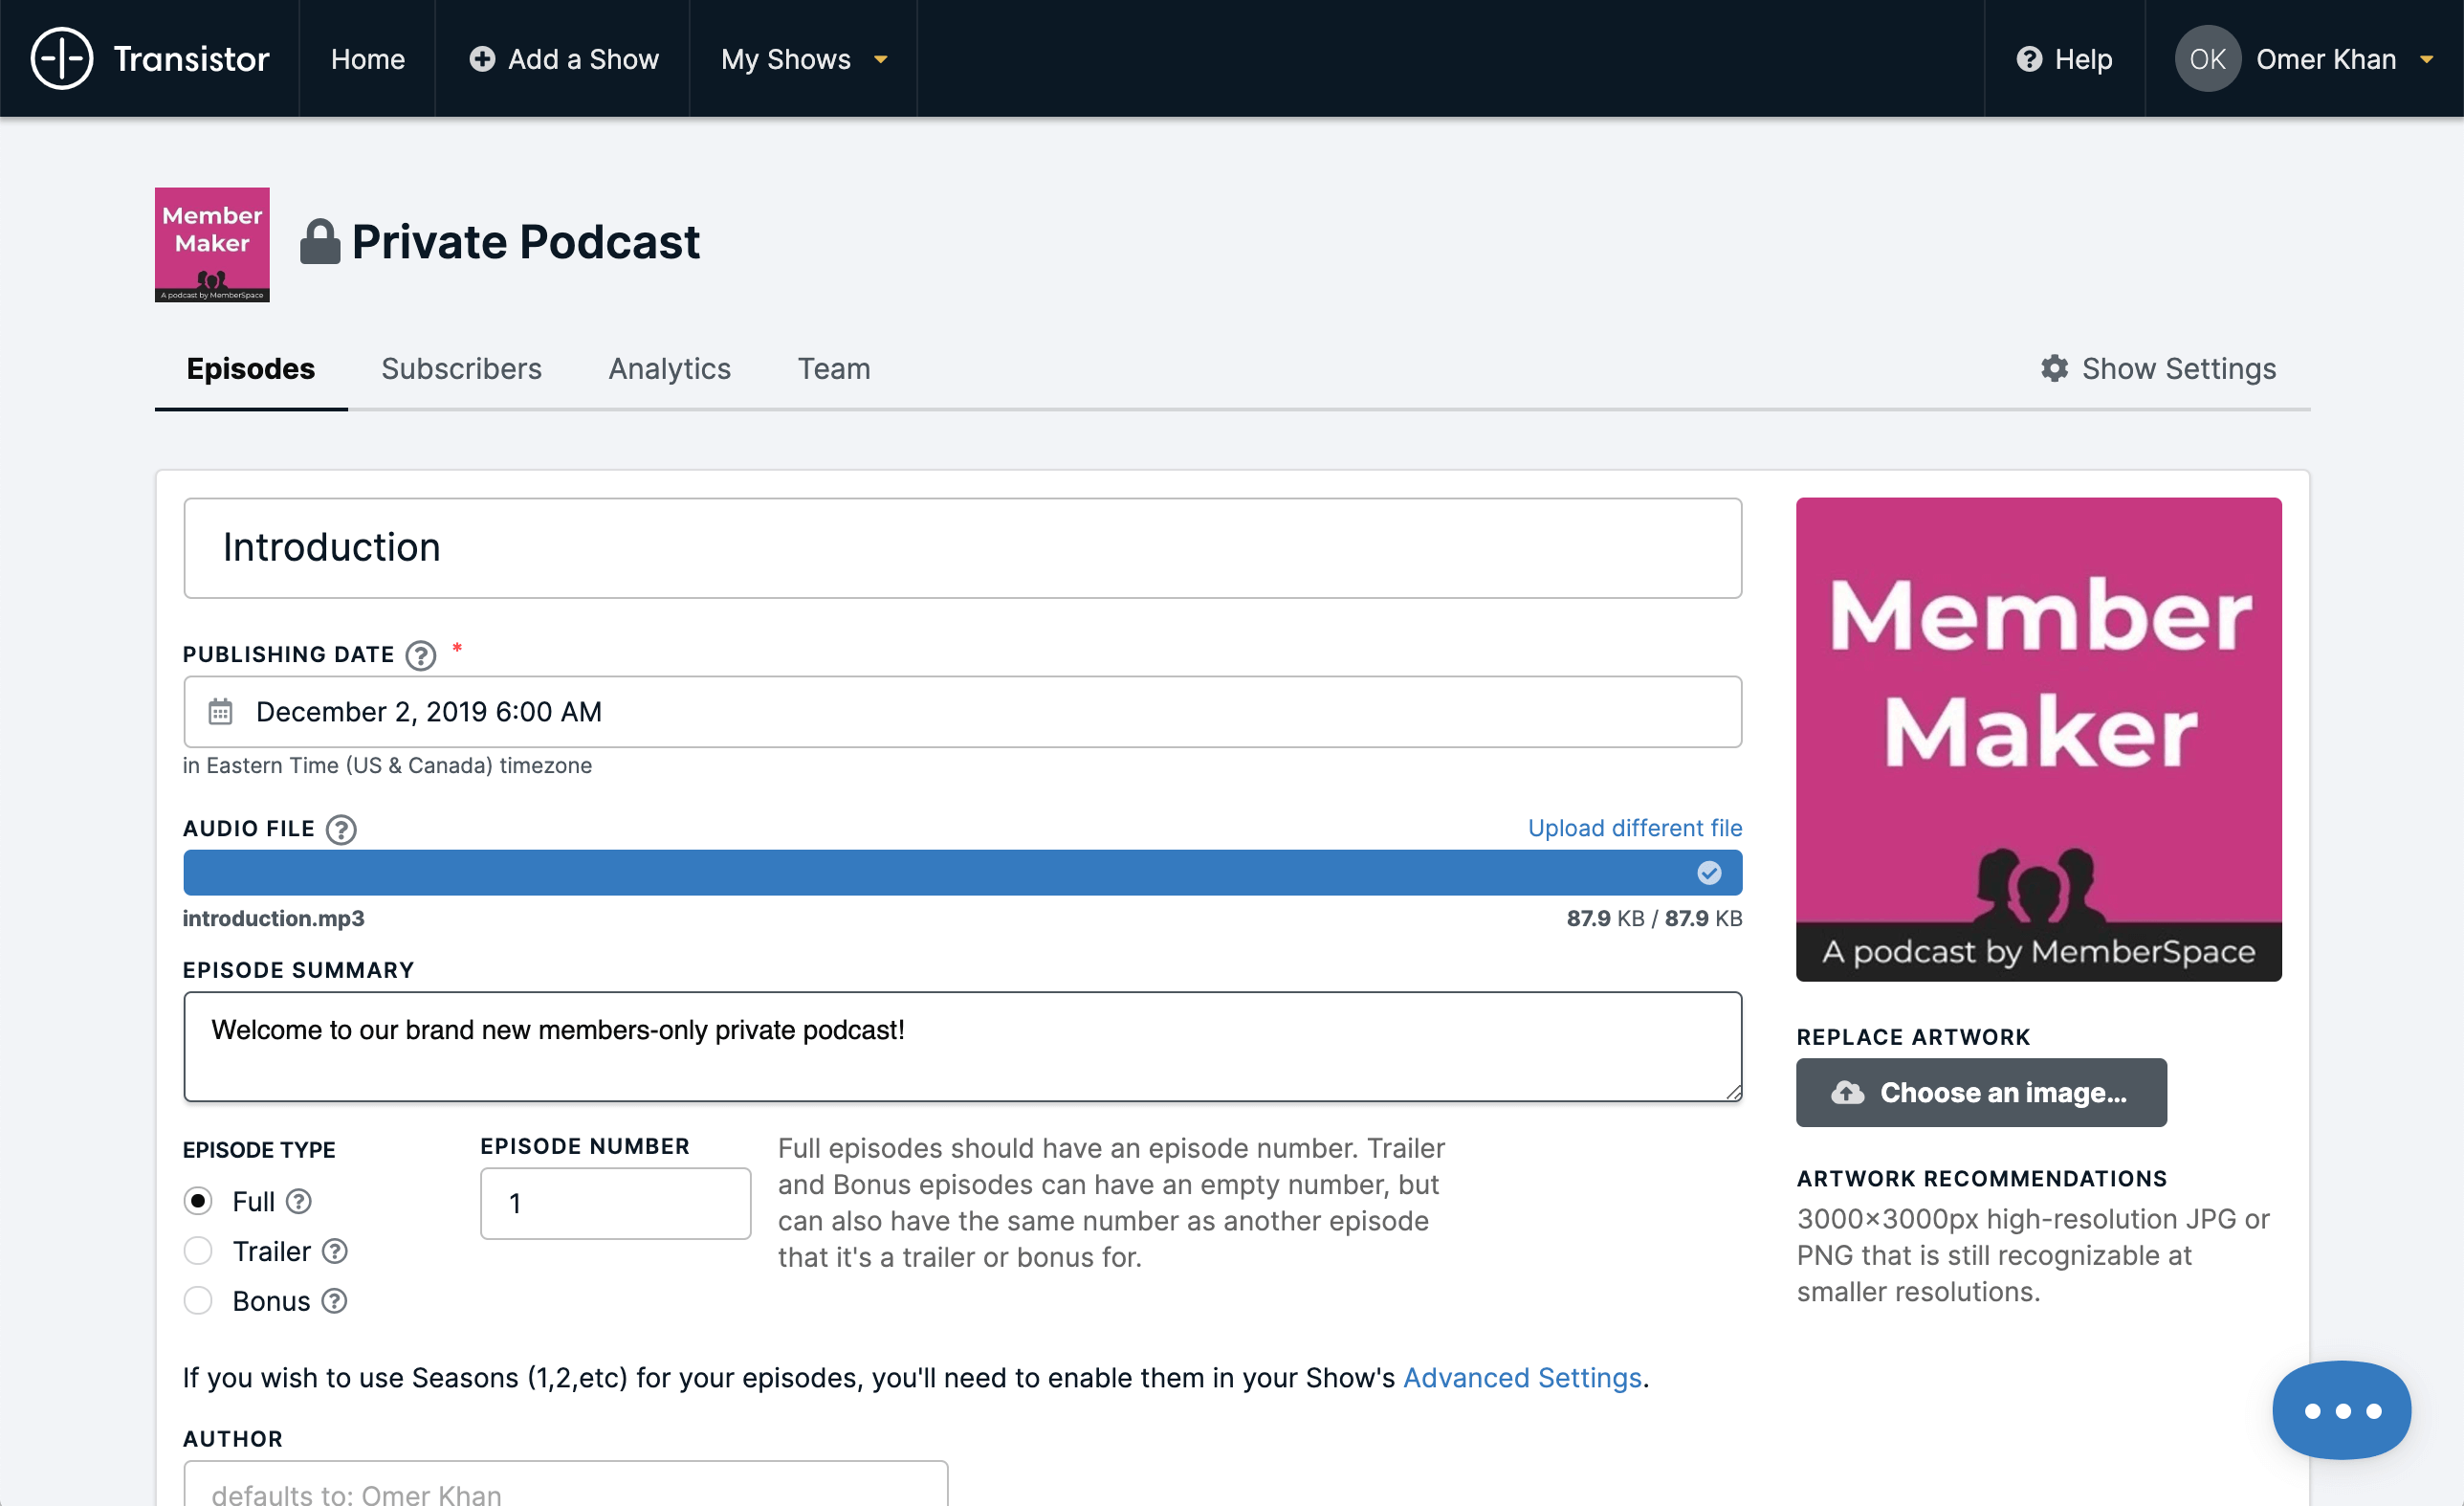
Record, edit and upload your first episode. And add basic information about your episode e.g. title, description, publishing date etc.
How to Create a Private Podcast Page on Your Website
Now that you’ve got your podcast setup with your hosting service, you’re ready to create a private podcast page on your website.
You’ll need a MemberSpace account to protect the private podcast page, manage who can access the page and charge for access (if access isn’t going to be free).
1. Create a new page on your website
Create a new page on your website for your private podcast. Add a headline and a brief description for the private podcast.
2. Embed your podcast on your new page
The next step is to embed your podcast on your web page. Just about every podcast host provides a way to embed each episode onto a web page.
All you have to do is find the episode in your podcast hosting service, copy the embed code and paste it into your web page like this:

Every time you publish a new episode, you just repeat this process and add the embed code for the new episode to your page. But this can get a little tedious.
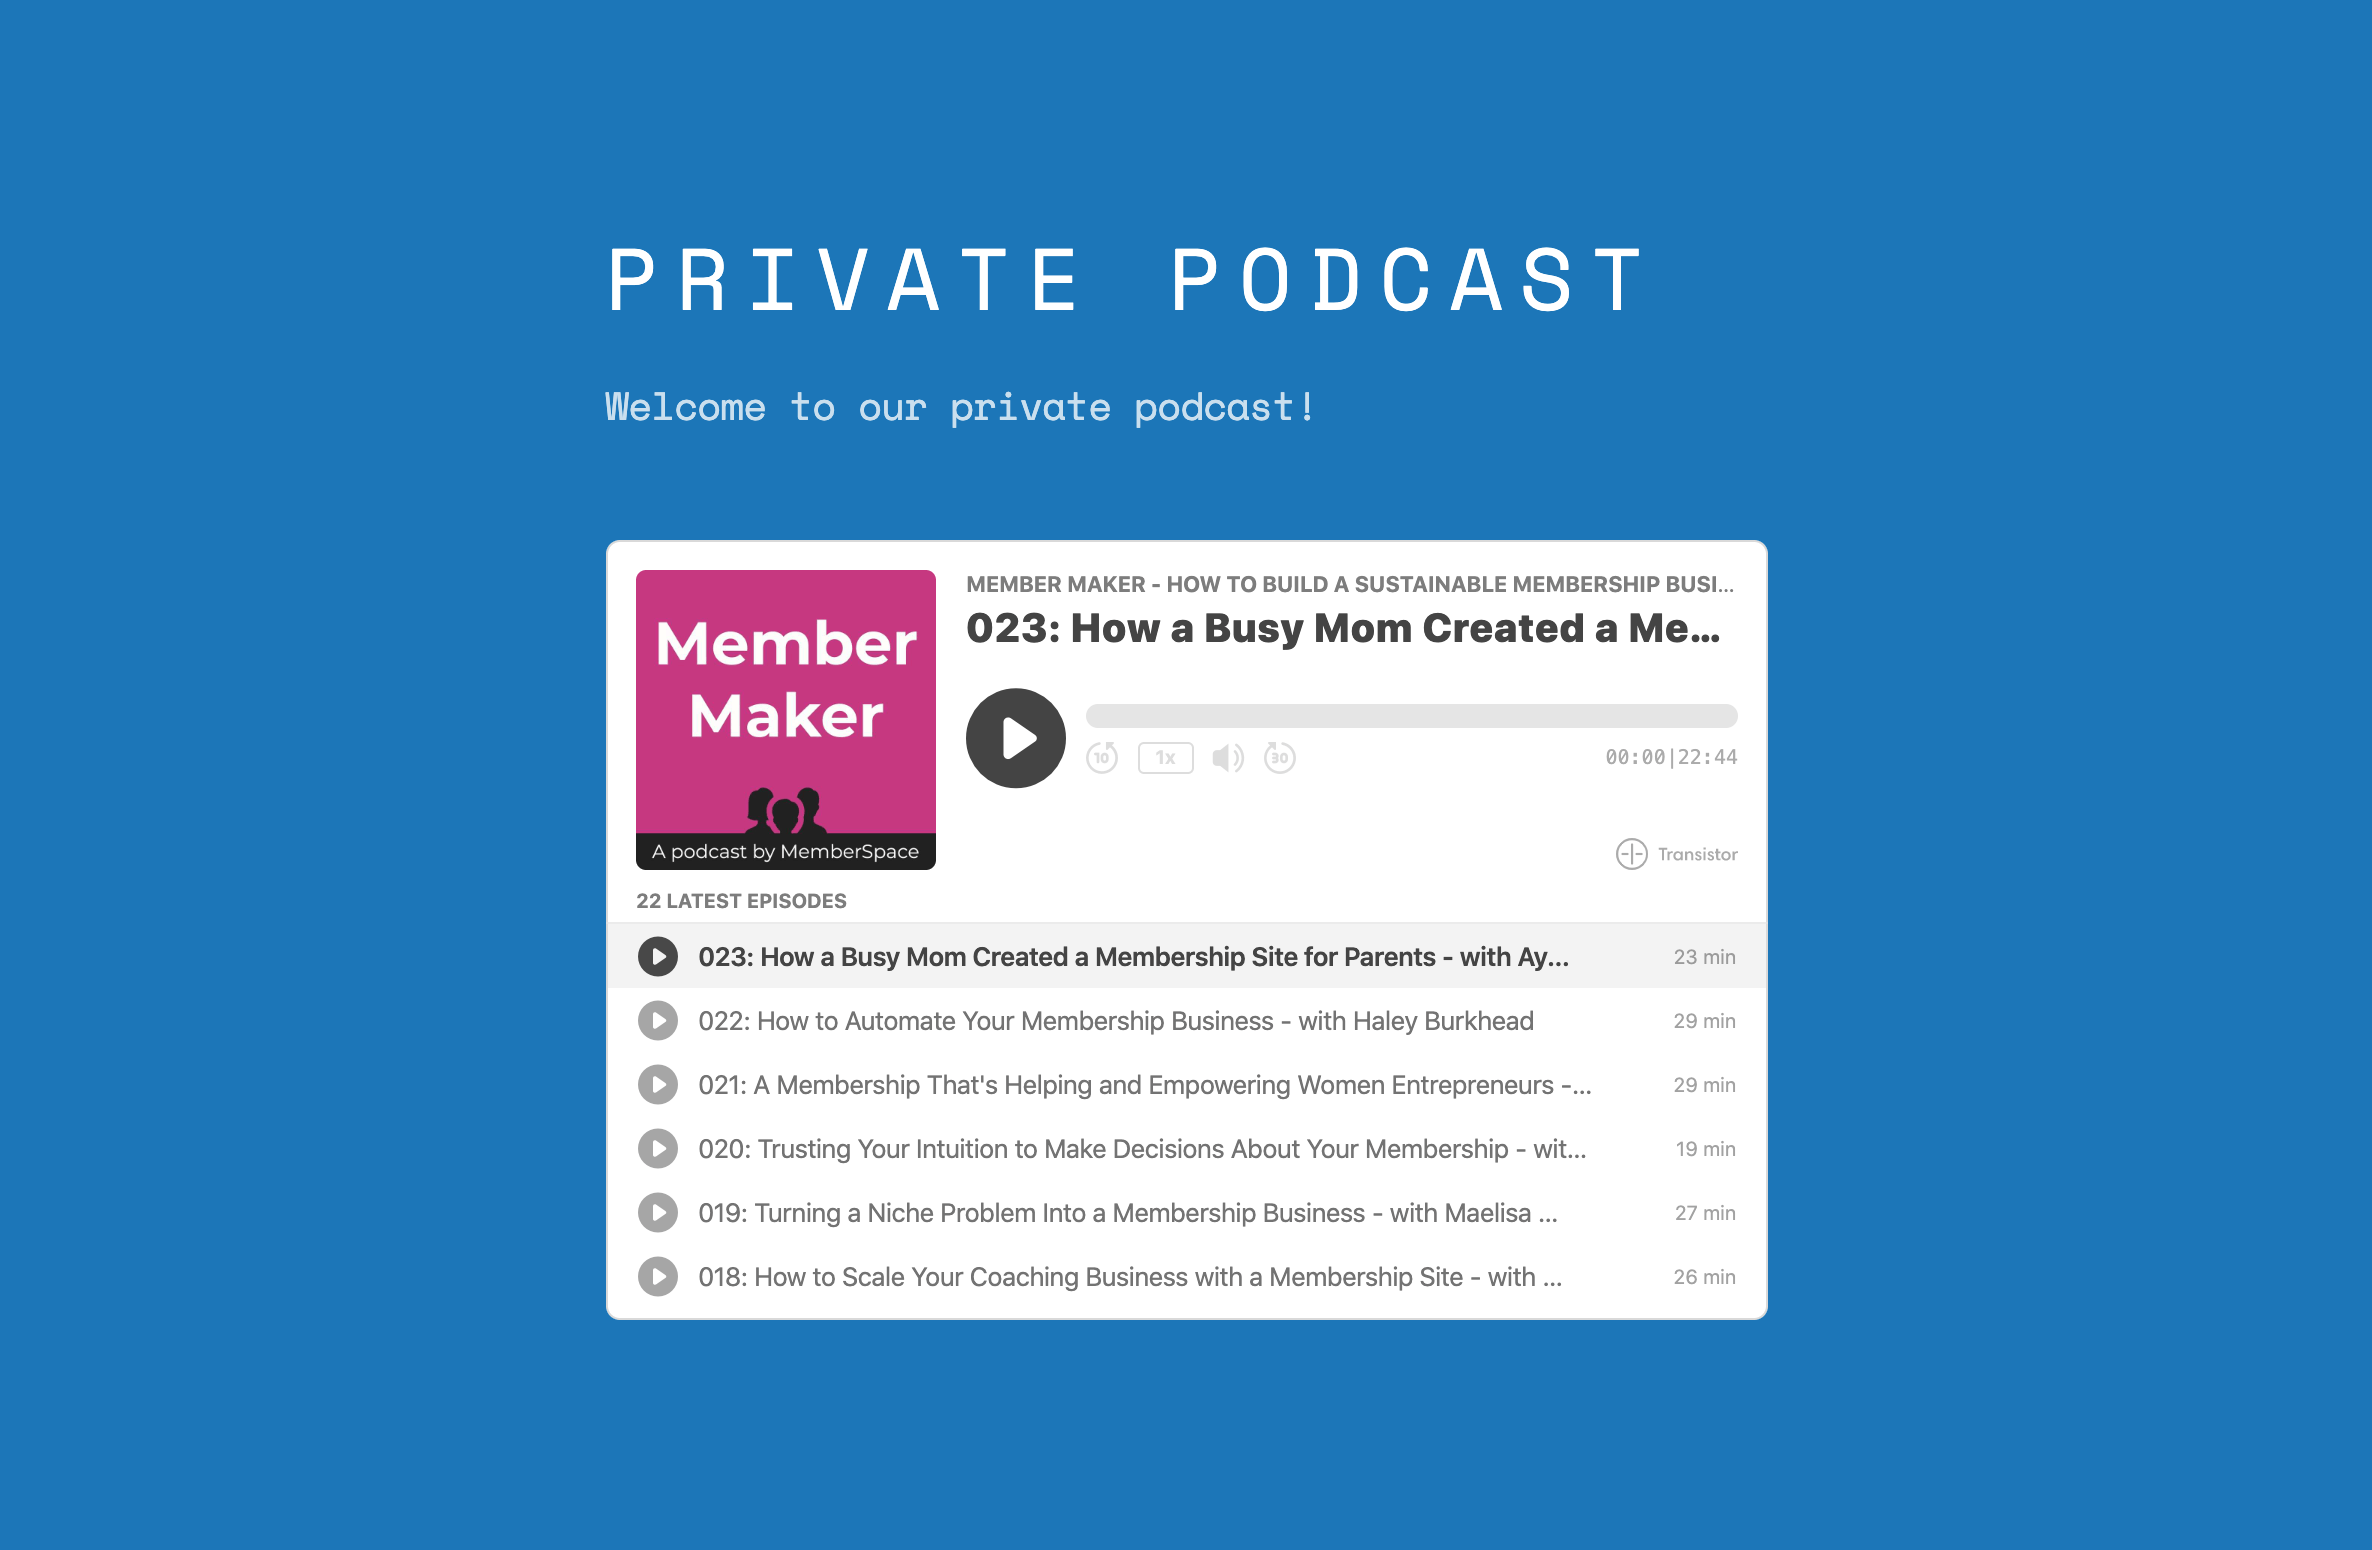
One feature we like in Transistor is that you can embed the entire podcast (instead of individual episodes) onto a web page. The benefit of this is that you don’t have to keep manually embedding new episodes every time to publish them. Instead, new episodes will automatically show up on your website when they’re published.
Here’s an example of how that looks:
3. Use MemberSpace to protect the page
Once your private podcast page is set up on your website, you need to protect it so only specific people can access it. That’s where MemberSpace comes in.
If you haven’t already set up your website to integrate with MemberSpace, you can find instructions on how to do that here or contact us and we’ll help you with the setup.
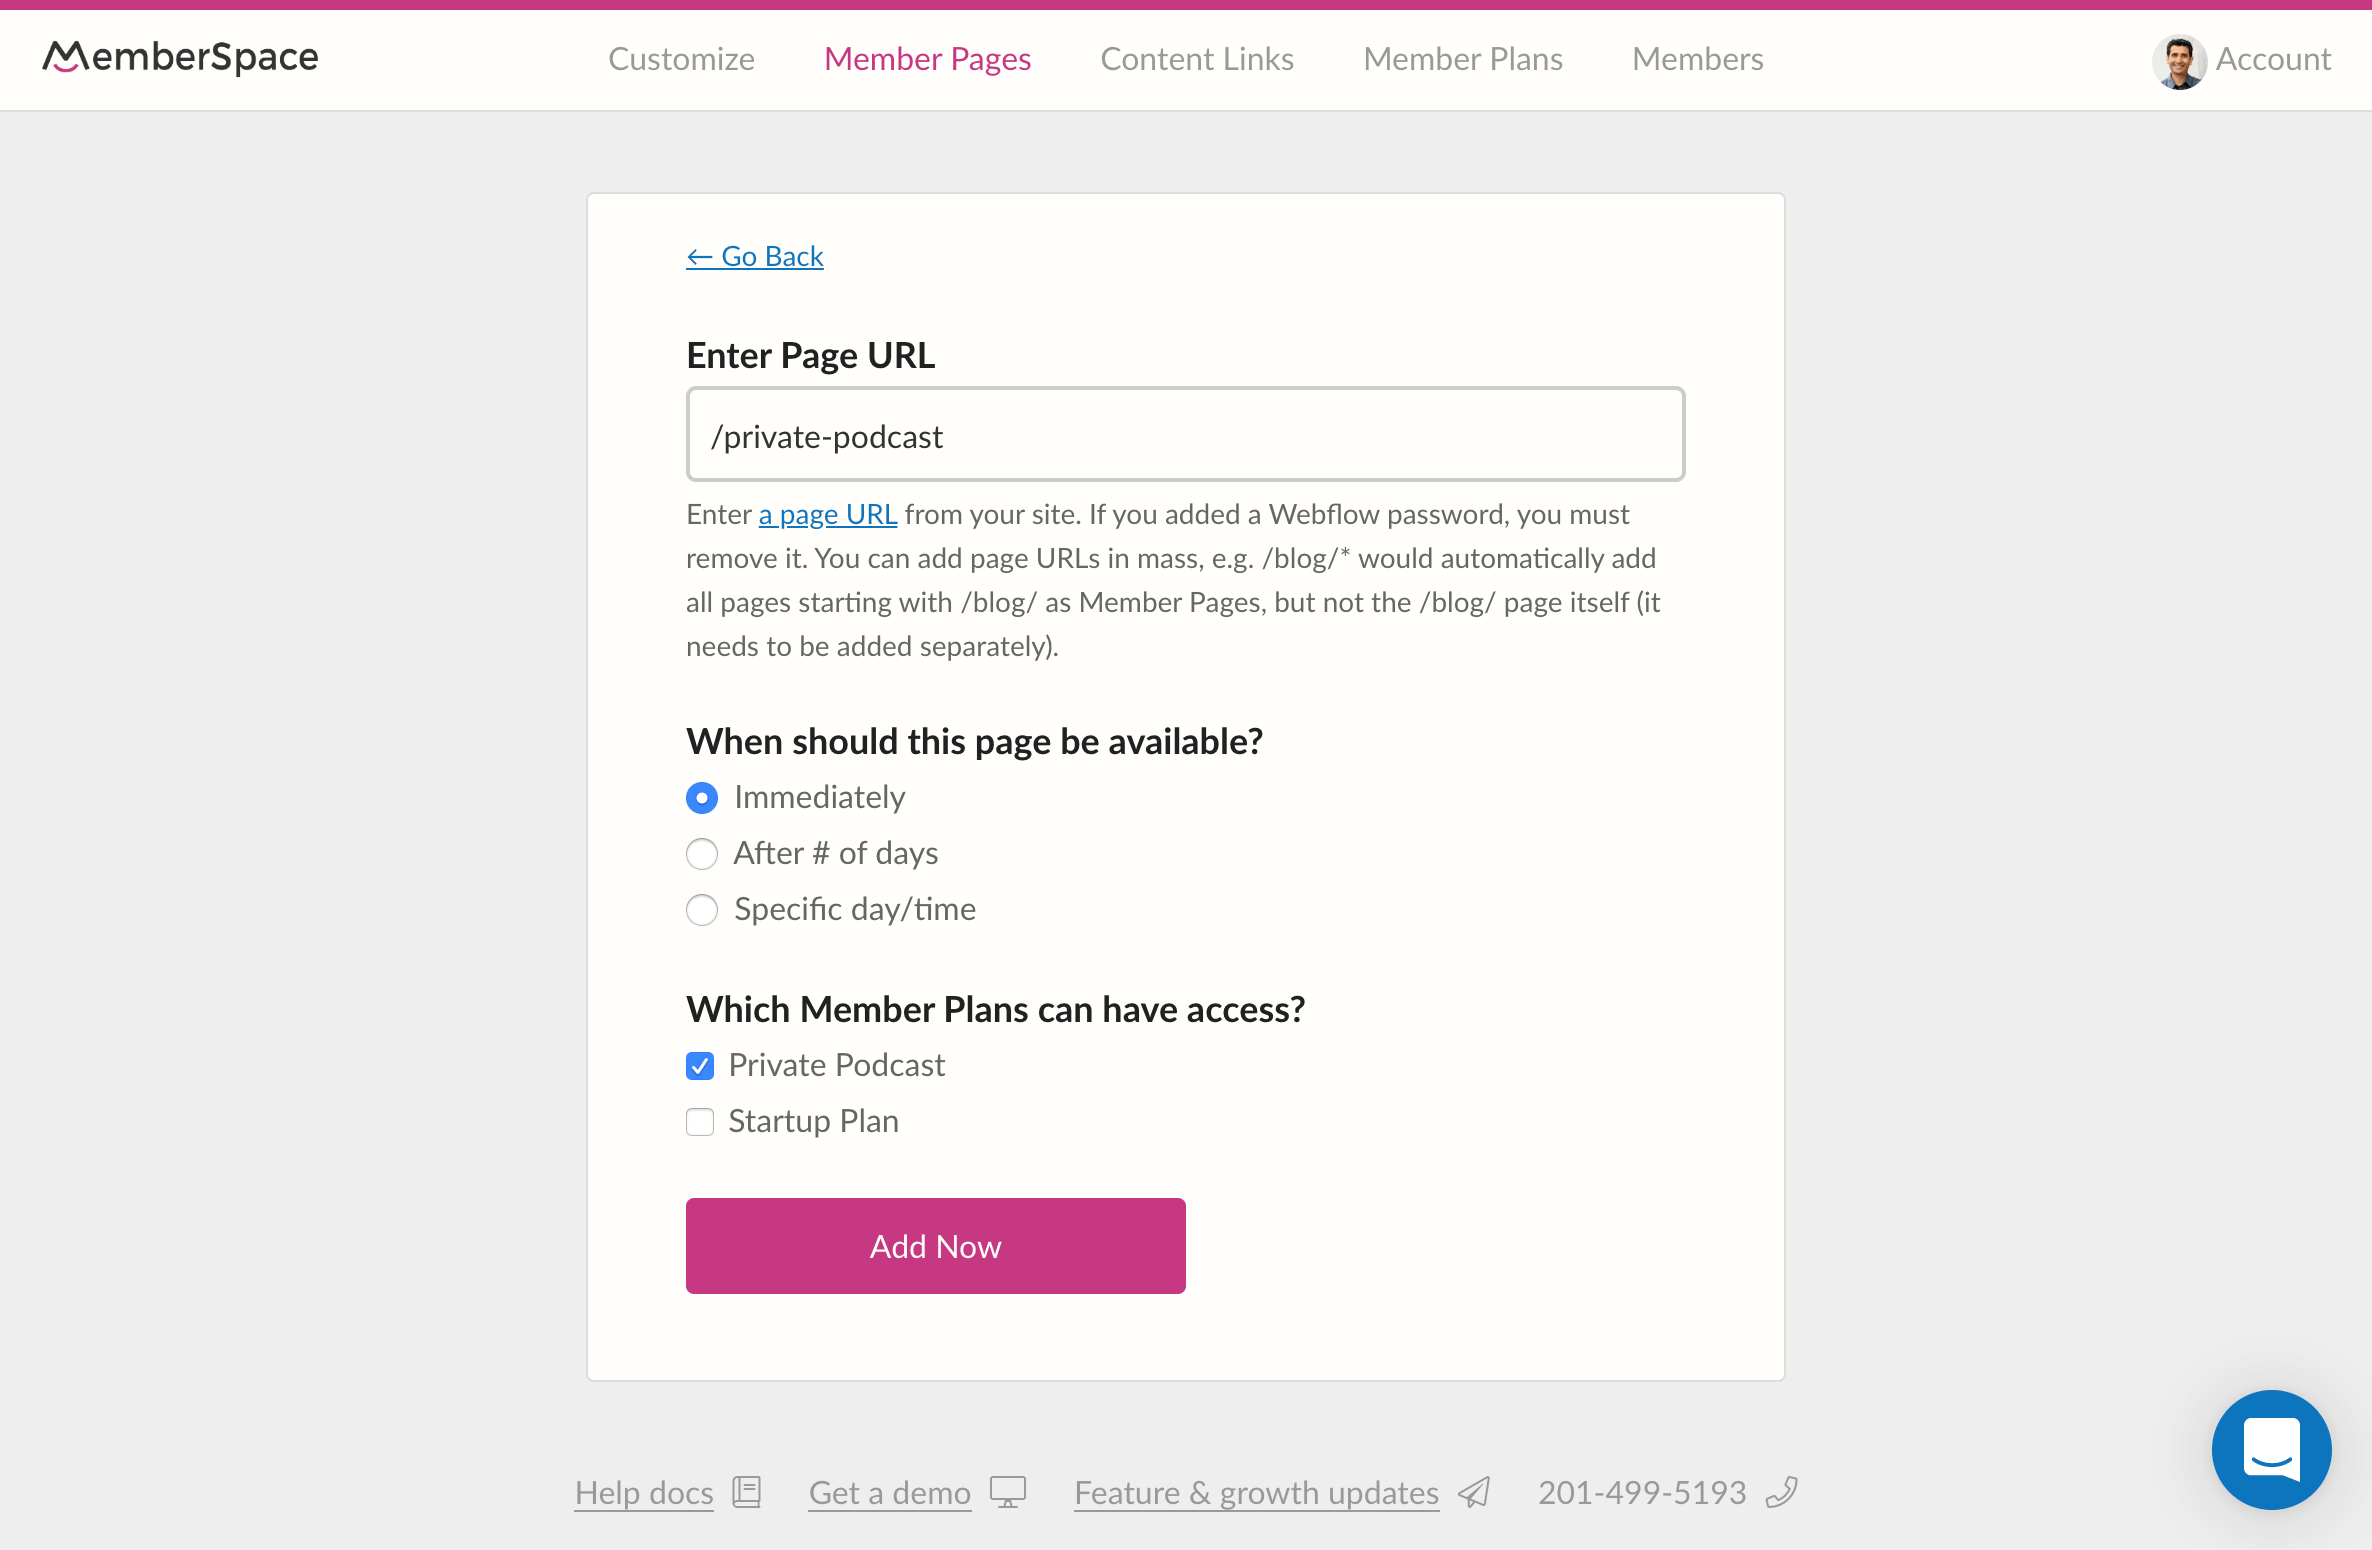
Now you’re ready to use MemberSpace to protect your private podcast page:
- In the MemberSpace backend, select your website from the list
- Click the ‘Member Pages’ link in the top navigation and then click the ‘Add Member Page’ button
- Copy and paste the URL of your private podcast page here
- Select which ‘Member Plans’ can access this page (if you don’t have an existing ‘Member Plan’, we’ll show you how to create one in the next step).
- Click the ‘Add Now’ button
4. Setup a MemberSpace plan
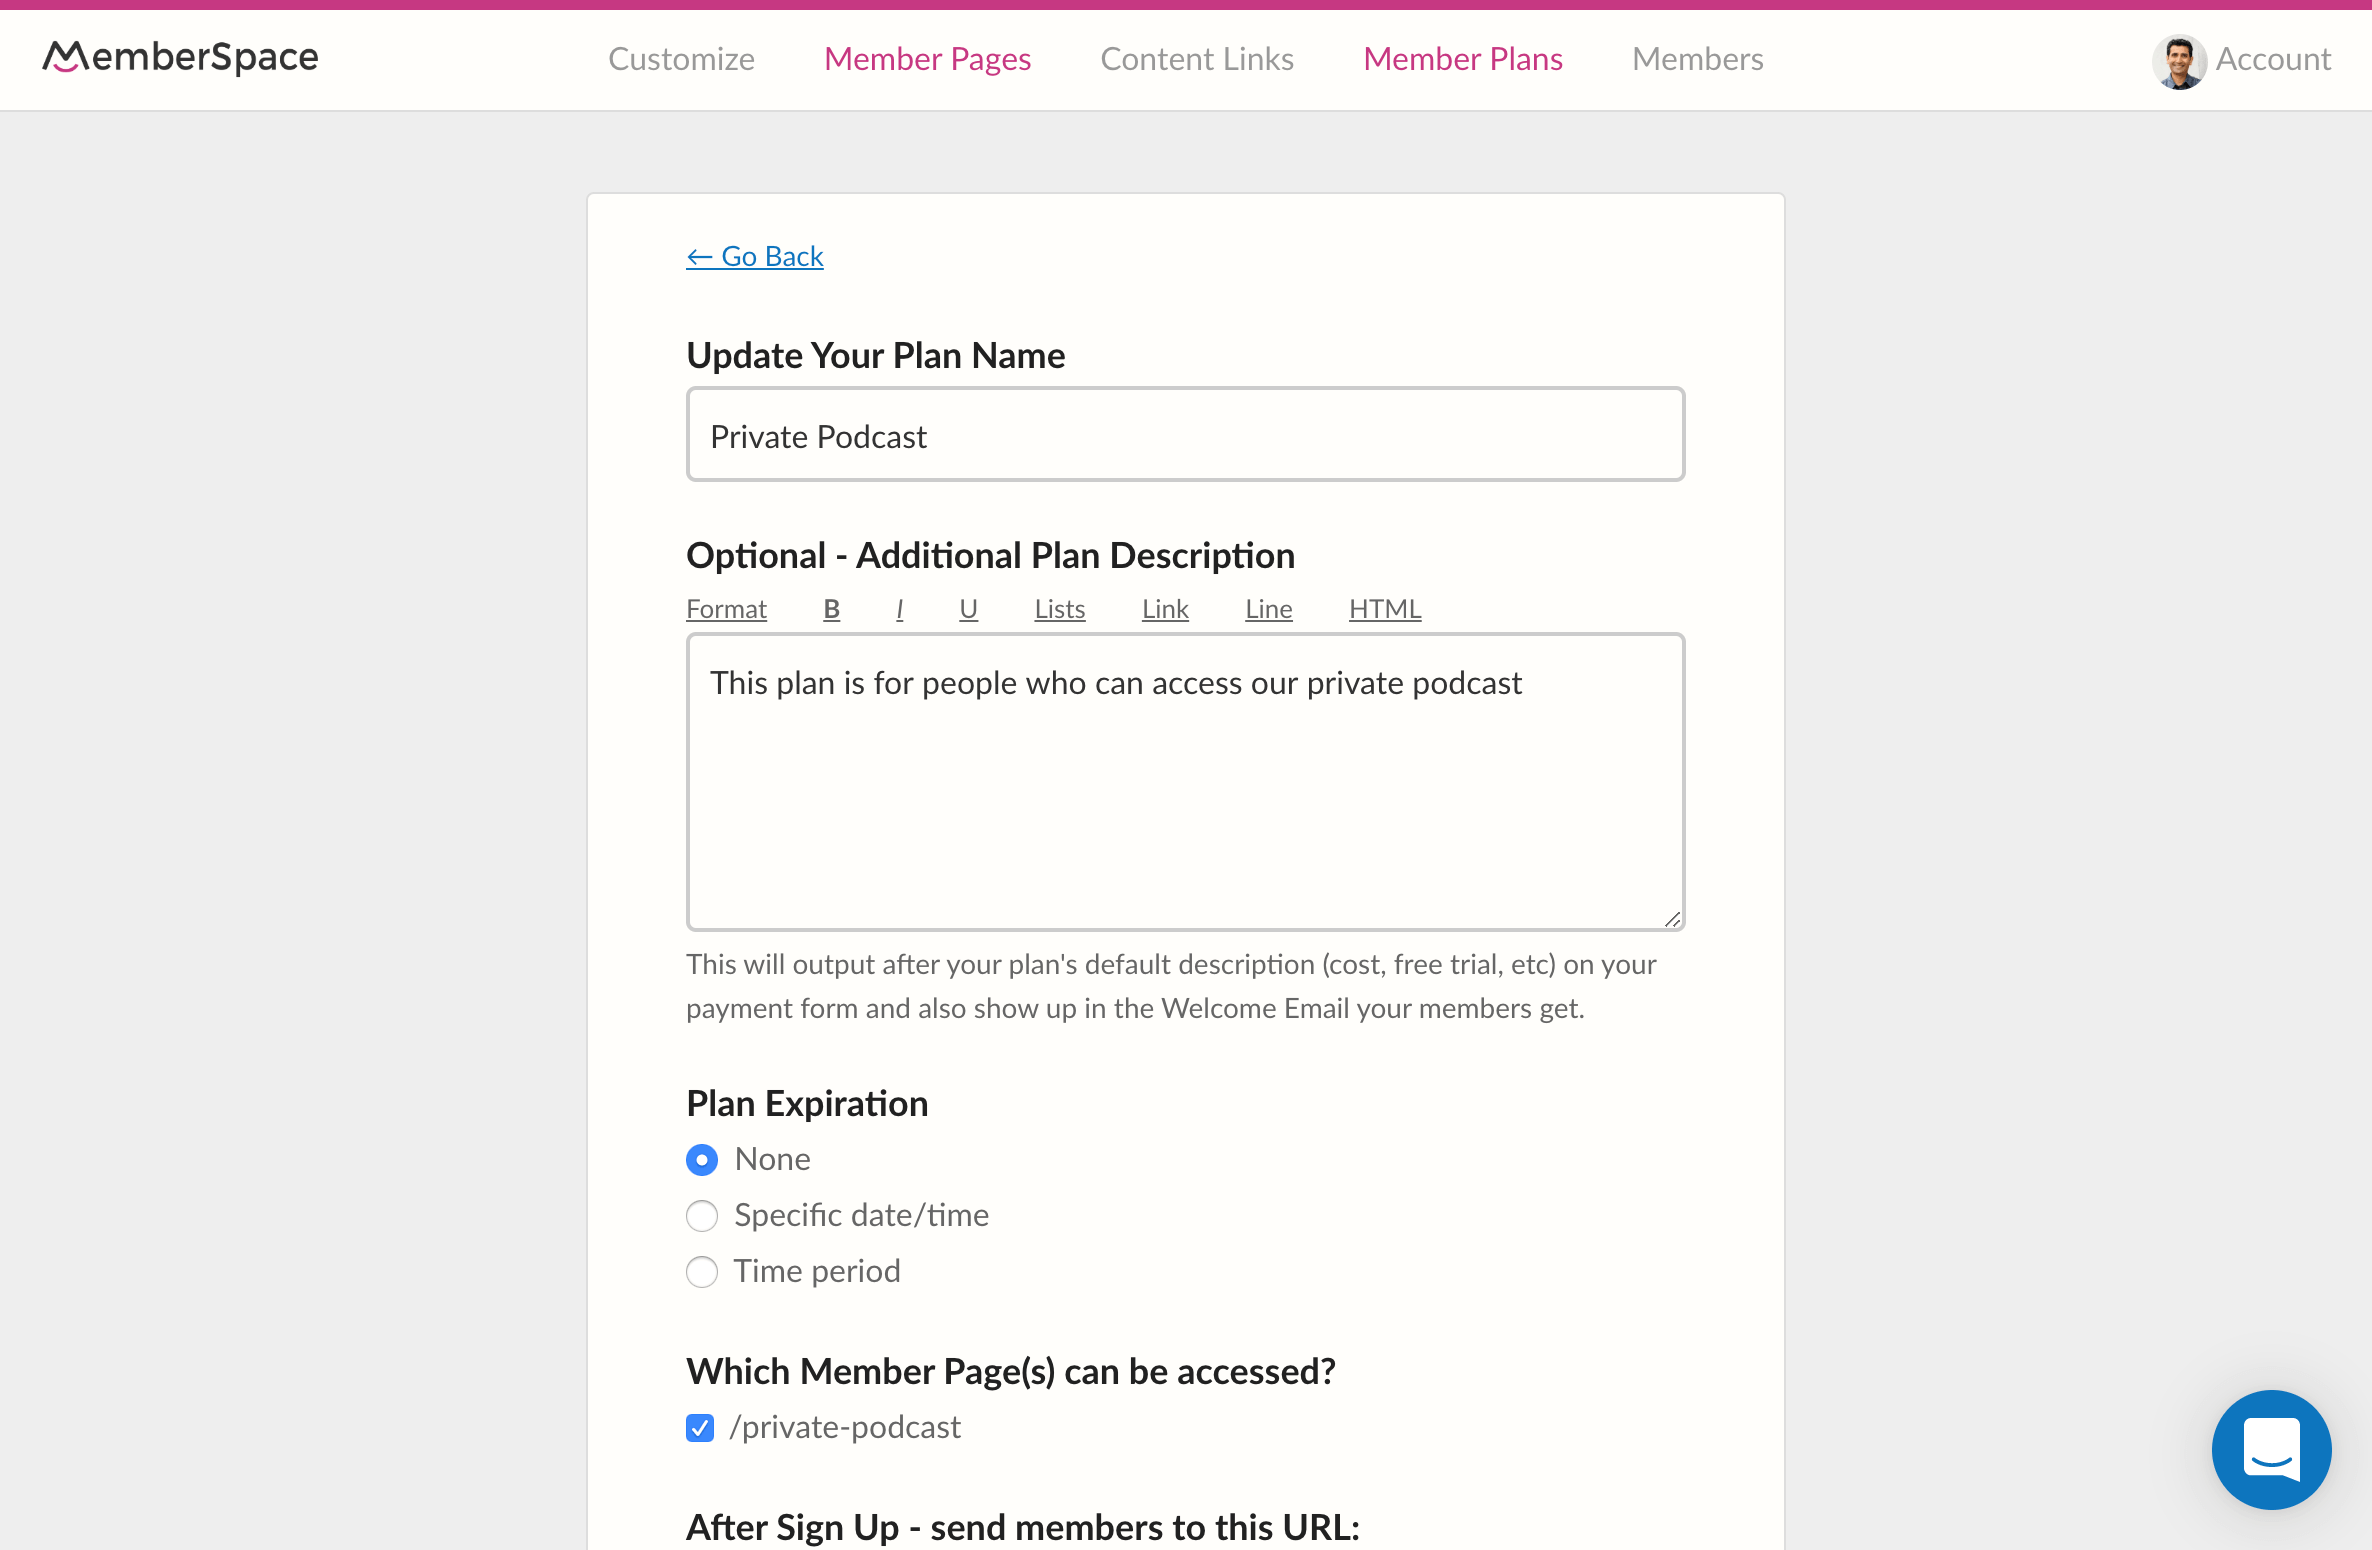
If you need to create a new ‘Member Plan’:
- In the MemberSpace backend, select your website from the list
- Click the ‘Member Plans link and then click the ‘Add Member Plan’ button
- Select the type of member plan e.g. free, one-time payment, monthly, etc. (if you don’t want to charge people for access make sure you select “free”)
- Enter the name and description (optional) of your new ‘Member Plan’
- Under ‘Which Member Page(s) can be accessed’ select your podcast page
- Complete the rest of the form and then click the ‘Create this plan’ button
5. Add members to your plan
Now you’re ready to add members to your plan. You can do this in 2 ways:
Option 1: Manually inviting people to join and access your podcast
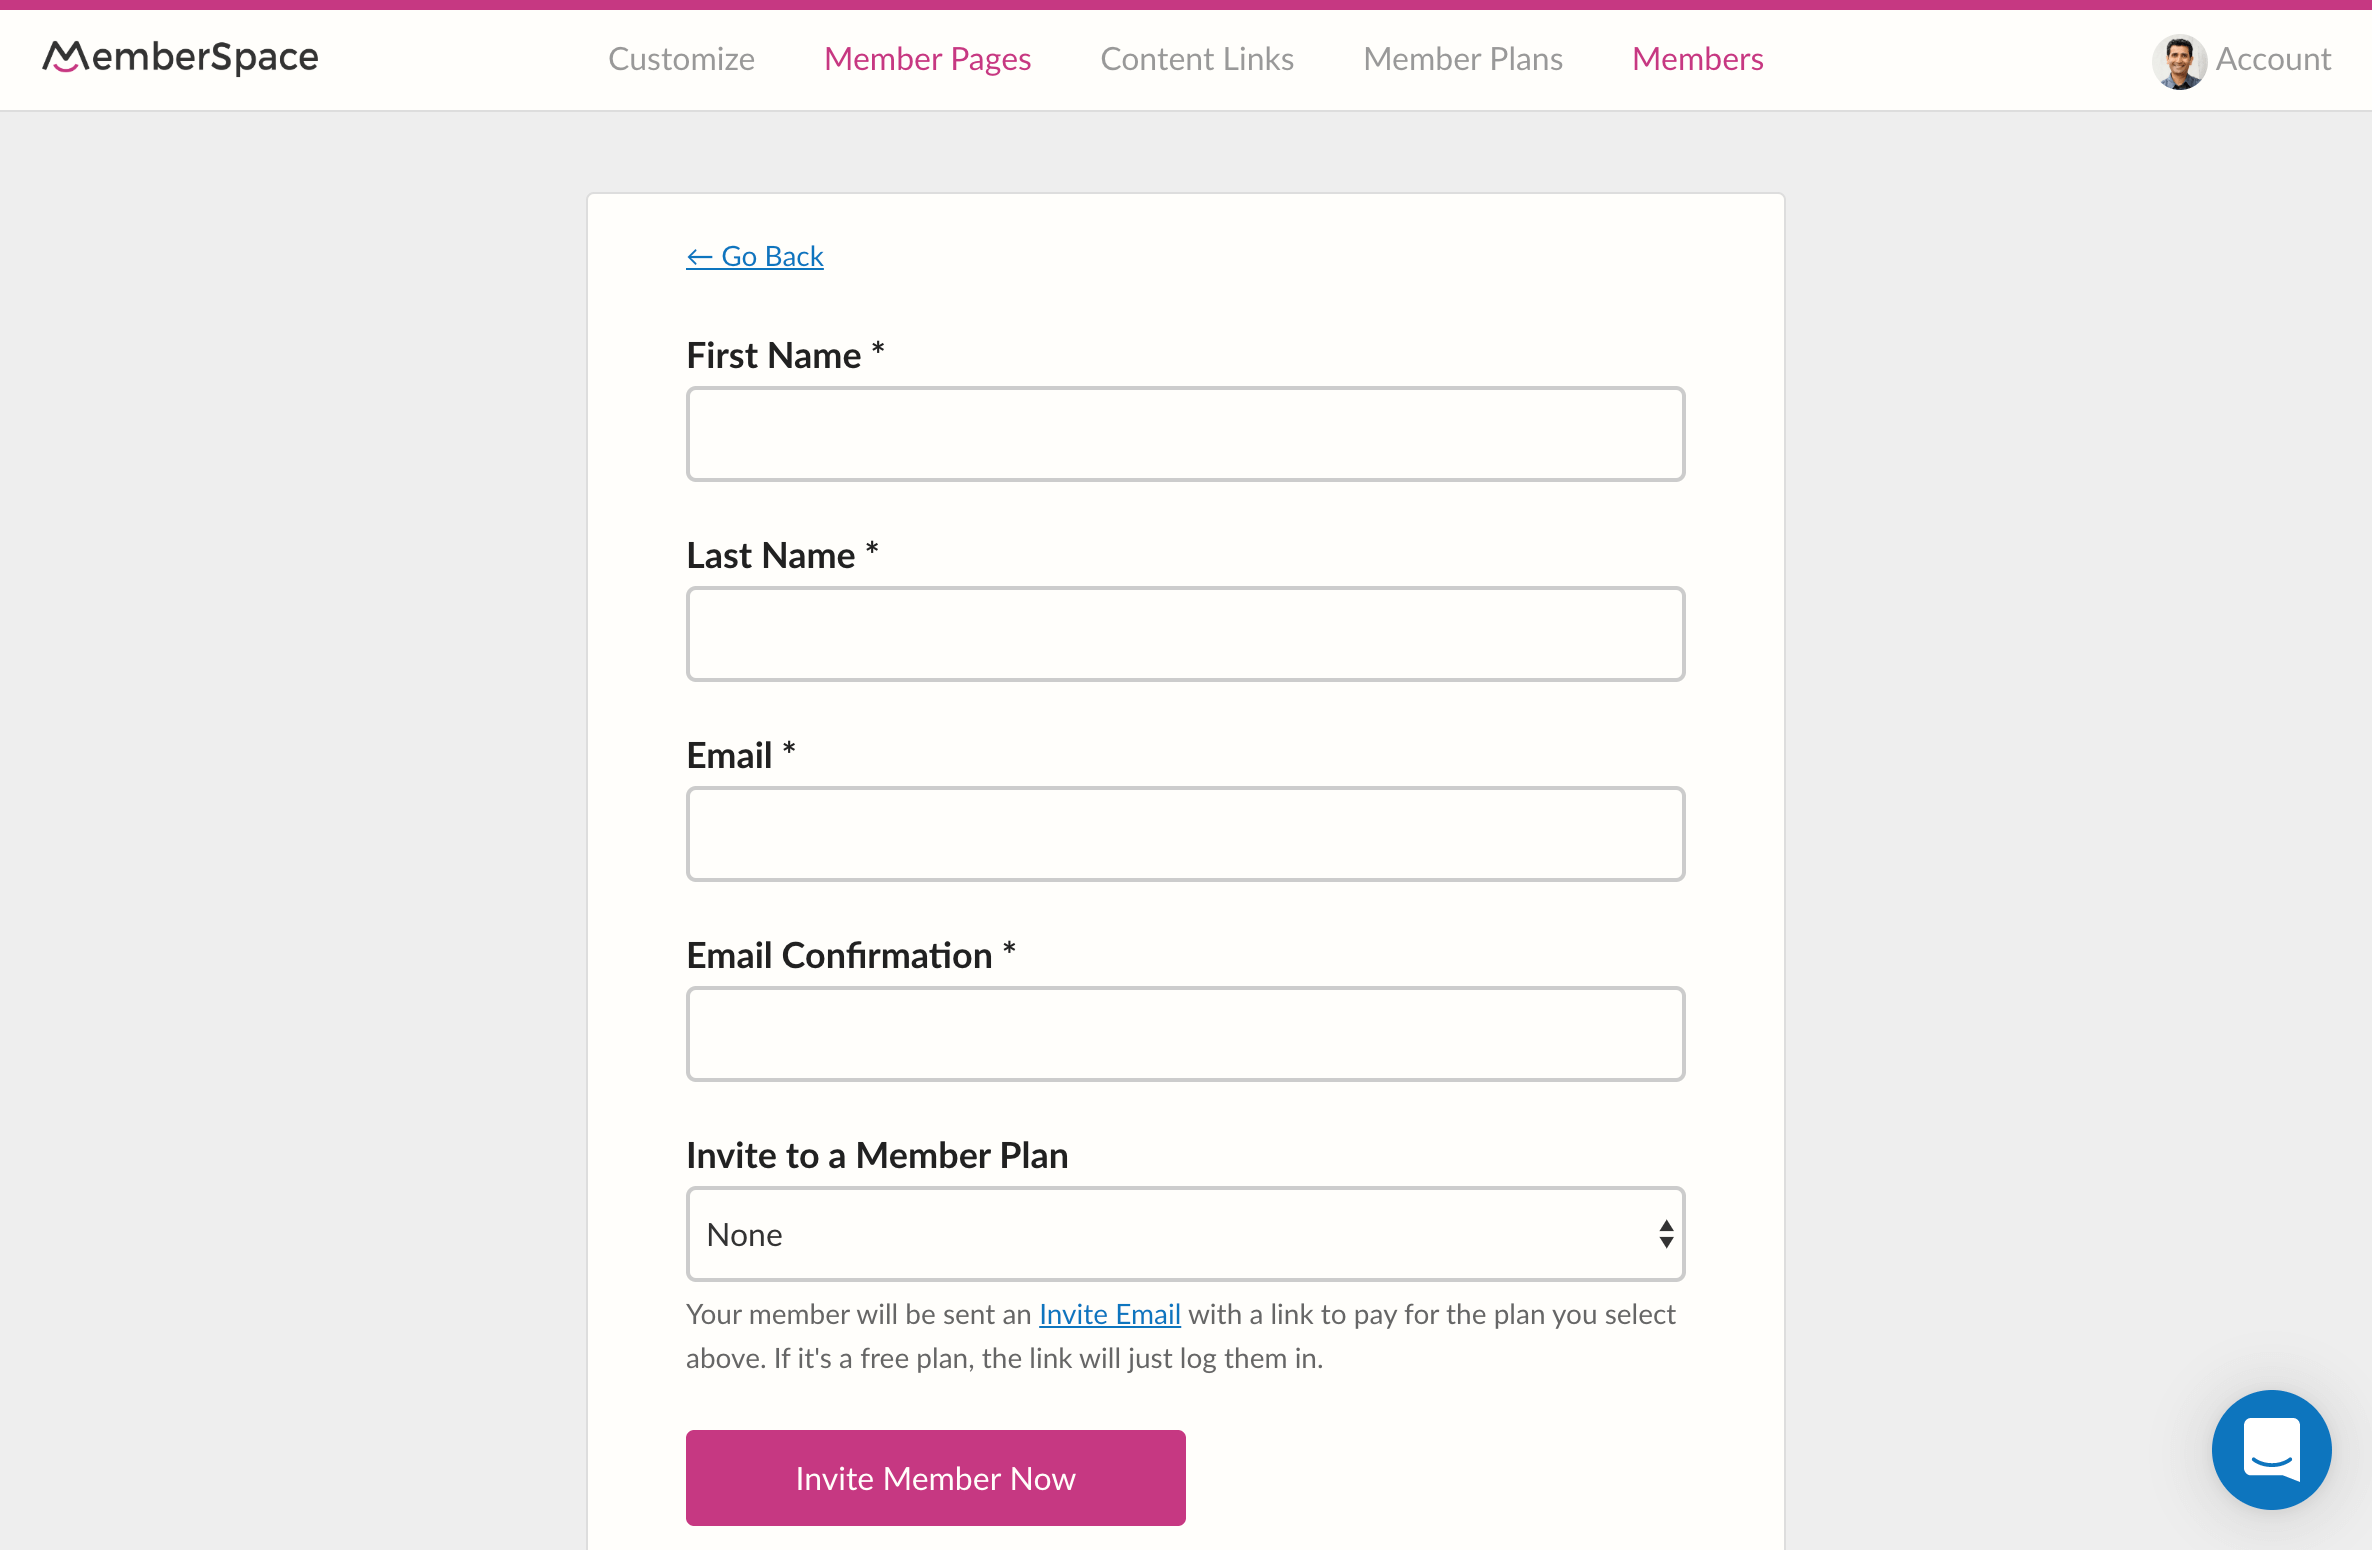
- In the MemberSpace backend, select your website from the list
- Click the ‘Members’ link and then click the ‘Invite New Member’ button
- Type in the name, email and select which plan you’re inviting them to join.
- Click the ‘Invite Member Now’ button
Each person you add will receive an Invite Email (which you can edit) and when they click the join link they will be asked to enter their credit card details (if the plan is not free).
If you want to import a list of 10 or more people, contact us and we’ll help do that.
Option 2: Give people a link to signup
- In the MemberSpace backend, select your website from the list
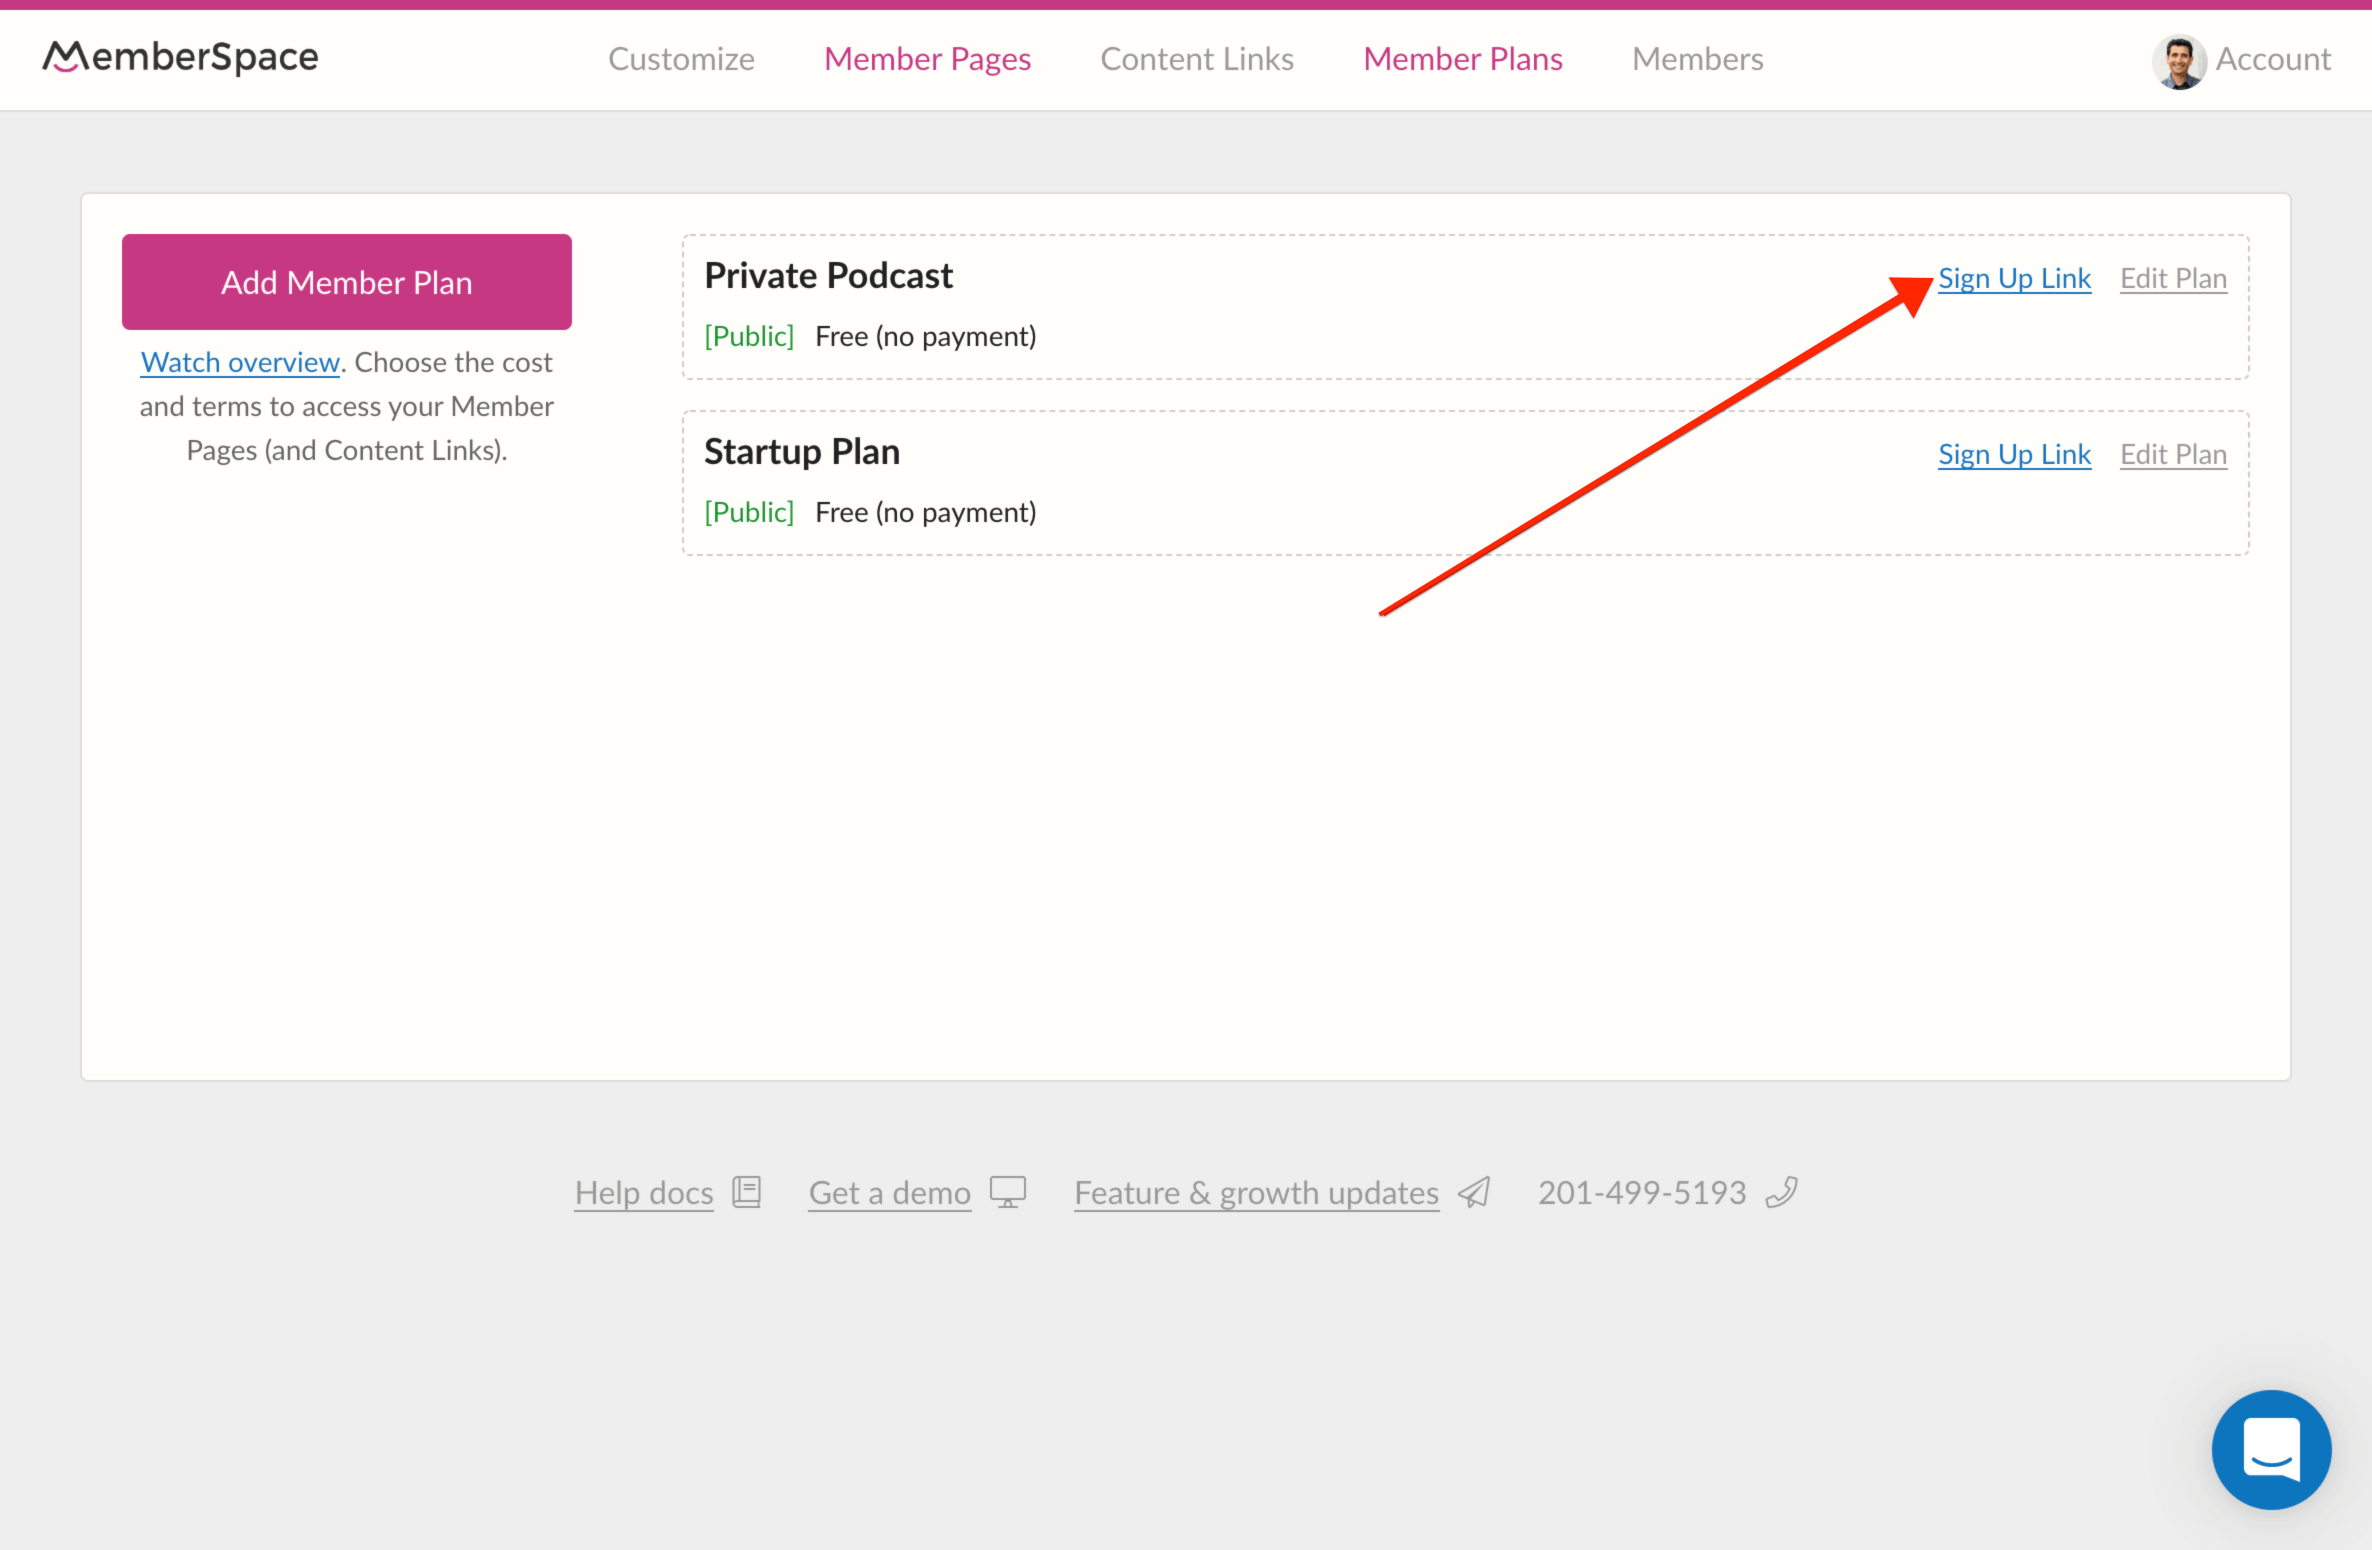
- Click the ‘Member Plans’ link in the top navigation and then ‘Sign Up Link’ next to your plan
- Copy the signup link and share it with your target audience
6. Use content links to make it even more secure (optional)
If you’d like to make your private podcast even more secure, you can add an extra layer of security using the MemberSpace ‘content links’ feature.
Click here to watch a short video about content links
How to Create a Private Podcast Feed for Mobile
You can make it even easier for your members or employees to access your private podcast from their mobile devices by creating a private podcast feed. This will allow your audience to listen to your private podcast in their favorite podcast app.
Reminder: To create a private podcast feed, you’ll need to set up your podcast as option 2 in the getting started with your private podcast section.
Once you’ve setup your podcast correctly in Transistor, creating a feed is easy:
1. Add subscribers in Transistor
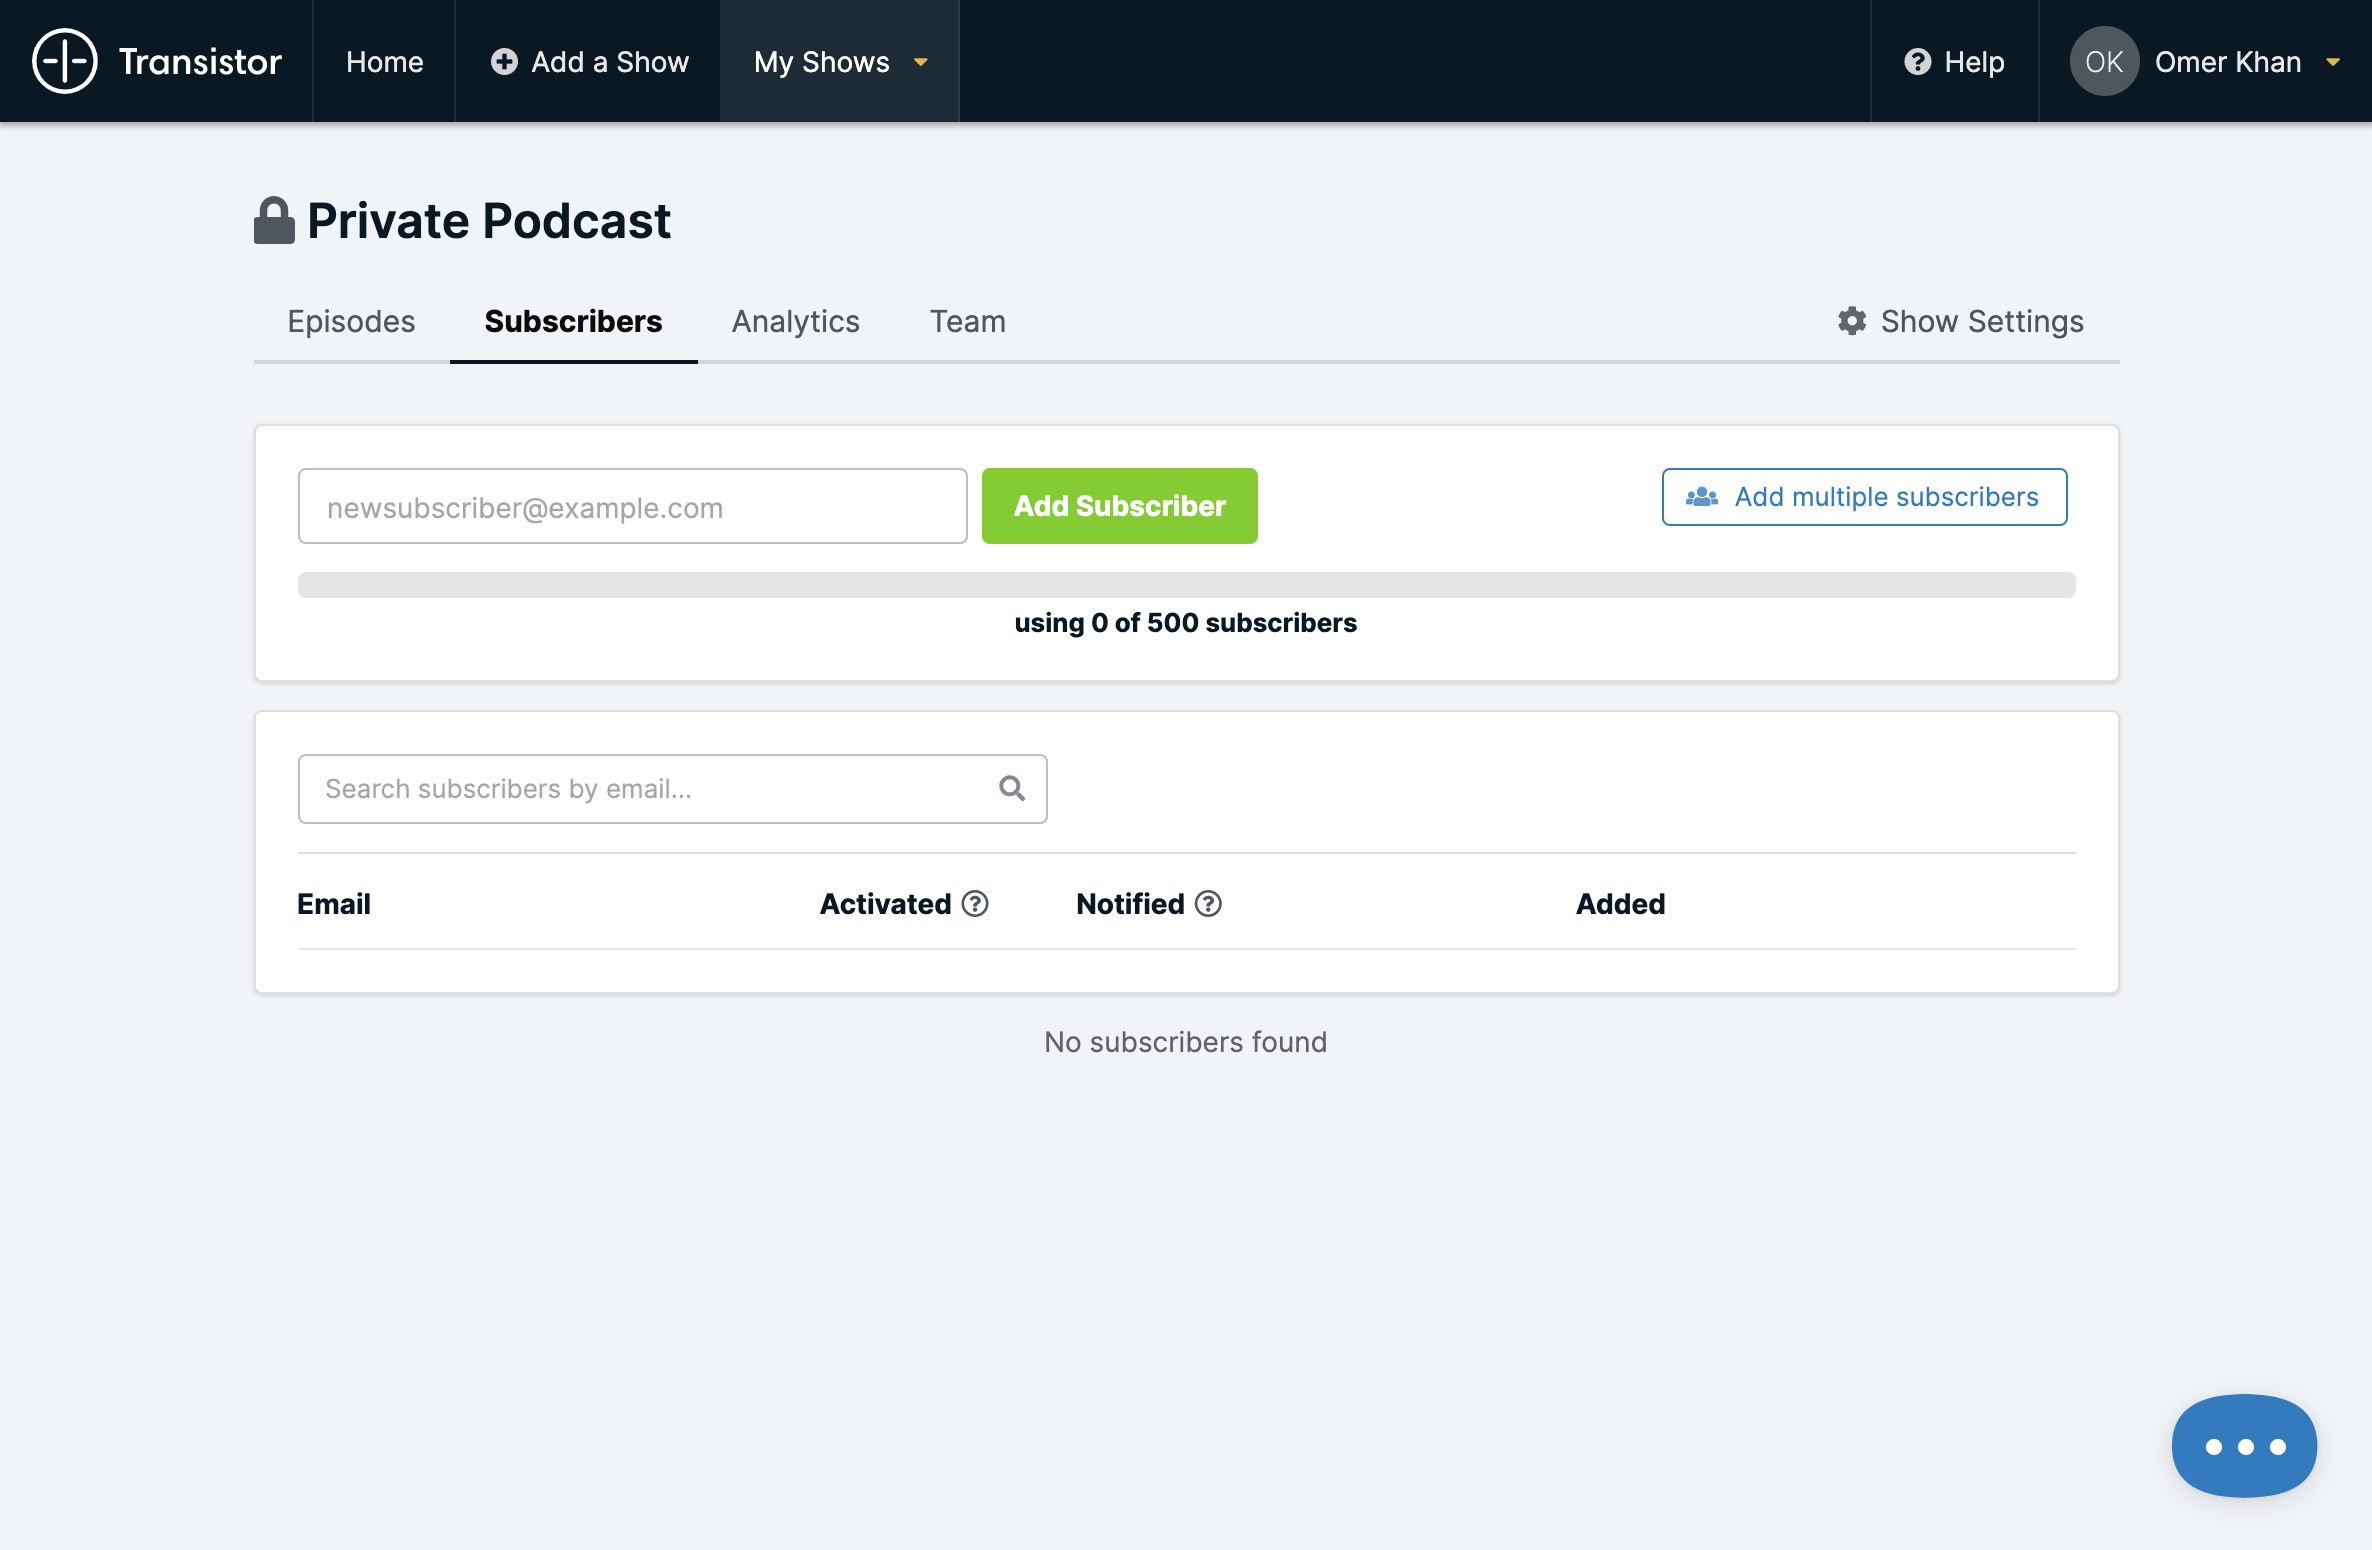
In your Transistor dashboard, select your private podcast and click the “Subscribers” tab. Type in each subscribers’ email address (or upload a CSV file with a list of email addresses).
2. Each subscriber will automatically receive an email
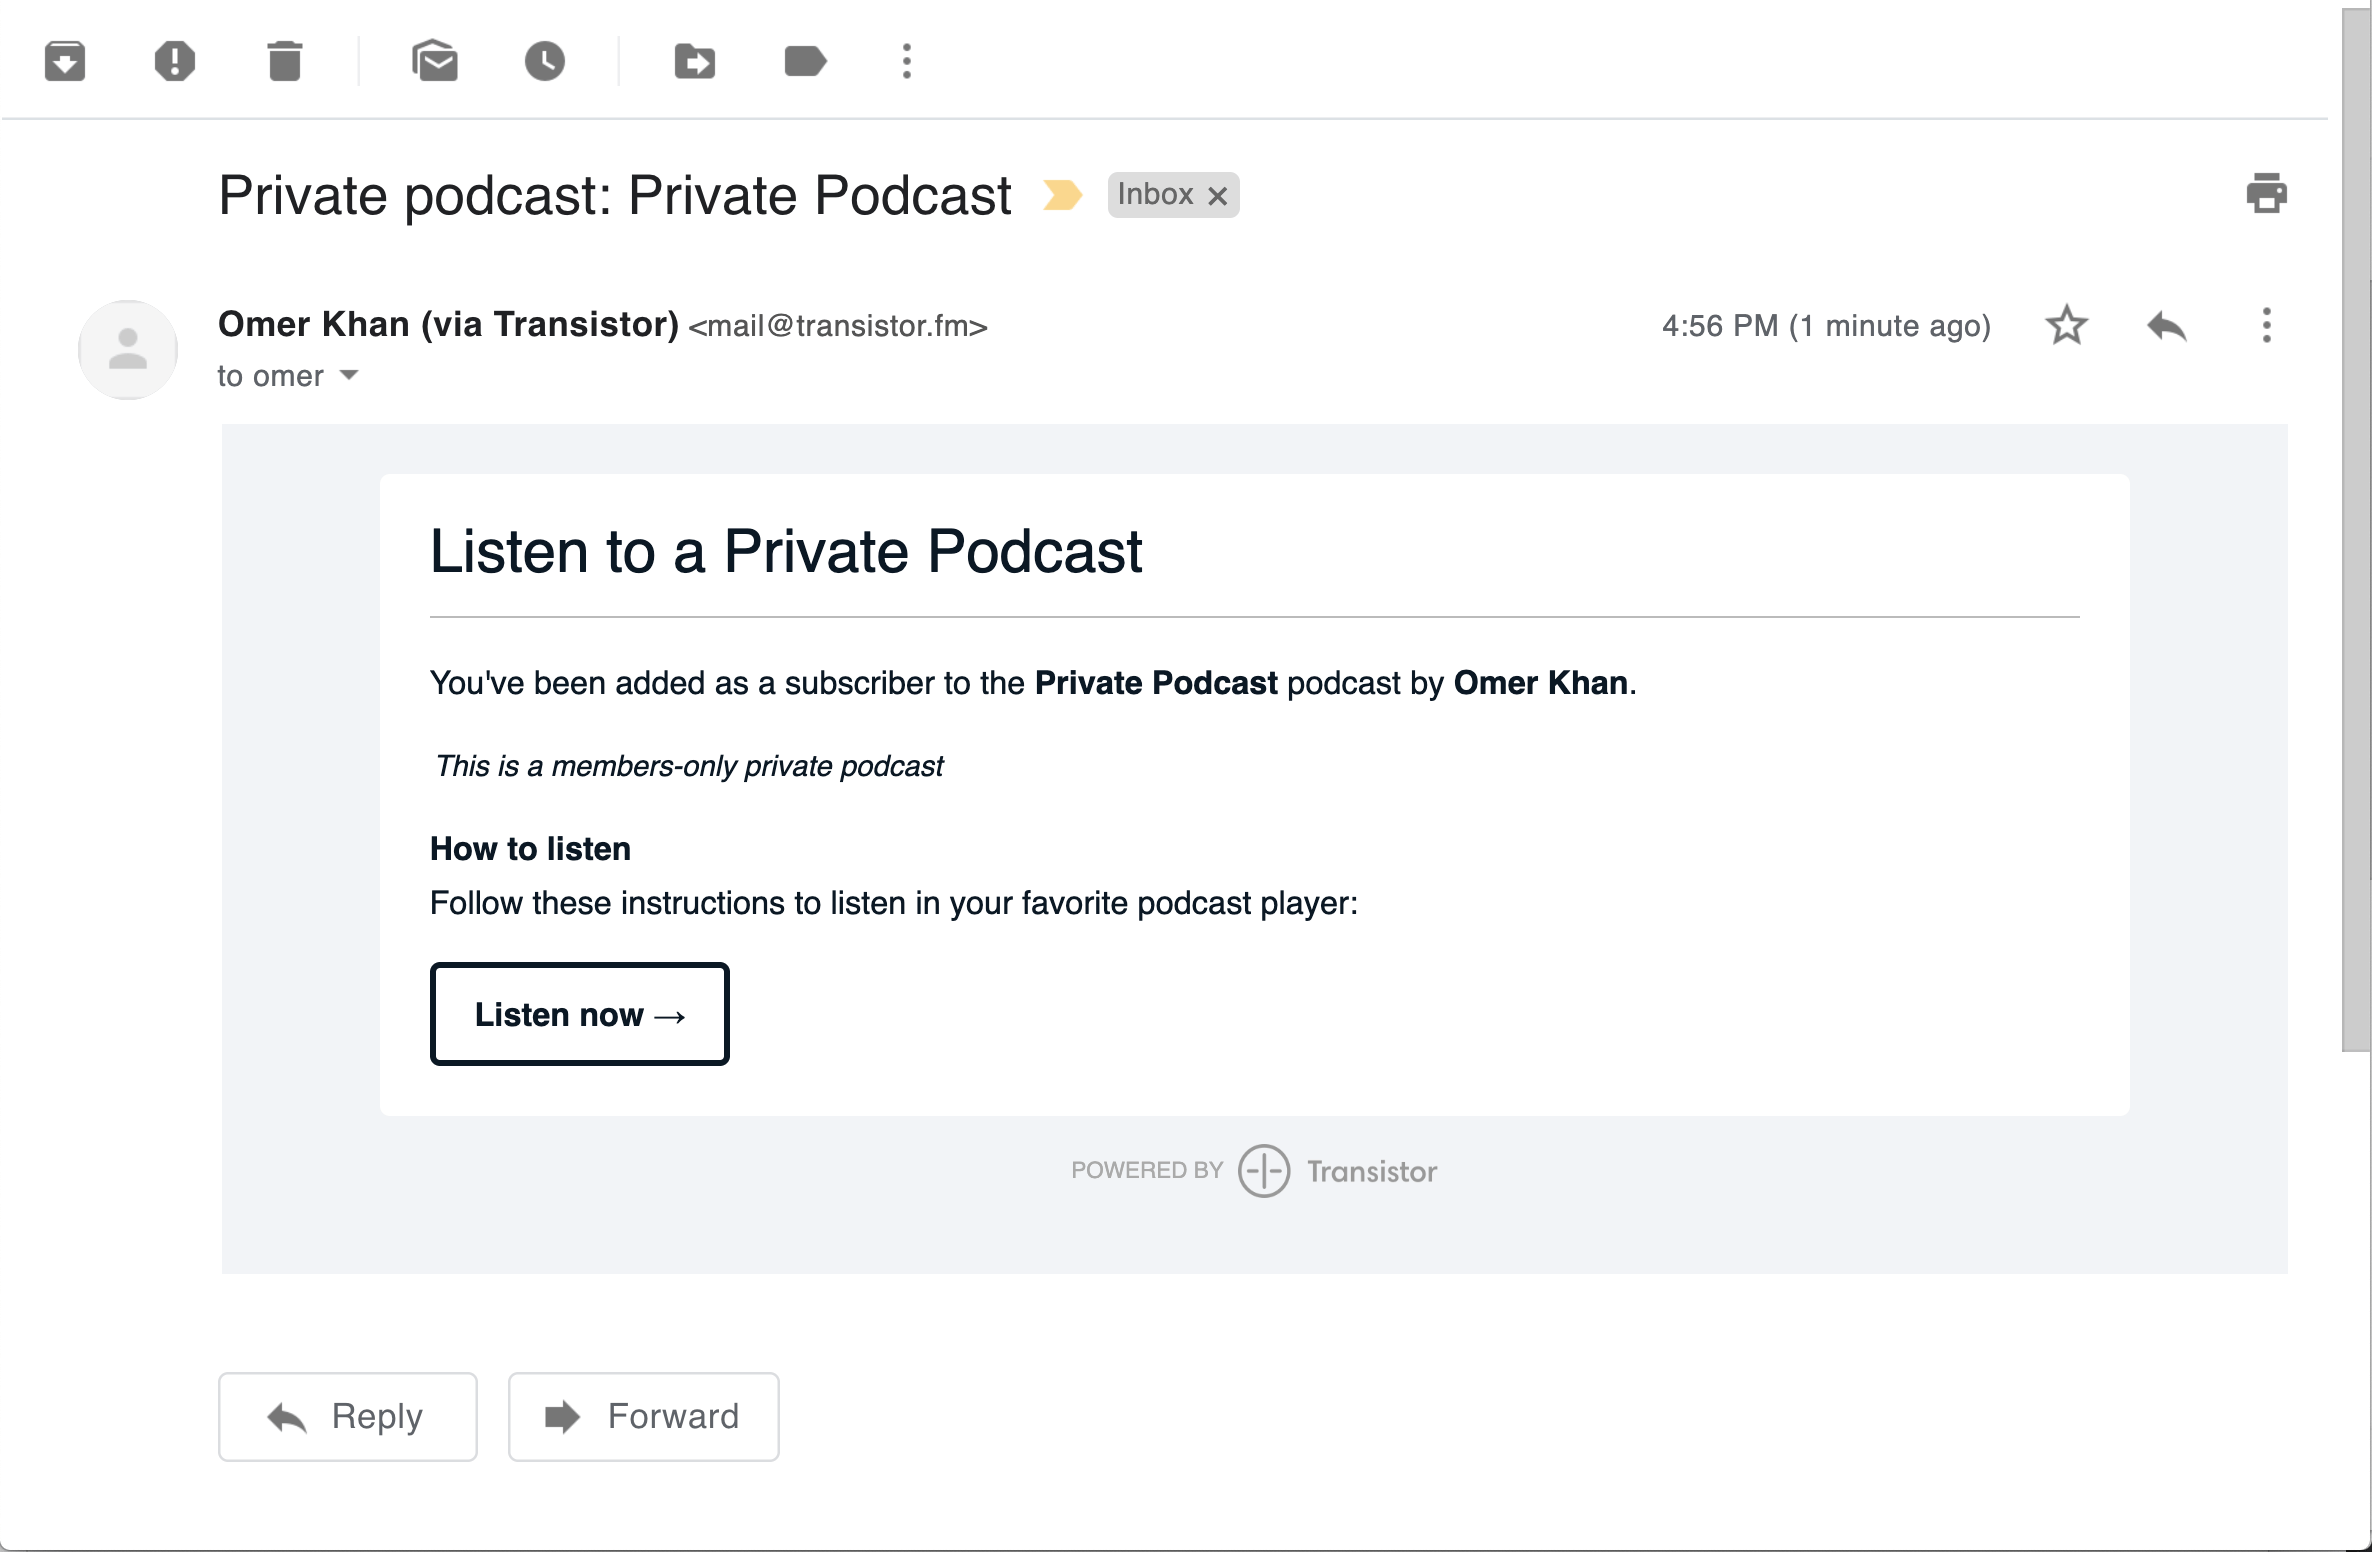
Each subscriber you add will automatically receive an email invite.
3. Subscribers choose how they want to listen
Clicking on the “Listen now” link in the email will give each person a list of links to different podcast player apps that are supported on their device. All they do is select their preferred app and start listening to the podcast.
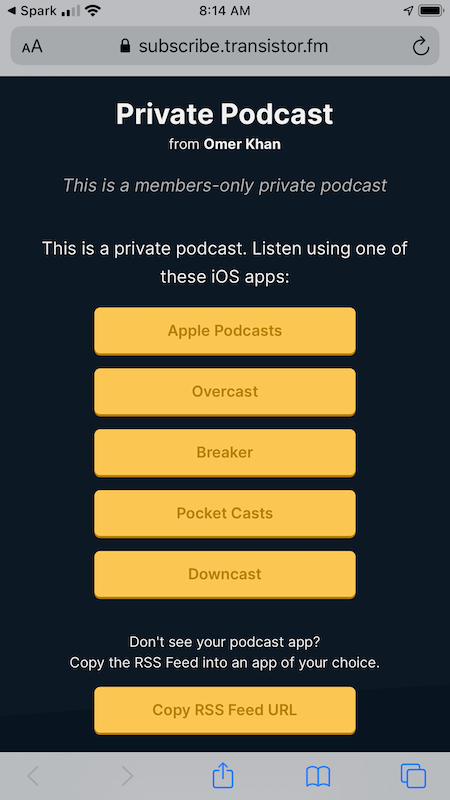
Once they’re subscribed, they’ll automatically receive new episodes.
You can get more details on how to set up a private podcast feed on the Transistor site.
Keep in mind, if you ever have a member who you no longer want to have access (e.g. they canceled their plan) then you’ll need to remember to manually remove them from your Transistor subscribers as well.

.png)
